
WordPress is probably the best content management system to build a website for any purpose. It offers a variety of features that speak for themselves. As it is a user-friendly platform, anyone can cope with it, from installing a WordPress theme to customizing everything.
Moreover, there is a wide range of themes, both free and premium ones, that are responsive and SEO-optimized.
As we have already mentioned, it is easy to install any WordPress theme you will opt for. Moreover, it does not take much time. Let us see how to set up the one, taking Monstroid2 WordPress theme as an example.
Why exactly this theme? It is an awesome solution that is suitable for any business. Moreover, it contains the Elementor Page Builder with a variety of plugins and add-ons that will make any website a masterpiece. By the way, if you do not know much about the Elementor, here is a cool tutorial explaining how to use it to improve the webpage:
So, let us focus on the installation process.
WordPress Theme Installation
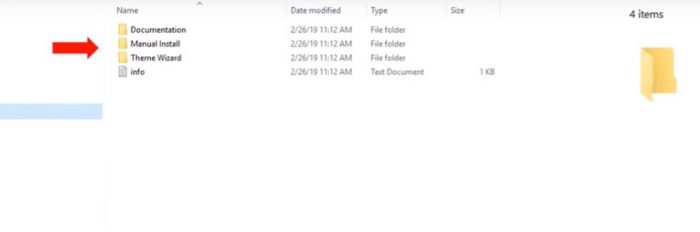
You have purchased Monstroid2 and downloaded the whole package on your computer. Now you are ready to set up the theme. Unzip the package, and you will find the Documentation, Manual Install, and Theme Wizard folders. Moreover, there is also an Info file.
There are two ways to install WordPress theme. It is possible to:
- do it manually. In this case, you will need the stuff from the Manual Install Folder;
- set it up from the WordPress dashboard. There is the m2theme-wizard plugin in the Theme Wizard Folder to help you cope with the task.
How to Install Monstroid2 through the WordPress Dashboard
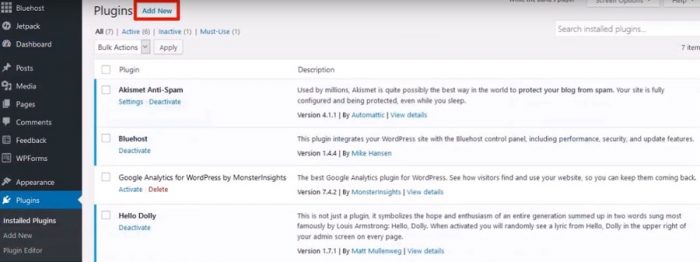
First of all, open the WordPress dashboard. Then go to the Plugins tab and click Add New to install m2theme-wizard as a plugin.
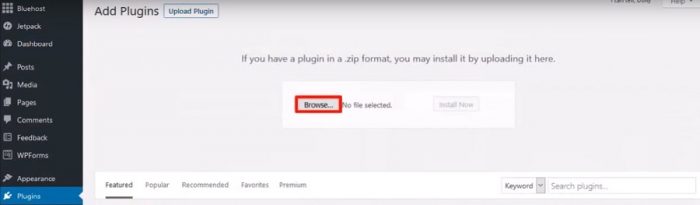
Click the Upload Plugin button and then Browse button.
Find the place where your Theme Wizard folder is and click on the m2theme-wizard plugin to add it to the Dashboard, install and activate it.

To enter the order ID, go to the page you have downloaded the Monstroid2 from. Or it is possible to find it in the email sent by TemplateMonster as soon as you have purchased the theme.
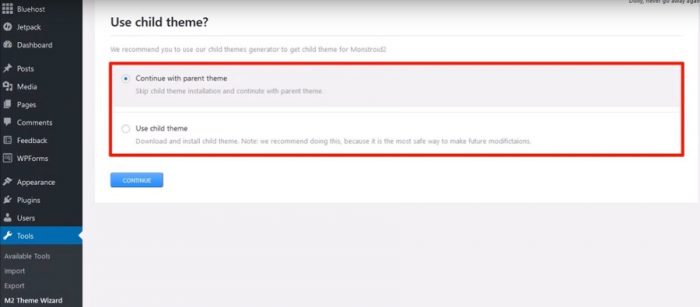
Once the theme is activated, you will see two options to choose from:
- to continue with the parent theme
- to use the child theme.
It is advisable to continue with the child theme. Thus, it will be much easier to customize Monstroid2 later while adding the required content or modifying some settings.
Choosing Skins and Plugins
The next step is to choose an appropriate skin to continue the installation process. When you have selected the skin you want to work with, you may click Start Install button or view its demo version.
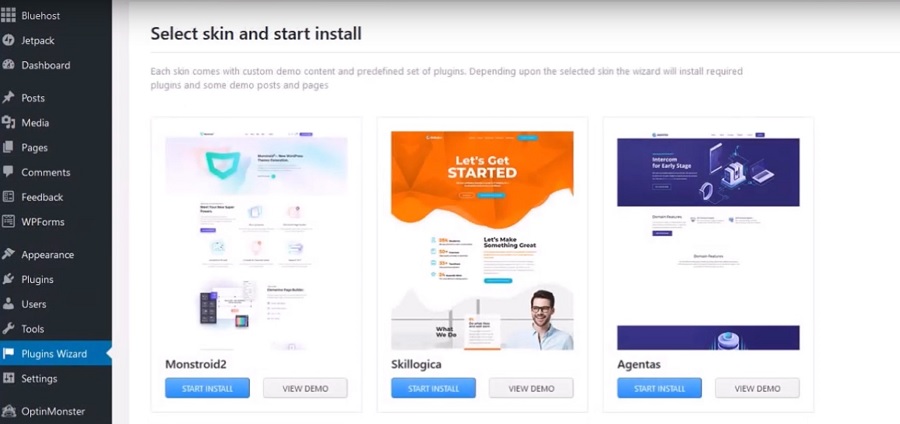
You have opted for some skin, clicked Start Install button, and you see the following page with the plugins.

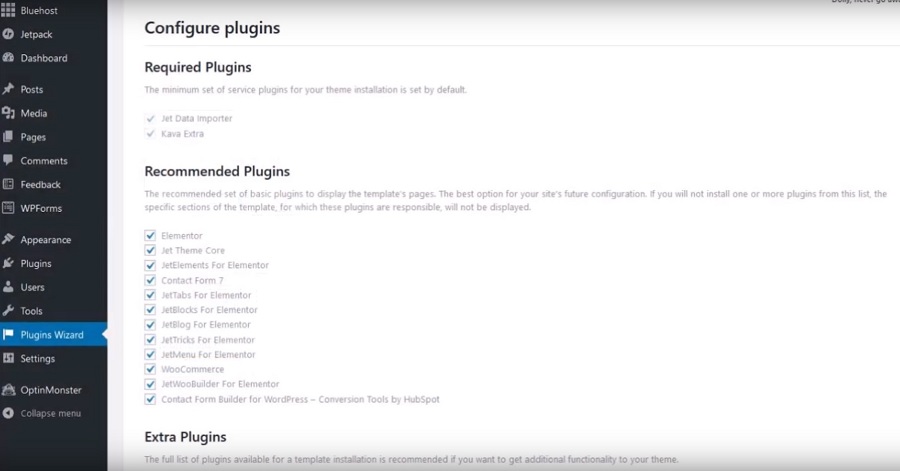
There are three categories of plugins available in the wizard, in particular, the required plugins, the recommended, and the extra ones.
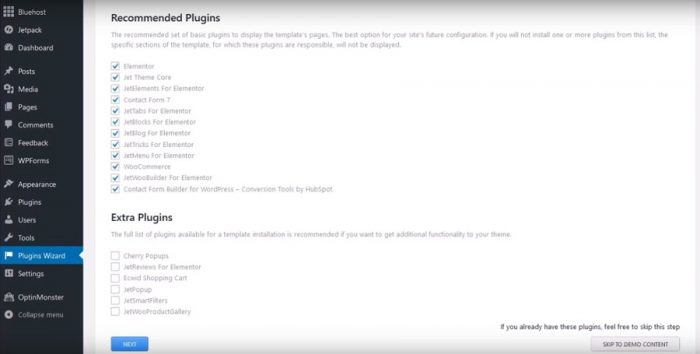
The required plugins include a minimum set of service plugins that are necessary for theme installation. It is also advisable to install all the recommended plugins if you want all the webpages to display correctly. As for extra plugins, they are responsible for the additional functionality of the website. If it is important to you, put a tick in front of each extra plugin that you need. Then click Next to install the plugins and move further.
Demo Content Management
Now it is time to decide what to do with the demo content. There are three possible options to select:
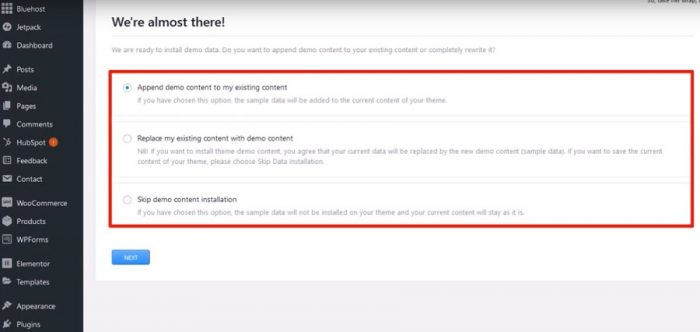
You may either append demo content to the one that already exists or replace the existing content with the demo one. If you do not want to change anything, simply skip the demo content installation. Click the Next button, and here you are.
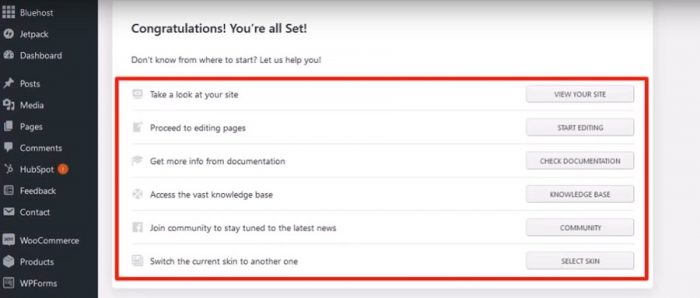
The installation process is over, and you may take a look at your website and start customizing it according to your requirements.
How to Install Monstroid2 Manually
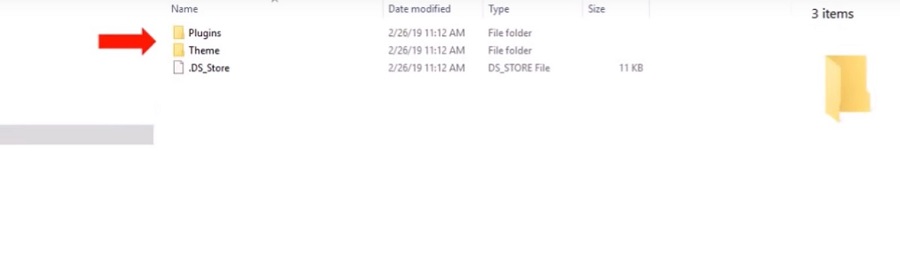
We have already mentioned that after unzipping the main package, you will find three folders in it. Now it is time to work with the Manual Install folder. It contains two subfolders, in particular, Plugins and Theme.
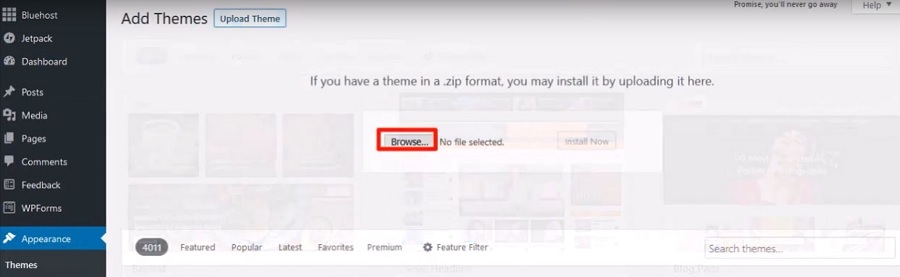
First, you will need the Theme folder. Open the WordPress dashboard. Then you need to find the Appearance tab and go to the Themes subtab.

After that, you should click Upload button, then Upload Theme button, Browse button,
and find the folder on your computer where the Theme subfolder is located. You will see monstroid2 and monstroid2-child zip files.
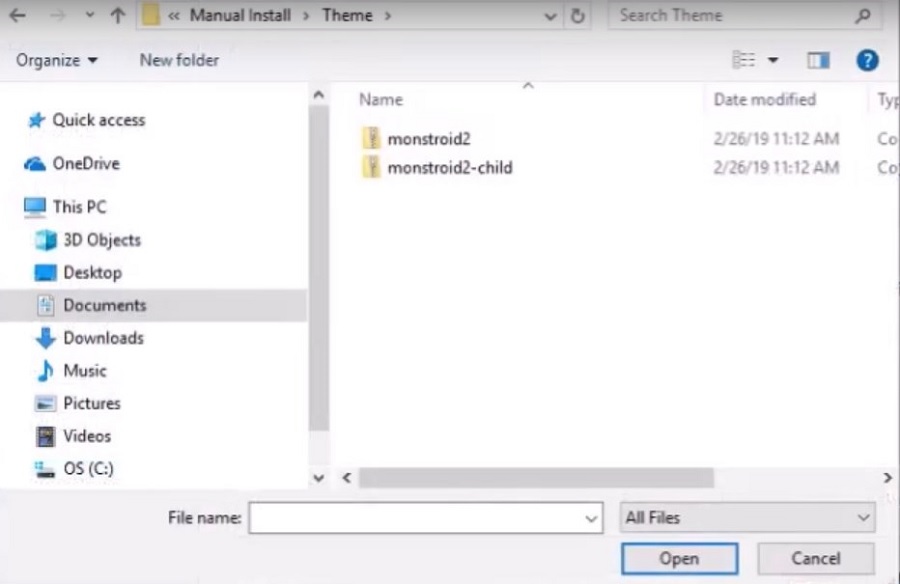
It is advisable to install both the parent and the child themes, as you will have more opportunities to customize the website later. It is necessary to install and activate the parent theme first and then repeat the procedure for the child theme.
Now it is time to install the plugins. There are two ways to do it. The first option is to click Begin installing the plugin link.
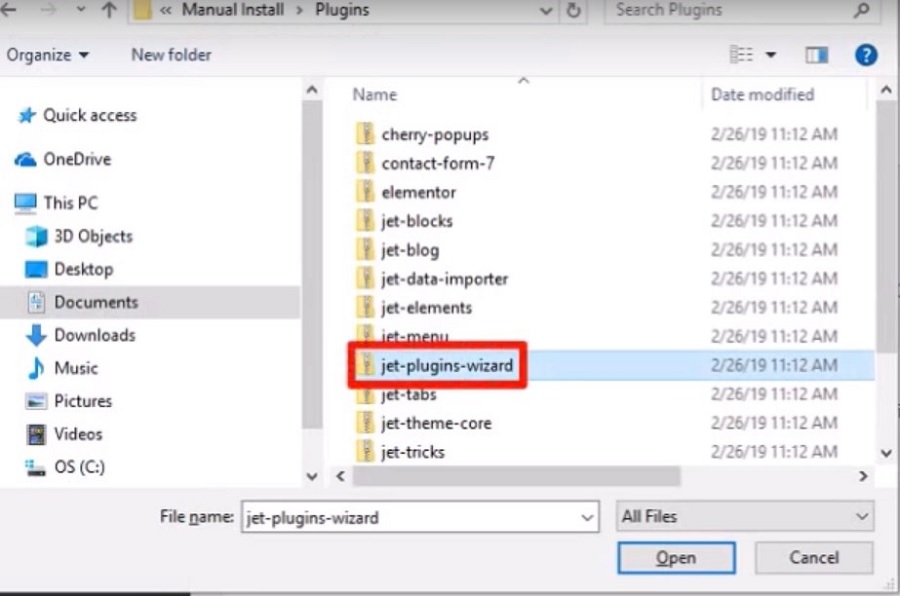
The second variant is to go to the Plugins tab, click Add New → Upload Plugin → Browse button, and go to the Plugins subfolder in the Manual Install folder. There you will see a variety of plugins. You need a jet-plugin-wizard.
Install and activate this plugin. After that, you will be able to install all the other plugins you may need for the website. To do this, click the Start Install button and enter your license key to activate the license.

The license key is the same as the Order ID. Click the Next button, to proceed to select the skin you would like to set up.
After that, install the required, recommended, and extra plugins.
Once all the necessary plugins are installed, you will see the following page.

Now you may start building your website.
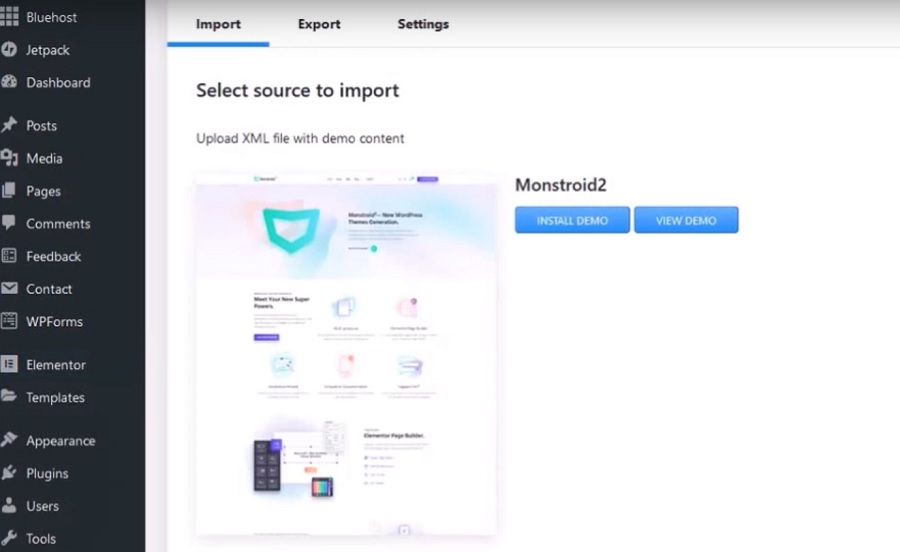
If you need demo content from a certain skin, you may import it. Go to the Demo Content tab and select the source to import the content.
Conclusion
Thus, we have considered two ways of setting up a WordPress theme. Both of them are simple and do not take much time. Decide for yourself which one to use to create an attractive website with awesome functionality.