Learn How to Mock API with Vue and MirageJS

In this tutorial, you will learn how to Mock API with Vue and MirageJS.
Single-page applications (SPAs) continue to gain more and more popularity every day. As the complexity of these SPAs increases, the need for dynamic/real-time data increases as well.
APIs provide a way to bridge the gap between the SPA and the backend.
There are times, however, when the required API is not available or it’s just too expensive to develop one just for the purposes of testing.
This is what spurred the idea of API mocking.
API mocking can be defined as the simulation of a real API.
You can think of it as mimicking the behavior of what the actual API would do.
This means that the entire front end can be developed without waiting for backend APIs.
In this tutorial, we’ll be looking at how to mock an API using mirage js, an API mocking library. We’ll be building our front end with Vue.js and Bootstrap. Let’s get started.
What is Mirage JS?
Mirage JS is an API mocking library that lets you build, test, and share a complete working JavaScript application without having to rely on any backend services.
It solves the problem of testing APIs without depending on the backend. It’s quite lightweight and relatively straightforward to get up and running as we’ll see in this article.
Setting up the Frontend
To get started, let’s create a new Vue project. From your terminal, run the command below:
vue create mock-api-vueIt asks you to either use the default preset or manually select preferences. Choose a manual and answer the questions like so:

Once done, it goes ahead to set up a nice Vue project. Install Mirage JS as well. From the root of your project, run:
yarn add -D miragejsOnce it’s done, you can run your project like so:
yarn serveThis starts a development server that allows you to view your app on http://localhost:8080.
API Mocking with Vue and MirageJS
A common feature of a lot of web applications is subscription plans. Users can see a list of subscription plans and subscribe to the plan that suits their needs. That’s what we’ll be building throughout the course of this article.
Building Out the User Interface
Rename src/components/HelloWorld.vue to src/components/ProductPlan.vue. Remove the markup and styles. In App.vue, rename the previous <HelloWorld /> to <ProductPlans /> but remove the msg prop. App.vue should now look like this:
<template>
  <div id="app">
    <ProductPlans/>
  </div>
</template>

<script>
import ProductPlans from './components/ProductPlans.vue'

export default {
  name: 'App',
  components: {
    ProductPlans
  }
}
</script>
We’ll be using Bootstrap so add the CDN to the head section of public/index.html
<link rel="stylesheet" href="https://cdnjs.cloudflare.com/ajax/libs/twitter-bootstrap/4.4.0/css/bootstrap.min.css">
<link rel="stylesheet" href="https://cdnjs.cloudflare.com/ajax/libs/font-awesome/5.13.0/css/all.min.css">
Just under <div id="app"></div>, add the following scripts:
https://cdnjs.cloudflare.com/ajax/libs/jquery/3.5.0/jquery.min.js
https://cdnjs.cloudflare.com/ajax/libs/twitter-bootstrap/4.4.0/js/bootstrap.min.js
Create a new folder in src called data. Inside this folder, add a file plans.js and add the following content:
export default [
  {
    name: 'bronze',
    icon: 'fa-bread-slice',
    price: 1000,
    features: [
      {
        name: '100 Sample UI Kits',
        enabled: true
      },
      {
        name: 'Easy to use',
        enabled: true
      },
      {
        name: 'All Open files',
        enabled: true
      },
      {
        name: 'Available in all files',
        enabled: false
      },
      {
        name: 'Responsive files',
        enabled: false
      }
    ]
  },
  {
    name: 'gold',
    icon: 'fa-bolt',
    price: 10000,
    features: [
      {
        name: '100 Sample UI Kits',
        enabled: true
      },
      {
        name: 'Easy to use',
        enabled: true
      },
      {
        name: 'All Open files',
        enabled: true
      },
      {
        name: 'Available in all files',
        enabled: true
      },
      {
        name: 'Responsive files',
        enabled: true
      }
    ]
  },
  {
    name: 'silver',
    icon: 'fa-bullseye',
    price: 5000,
    features: [
      {
        name: '100 Sample UI Kits',
        enabled: true
      },
      {
        name: 'Easy to use',
        enabled: true
      },
      {
        name: 'All Open files',
        enabled: true
      },
      {
        name: 'Available in all files',
        enabled: true
      },
      {
        name: 'Responsive files',
        enabled: false
      }
    ]
  }
]
This module exports an array that contains all available plans. Each plan has a name, price, icon and features of the plan. Some features are not enabled for some plans which will help us style our UI accordingly.
Back in the src/components/ProductPlans.vue, let’s import product plans and add them to our data properties. We’ll have three types of plans: gold, silver, and bronze. Modify the script section to look like so:
<script>
import plans from '../data/plans'

export default {
  name: 'ProductPlans',
  data() {
    return {
      plans,
    }
  },
}
</script>
In the markup, add the following:
<template>
  <div class="container">
    <h2 class="text-center text-uppercase font-weight-bold">Product Plans</h2>
    <div class="row">
      <div class="col-12 col-lg-4 mt-4" v-for="(plan, index) in plans" :key="index">
        <div :class="`plan plan-${plan.name} card border-0 shadow-sm`">
          <div class="card-header">
            <h3 class="plan-name">{{ plan.name }}</h3>
          </div>
          <div class="card-body">
            <p><i :class="`fa ${plan.icon} plan-icon`" aria-hidden="true"></i></p>
            <p class="plan-price">${{ plan.price }}</p>
            <ul>
              <li
                v-for="feature in plan.features"
                :key="feature.name"
                :class="{'plan-feature': true, 'strike-through': !feature.enabled}"
              >
                {{ feature.name }}
              </li>
            </ul>
          </div>
          <div class="card-footer">
            <button class="btn btn-primary text-uppercase btn-lg rounded-pill px-5">Subscribe</button>
          </div>
        </div>
      </div>
    </div>
  </div>
</template>
In our markup, we use v-for to loop through the plans and create a card using the data gotten from each plan. We use style binding to add the “strike-through” class if a particular feature is not enabled for that plan. At the moment, it doesn’t look very pretty so add the following styles:
<style scoped lang="scss">
.plan-gold {
  background-color: #FFDF00;
}
.plan-bronze {
  background-color: #cd7f32;
}
.plan.silver {
  background-color: #C0C0C0;
}

.plan {
  padding: 25px 0;
  border-radius: 15px;

  .card-header, .card-footer {
    border: 0;
    background-color: transparent;
  }

  .card-header {
    border-radius: 15px 15px 0 0;
  }

  .plan-name {
    text-transform: uppercase;
  }

  .plan-icon {
    font-size: 48px;
  }

  .plan-price {
    font-size: 36px;
    font-weight: bold;
  }

  .plan-feature {
    font-size: 16px;
    font-weight: 500;

    &.strike-through {
      text-decoration: line-through;
    }
  }

  .btn {
    font-weight: bold;
  }

  .card-footer {
    border-radius: 0 0 15px 15px;
  }
}
ul {
  list-style-type: none;
  padding: 0;
}
</style>
Now it should look like so:
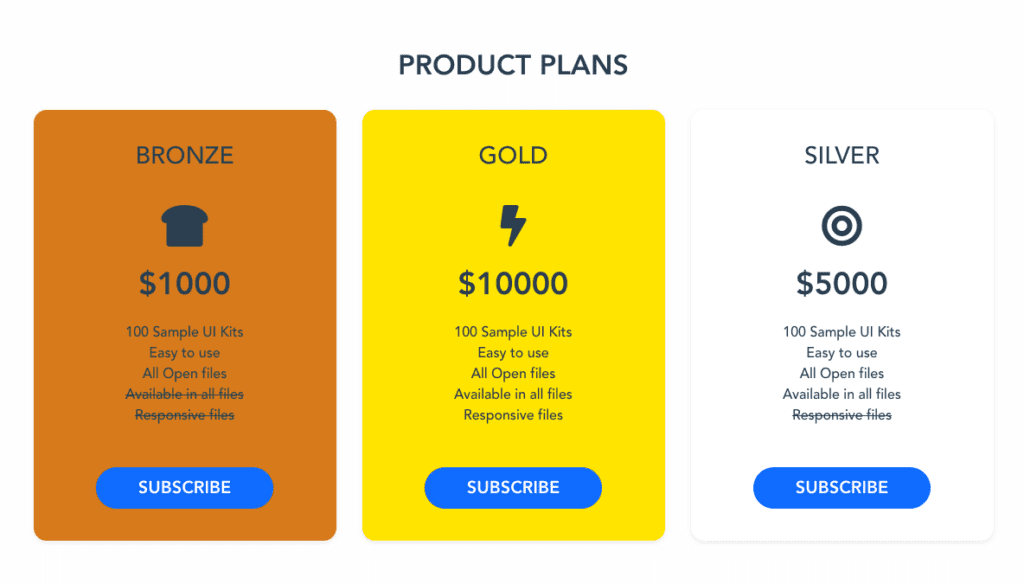
It looks good but it doesn’t really do anything and we are not mocking any APIs at the moment. Let’s do that in the next section.
API Mocking with Mirage JS
At the moment, the application just reads the plans from a file and there is no interaction. What we’ll do in this section is:
- Fetch plans from our mock API
- Subscribe users to plans
- Display message to notify users of successful subscription
Fetch plans from mock API
Inside the src directory, create a new file server.js. Add the following code to it:
import { Server, Response } from 'miragejs'
import plans from './data/plans'

export function makeServer({ environment = 'development' } = {}) {

  let server = new Server({
    environment,

    routes() {

      this.namespace = 'api'

      this.get('/plans', schema => {
        return new Response(200, {}, plans)
      })

      this.post('/plans', (schema, request) => {
        const headers = {}
        const plan = JSON.parse(request.requestBody)
        return new Response(
          200,
          headers,
          { message: `Successfully subscribed to ${plan.name} plan`}
        )
      }, { timing: 2000 })
    },
  })

  return server
}s
This is quite a bit of code so let’s walk through it step-by-step.
import { Server, Response } from 'miragejs'
import plans from './data/plans'
We import Server and Response from miragejs which would enable us to create a server and send responses from the server. Let’s import our plans here.
export function makeServer({ environment = 'development' } = {}) {
  …
}
We export a function makeServer() passing in an argument environment which by default, is set to development. Ideally, we’ll want our mock server to run only in development.
let server = new Server({
    environment,

    routes() {
      …
    }
})

return server
We create an instance of Server, passing in our environment and routes.
routes() {

  this.namespace = 'api'

  this.get('/plans', schema => {
    return new Response(200, {}, plans)
  })

  this.post('/plans', (schema, request) => {
    const headers = {}
    const plan = JSON.parse(request.requestBody)
    return new Response(
      200,
      headers,
      { message: `Successfully subscribed to ${plan.name} plan`}
    )
  }, { timing: 2000 })
},
In the routes, we set the namespace. Basically, we’ll prefix our API requests with the namespace i.e. /api/plans.
We have two routes: a get route that returns available plans and a post route that handles plan subscriptions. For the get request, we return a response with a status code 200 along with the plans. For the post request, all we do is get the plan that was sent to the server and send a response message that tells the user the plan they subscribed to was successful. Notice the timing of 2000 (2 seconds). In the real world, an API request takes some time before getting a response so we can simulate these network conditions quite easily with Miragejs.
To start using our mock API, add the following to src/main.js.
import { makeServer } from ‘./server’

if (process.env.NODE_ENV === ‘development’) {
  makeServer()
}
We import our mock API server. We detect if we are in a development environment before we use the mock API server. Open <ProductPlans /> and remove this line:
import plans from './data/plans'Next, initialize plans data property to []:
plans: []Add the created lifecycle hook and fetch the plans from the mock API server like so:
created () {
  fetch('/api/plans')
    .then(res => res.json())
    .then(json => {
      this.plans = json
    })
}
We fetch plans from the mock API server and assign the response to this.plans. We should end up with the same result as before which would indicate that our mock API server is working.
Subscribe Users to Plans
When a user clicks on the subscribe button, there should be some form of interaction. So here’s the interaction we’ll build:
- The user clicks subscribe button on a plan
- A modal opens to ask the user to confirm the plan
- If the user confirms, the plan is sent to the mock server
- The web app displays the response received from the mock server
First off, we’ll add the markup for the modal. Just under the subscribe button, add this markup:
<div class="modal fade" id="exampleModal" tabindex="-1" role="dialog">
<div class="modal-dialog" role="document">
<div class="modal-content">
<div class="modal-header">
<h5 class="modal-title">Confirm</h5>
<button type="button" class="close" data-dismiss="modal" aria-label="Close">
<span aria-hidden="true">×</span>
</button>
</div>
<div class="modal-body">
<p>Are you sure you want to subscribe to this plan?</p>
</div>
<div class="modal-footer">
<button
type="button"
class="btn btn-primary font-weight-bold rounded-pill px-4" @click="subscribe"
:disabled="processing"
>
<span v-if="!processing">Confirm</span>
<span v-else>Subscribing...</span>
</button>
<button type="button" class="btn" data-dismiss="modal">Cancel</button>
</div>
</div>
</div>
</div>This is the minimal markup for Bootstrap’s modal. We have a title, a body text to ask the user to confirm, a cancel button, and a confirm button.
On the confirm button, we have a click listener that triggers a method called subscribe which has not been created yet.
We disable the button while trying to subscribe the user to the plan and display an appropriate text while waiting for a response.
By default, the dialog is closed. We’ll trigger it open when the subscribe button on the plan is clicked so add a click listener on the button
<button class="btn btn-primary text-uppercase btn-lg rounded-pill px-5" @click="openSubscribe(plan)">Subscribe</button>It, in turn, triggers a method openSubscribe and we pass the selected plan to it. Down in the script section, add the method like so:
methods: {
  openSubscribe (plan) {
    this.selectedPlan = plan
    $('#exampleModal').modal('show')
  },
}
We assign the plan to selectedPlan and open the modal using its id. Add selected plan and processing to the data properties:
data() {
  return {
    plans: [],
    selectedPlan: {},
    processing: false
  }
},
Now add the subscribe method:
subscribe () {
  this.processing = true
  fetch('/api/plans', { method: 'post', body: JSON.stringify(this.selectedPlan) })
    .then(res => res.json())
    .then(data => {
      $('#exampleModal').modal('hide')
      this.processing = false
      alert(data.message)
    })
}
We set processing to true which would disable the confirm button. Using fetch, we specify a post request this time as well as adding the selected plan to the body of the request. Once we get a successful response, we close the dialog, set processing to false and display the response.
With that, we’ve successfully set up an API mocking server with Vue and Miragejs. You can go on to expand it by adding more plans or using it for a totally different use case.
Conclusion
To recap, we’ve seen how to set up a Vue project. We’ve added some styles to make the web app look good. Finally, we’ve seen how to use MirageJS to mock an API server and even simulate network conditions using timing. There’s a lot more that can be done with Miragejs but this is a good place to start.