


In this tutorial, we are going to create a CryptoCurrency Price Update website using Wix Code. Wix Code is a new advanced feature added to the Wix platform that makes it easier to create custom functionalities for your Wix website. As you may already know Wix is a website builder that lets you create a website from scratch without writing any code.
Quoting the Wix Code website:
“Wix Code makes it easy to build web applications and robust websites. It’s serverless, hassle-free coding. Set up database collections, create content-rich websites, add custom forms and change site behavior with our APIs.”
Wix code, however, was created to target developers who are willing to customize their website beyond the simple drag and drop and ready-made widgets already created by Wix. With Wix code you have full control of your website, you can create custom widgets and add custom behaviors as you desire. Read more about Wix Code here
We are going to take advantage of the Wix Code API in this tutorial to query a third party API and display data dynamically. We will build a Cryptocurrency app that will enable a user to keep track of their favorite Coins by search and also display the top 10 performing cryptocurrencies.
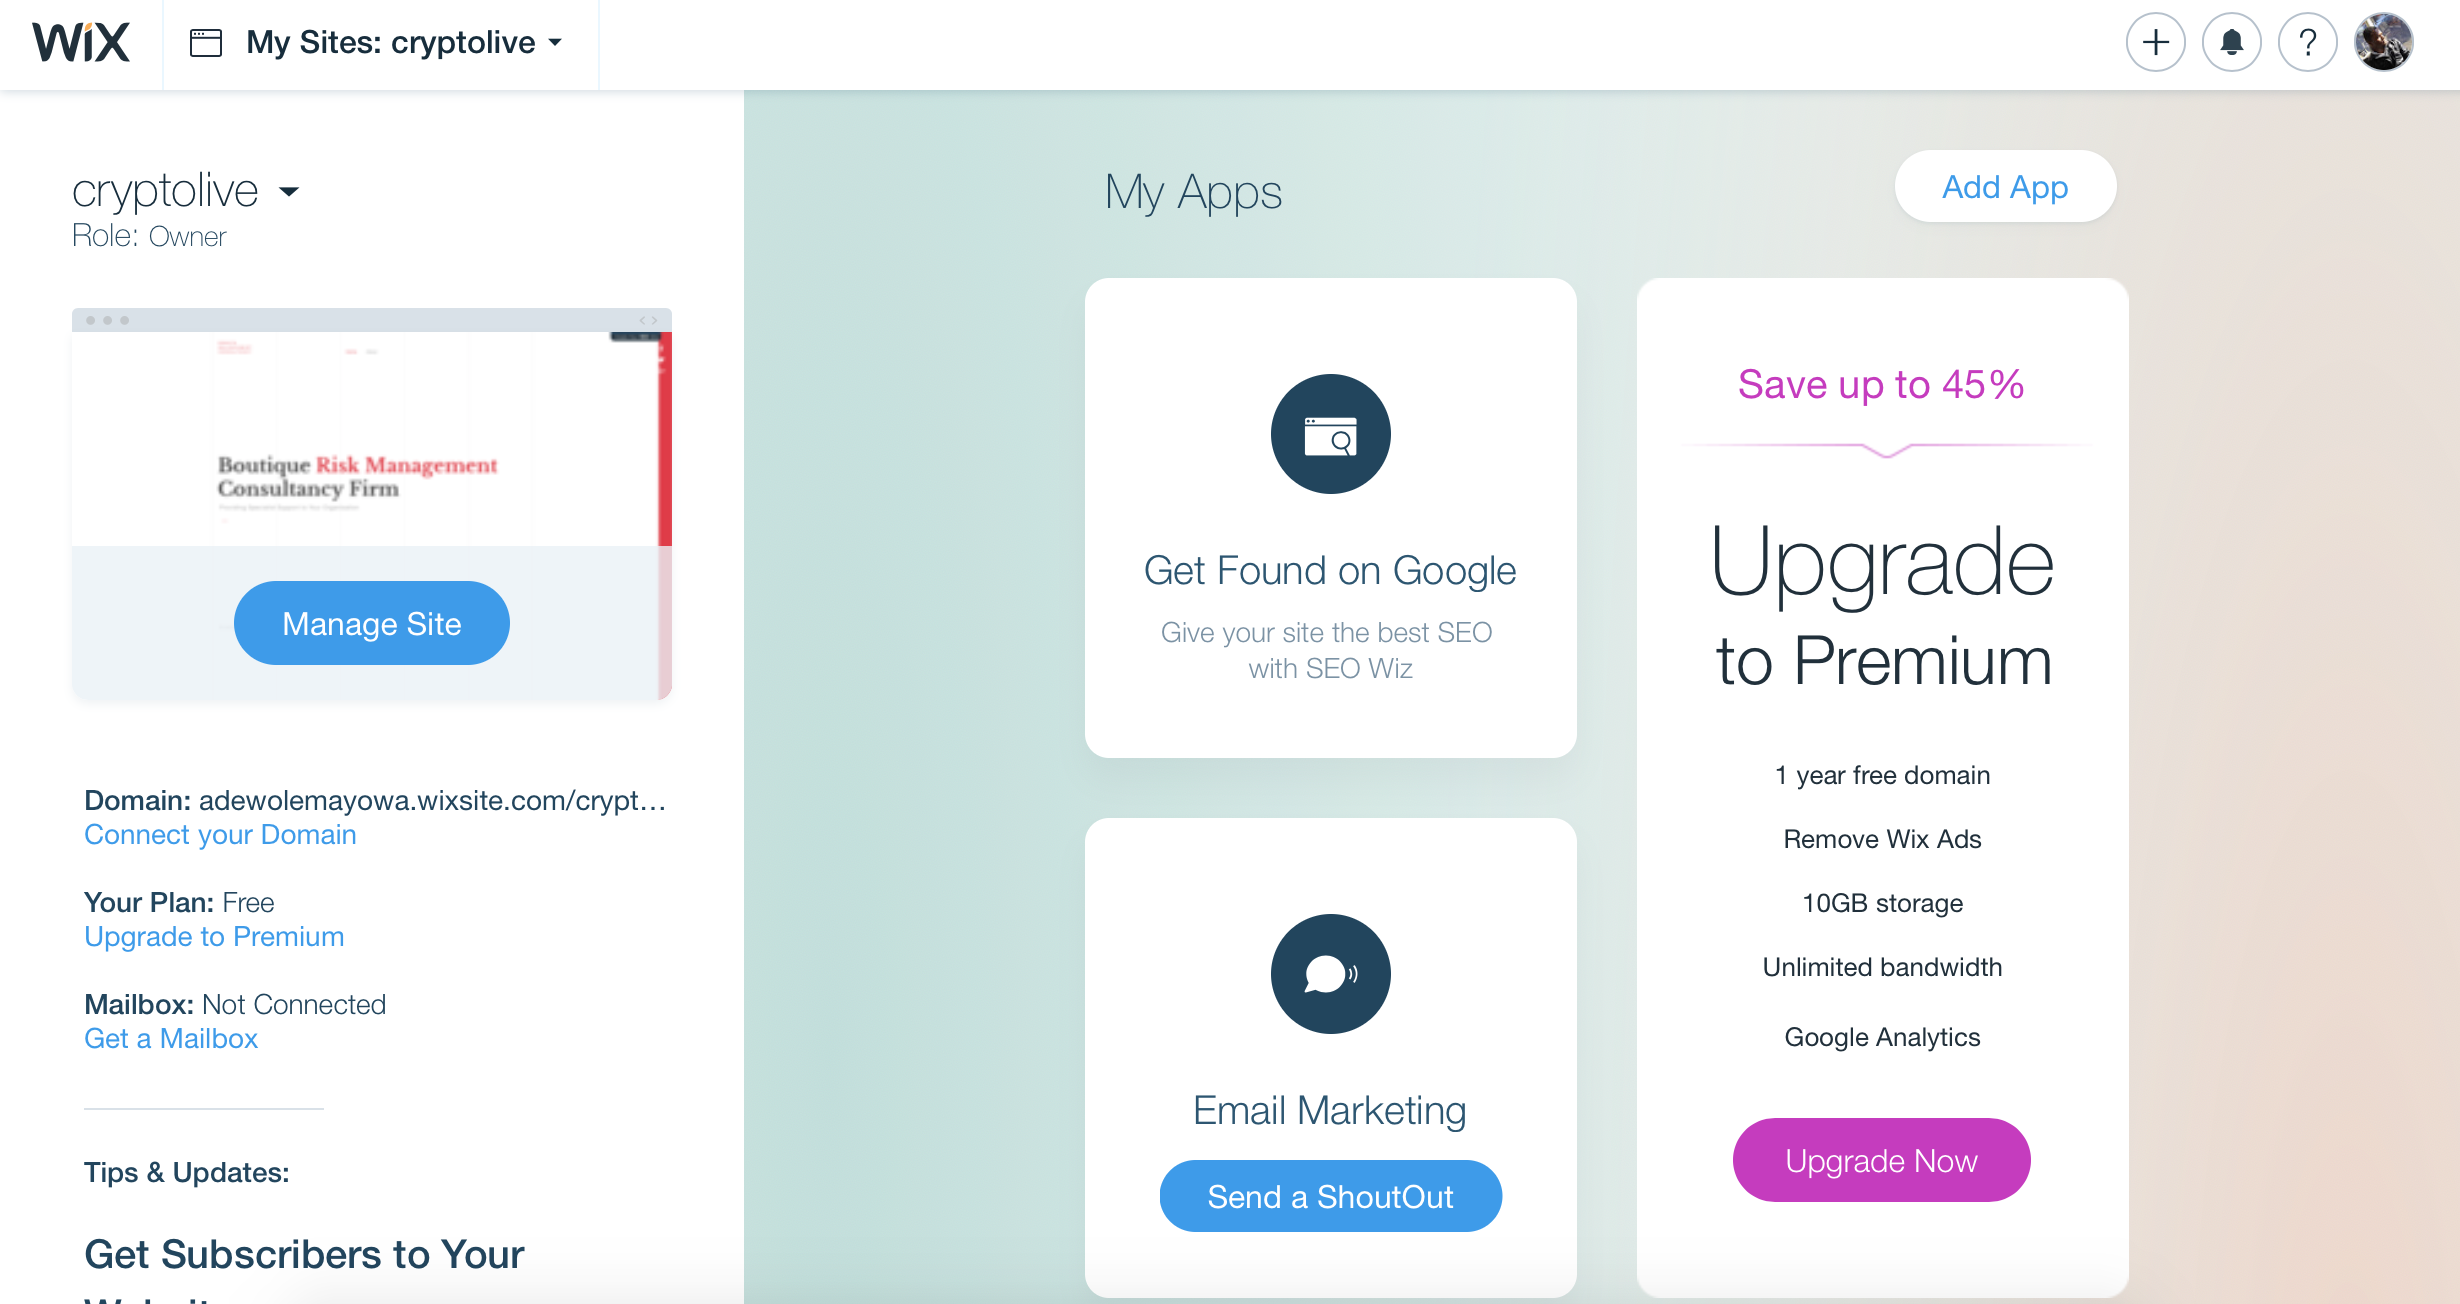
So to get started, you need to create an account on Wix, visit the Signup page to create an account. After that create a new site by hitting the plus icon on the top right corner of the page.
Which will take you to a new page asking, what kind of website do you want to create? You can choose any option you want there. I chose business.

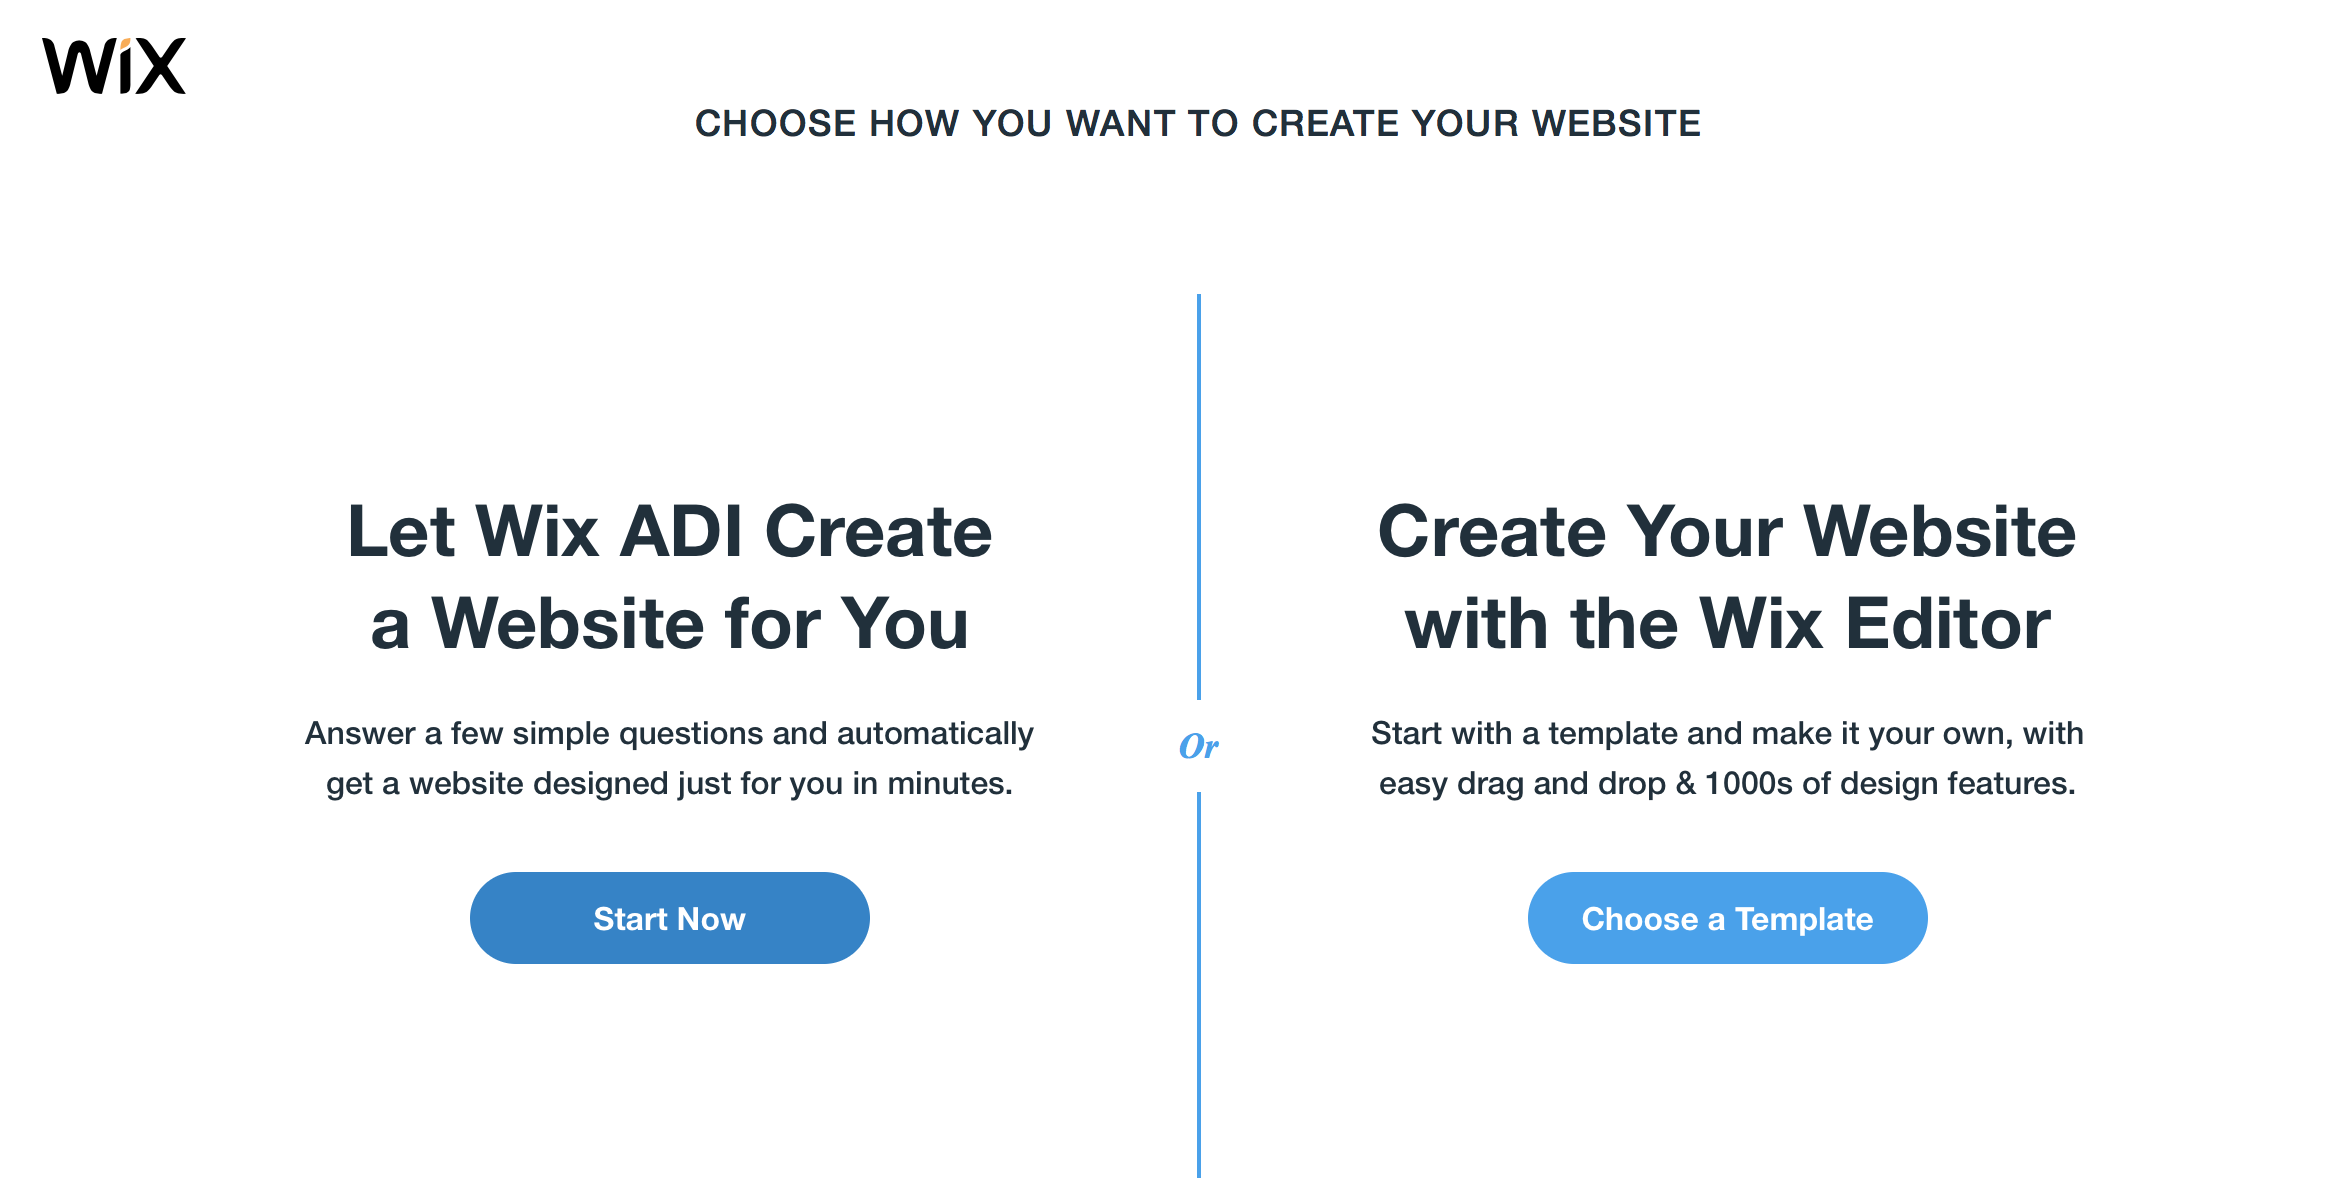
And then it takes you to the next page where you will be asked to choose how you want to create your website. To be able to use Wix code you have to choose to create your website with Wix editor.
And then on the next page, you will be asked to choose a template for your website. You can choose to either create with one of the existing templates or choose to start yours from scratch by choosing the blank template.
On any template you decide to choose, just click on edit so we can start developing our app. You can find edit when you hover over any of the templates. Upon clicking it will take you to the Wix website editor.

We can now start customizing our chosen template. We will add some important HTML elements.
We also need to enable Wix Code on this template. To do so, we click on Tools and then enable the Developer Tools, which is disabled by default.

So the first element we need to add to the page is an input control, this is where the user will type in the name of the cryptocurrency they want to keep track of, and then search for its information using the CoinMarketCap API. To add that navigate and click on plus, which will open a panel with lots of HTML elements that you can use on your page. To add an element to your page, you can either drag and drop it anywhere on your page or double-click on it.
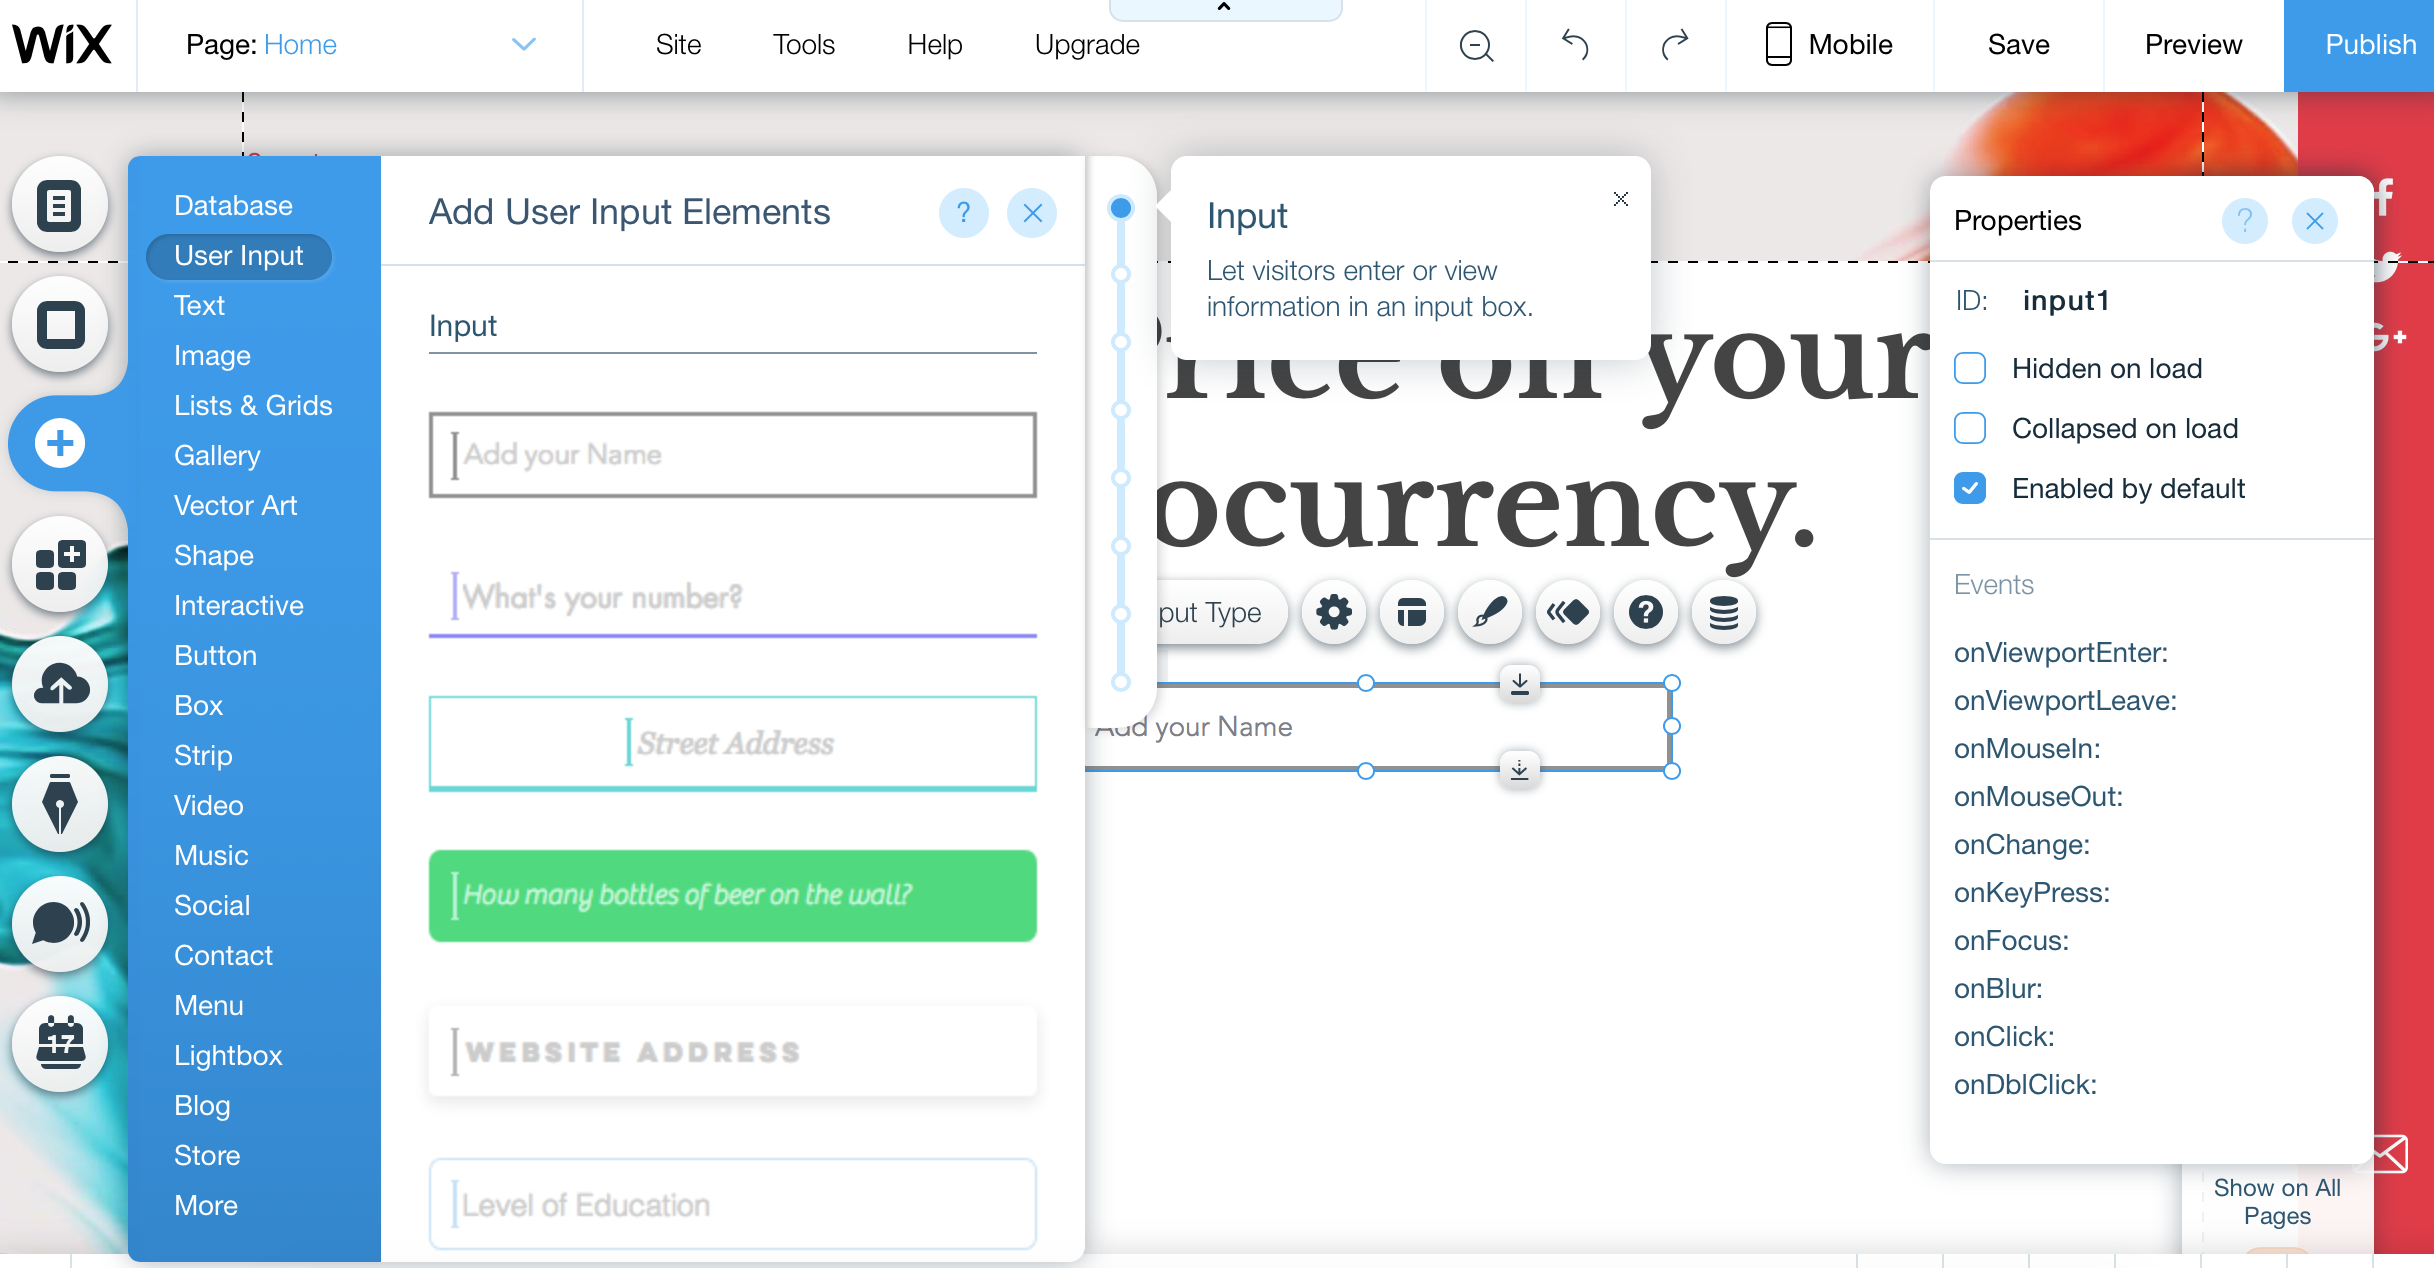
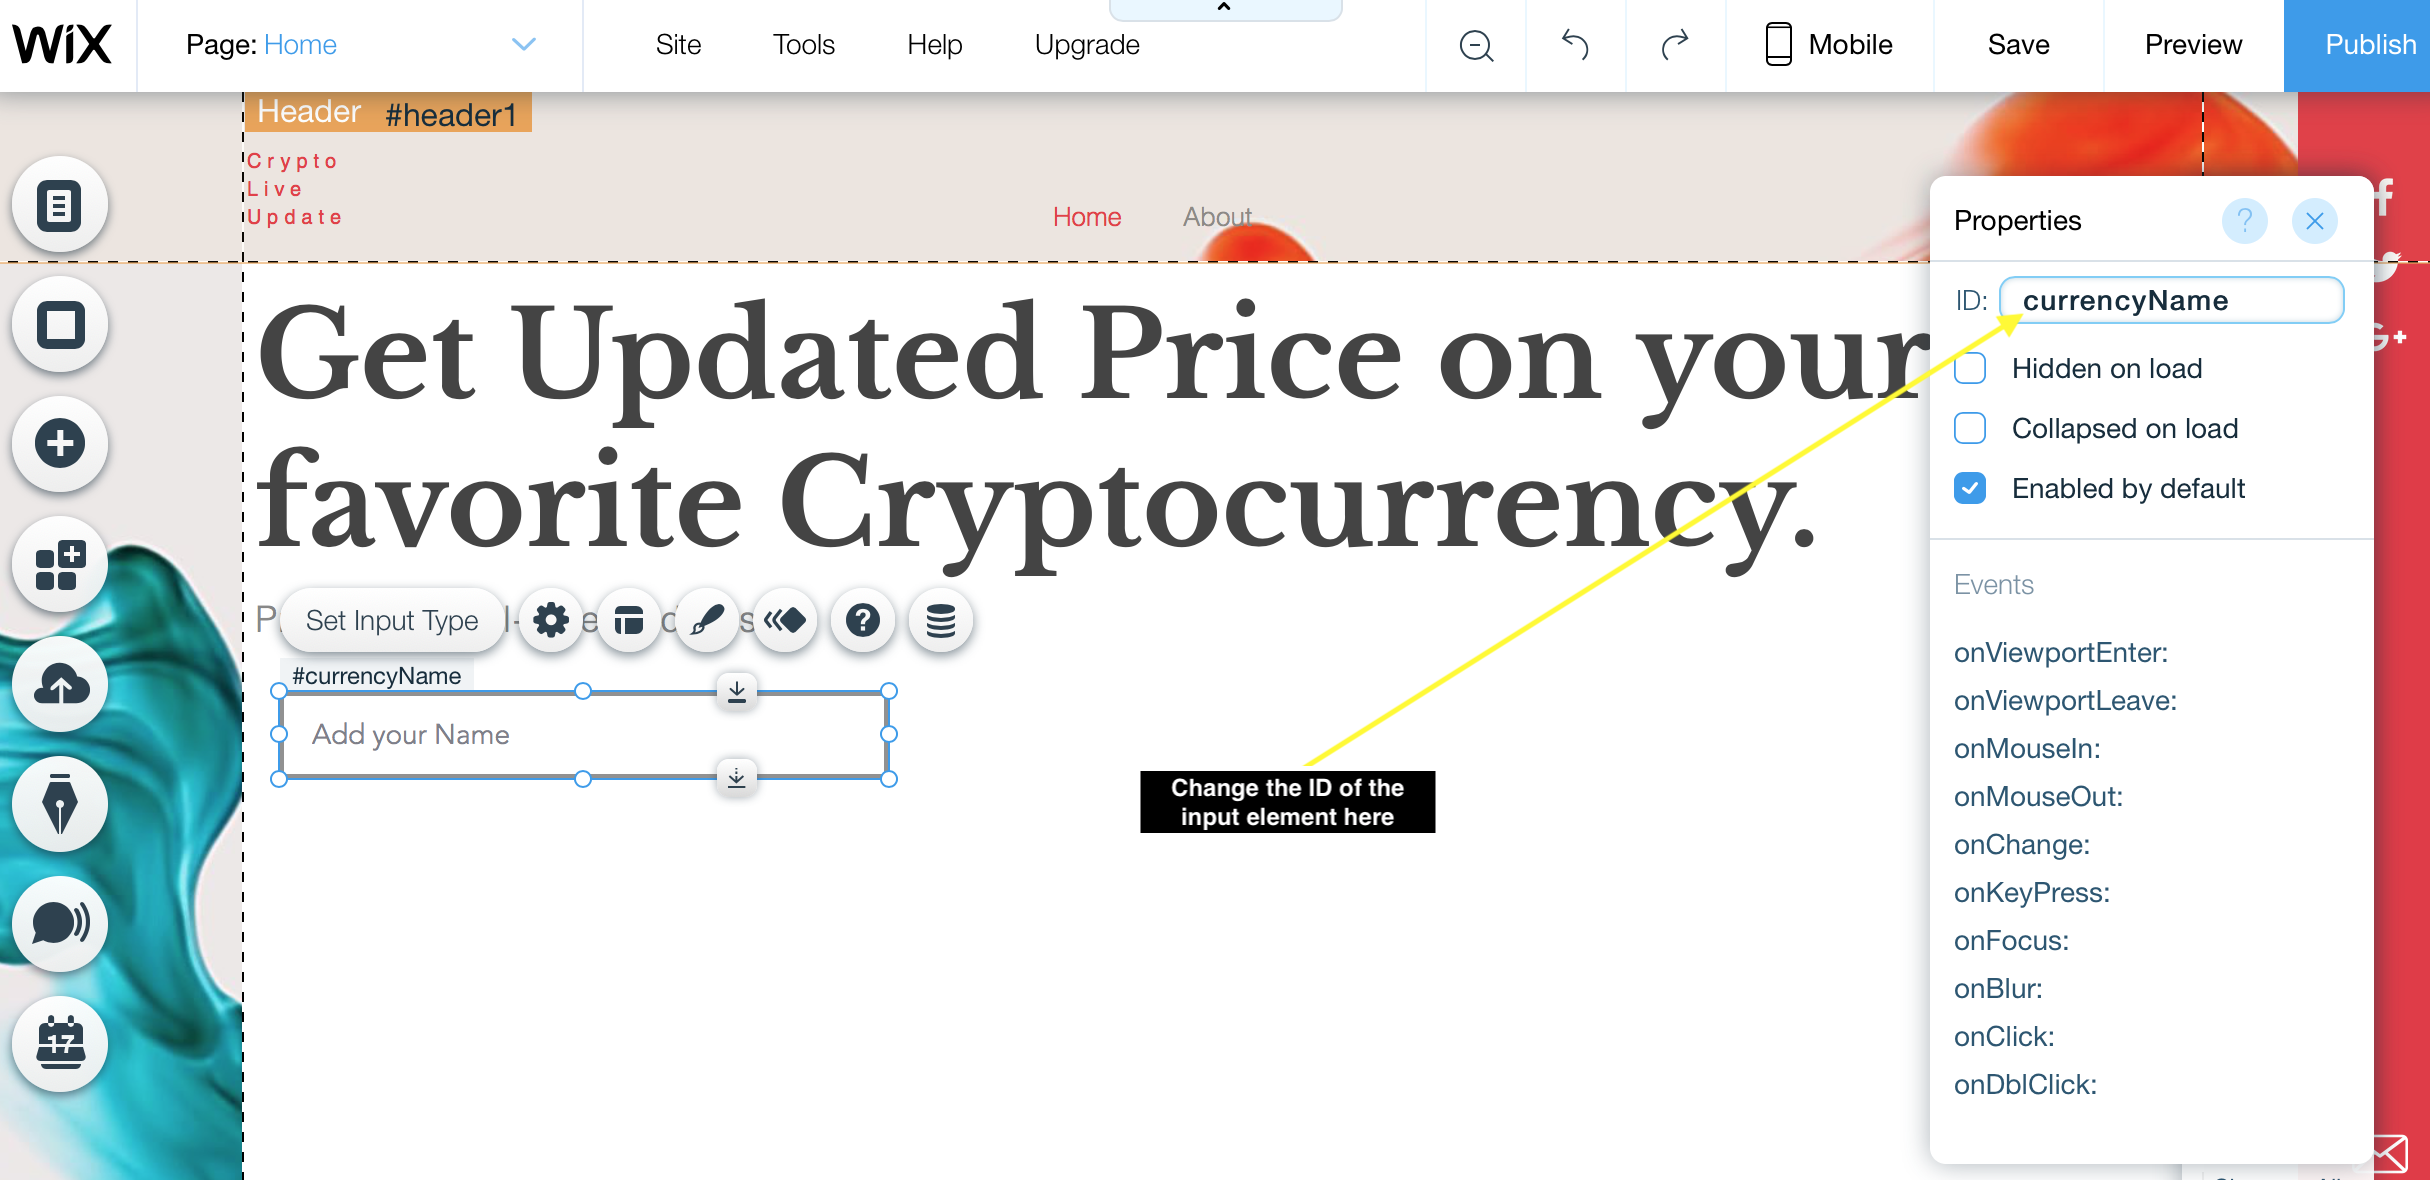
As you can see the input element gets assigned an ID which must always be unique. We will use the ID to interact with this Input element, later on, to get the value of the user input and then pass it on to the CoinMarketCap API. Let’s change the name of the Input element to something more friendly. Follow the instruction as in the image below.
Next, let us place a Button beside the input box which will initiate the search when the user clicks on it. We can place a button on the page by repeating the same steps we used to add the input box into the page. We can change the text of the button to Search and also give it an ID of search. After making the changes, my page now looks like this:
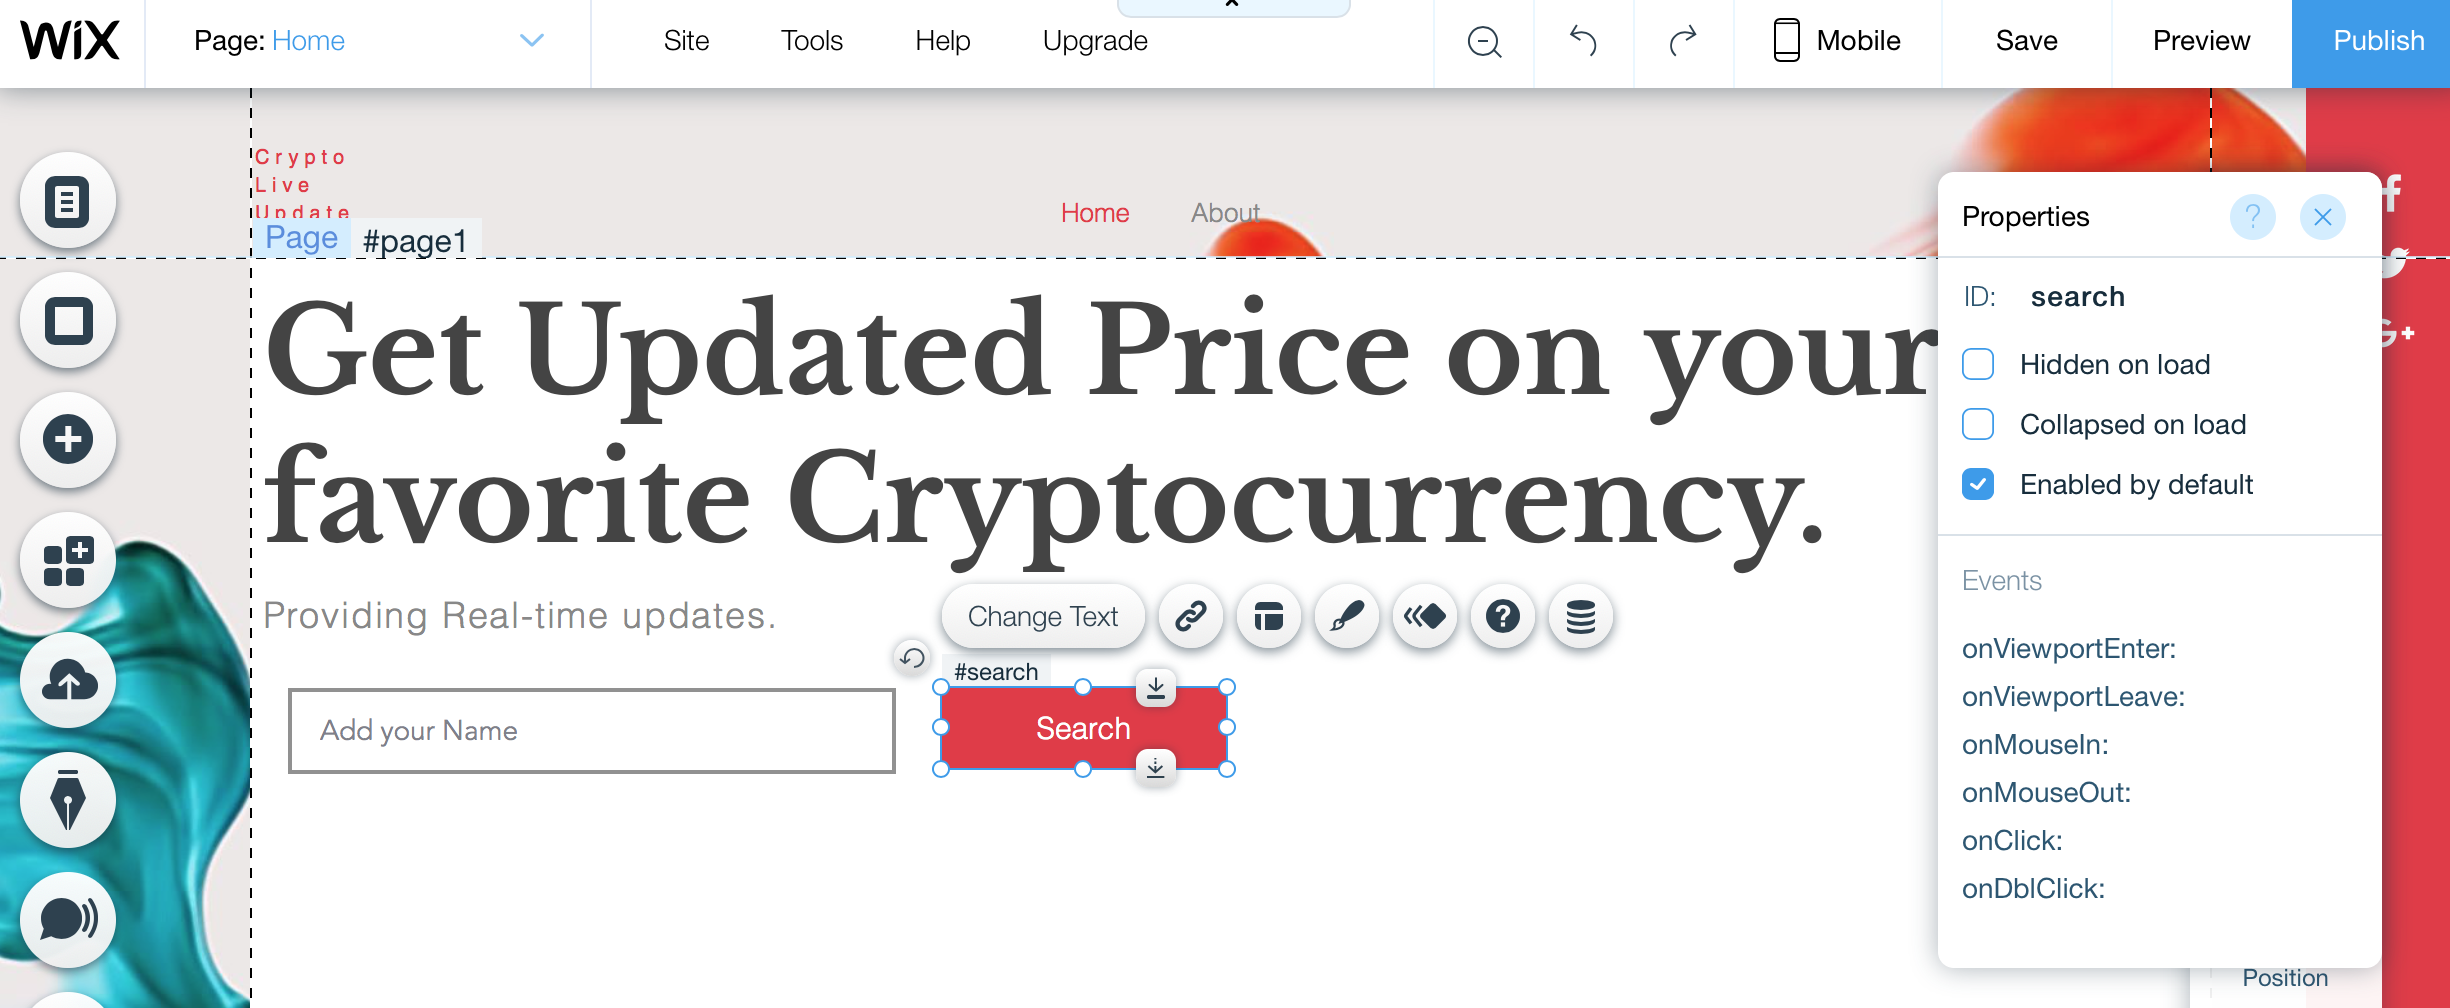
Later on, we will register an onClick event handler on this button, such that when a user clicks on it, it will initiate a Wix Code function that we will write. This function will search the CoinMarketCap API for any valid currency value you type into the Input element and then retrieve its information and then display it to the user.
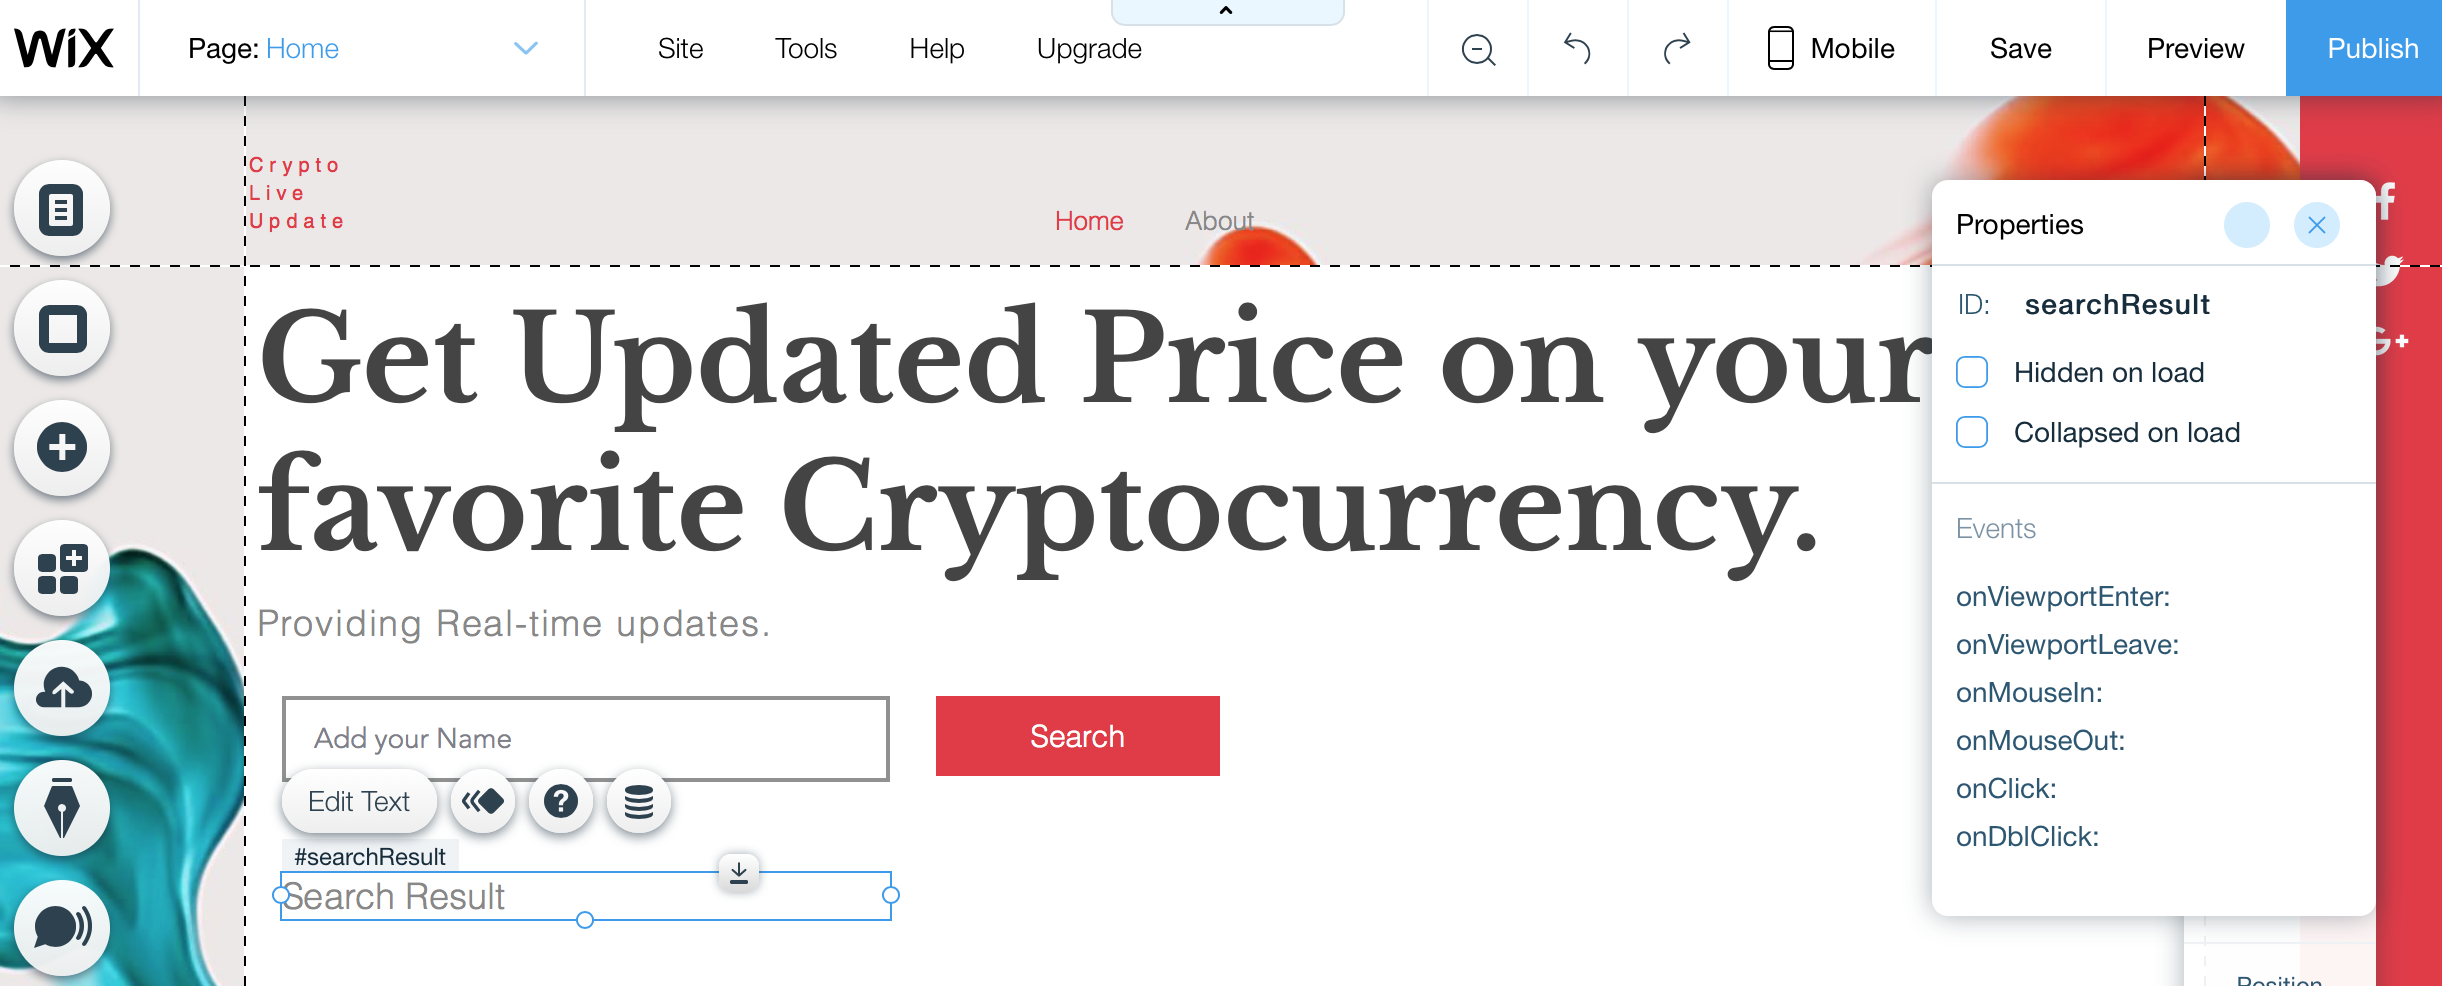
But before doing that we need to add another HTML element to the page, a Text element where the result of the search will be displayed. So go ahead and click on the Plus icon again, navigate to Text. I have inserted a paragraph on the page, changed the ID to searchResult and also edited the text content and gave it a simple title of Search Result.
This concludes the design and layout of our page and now we can start coding the main logic of the site which is to interact directly with the CoinMarketCap API. You can get an overview and explore the CoinMarketCap API more here. To preview your design you should click Save on the navigation bar before clicking Preview.
Next, We will create a method called getCoinInfo().
With Wix Code it is easy to add a Backend code, you can write functions that you would rather have to write in Backend programming languages like PHP, Python or Ruby.
To begin to write a backend code, navigate to the Arrow function in the footer of the page as shown in the image below.
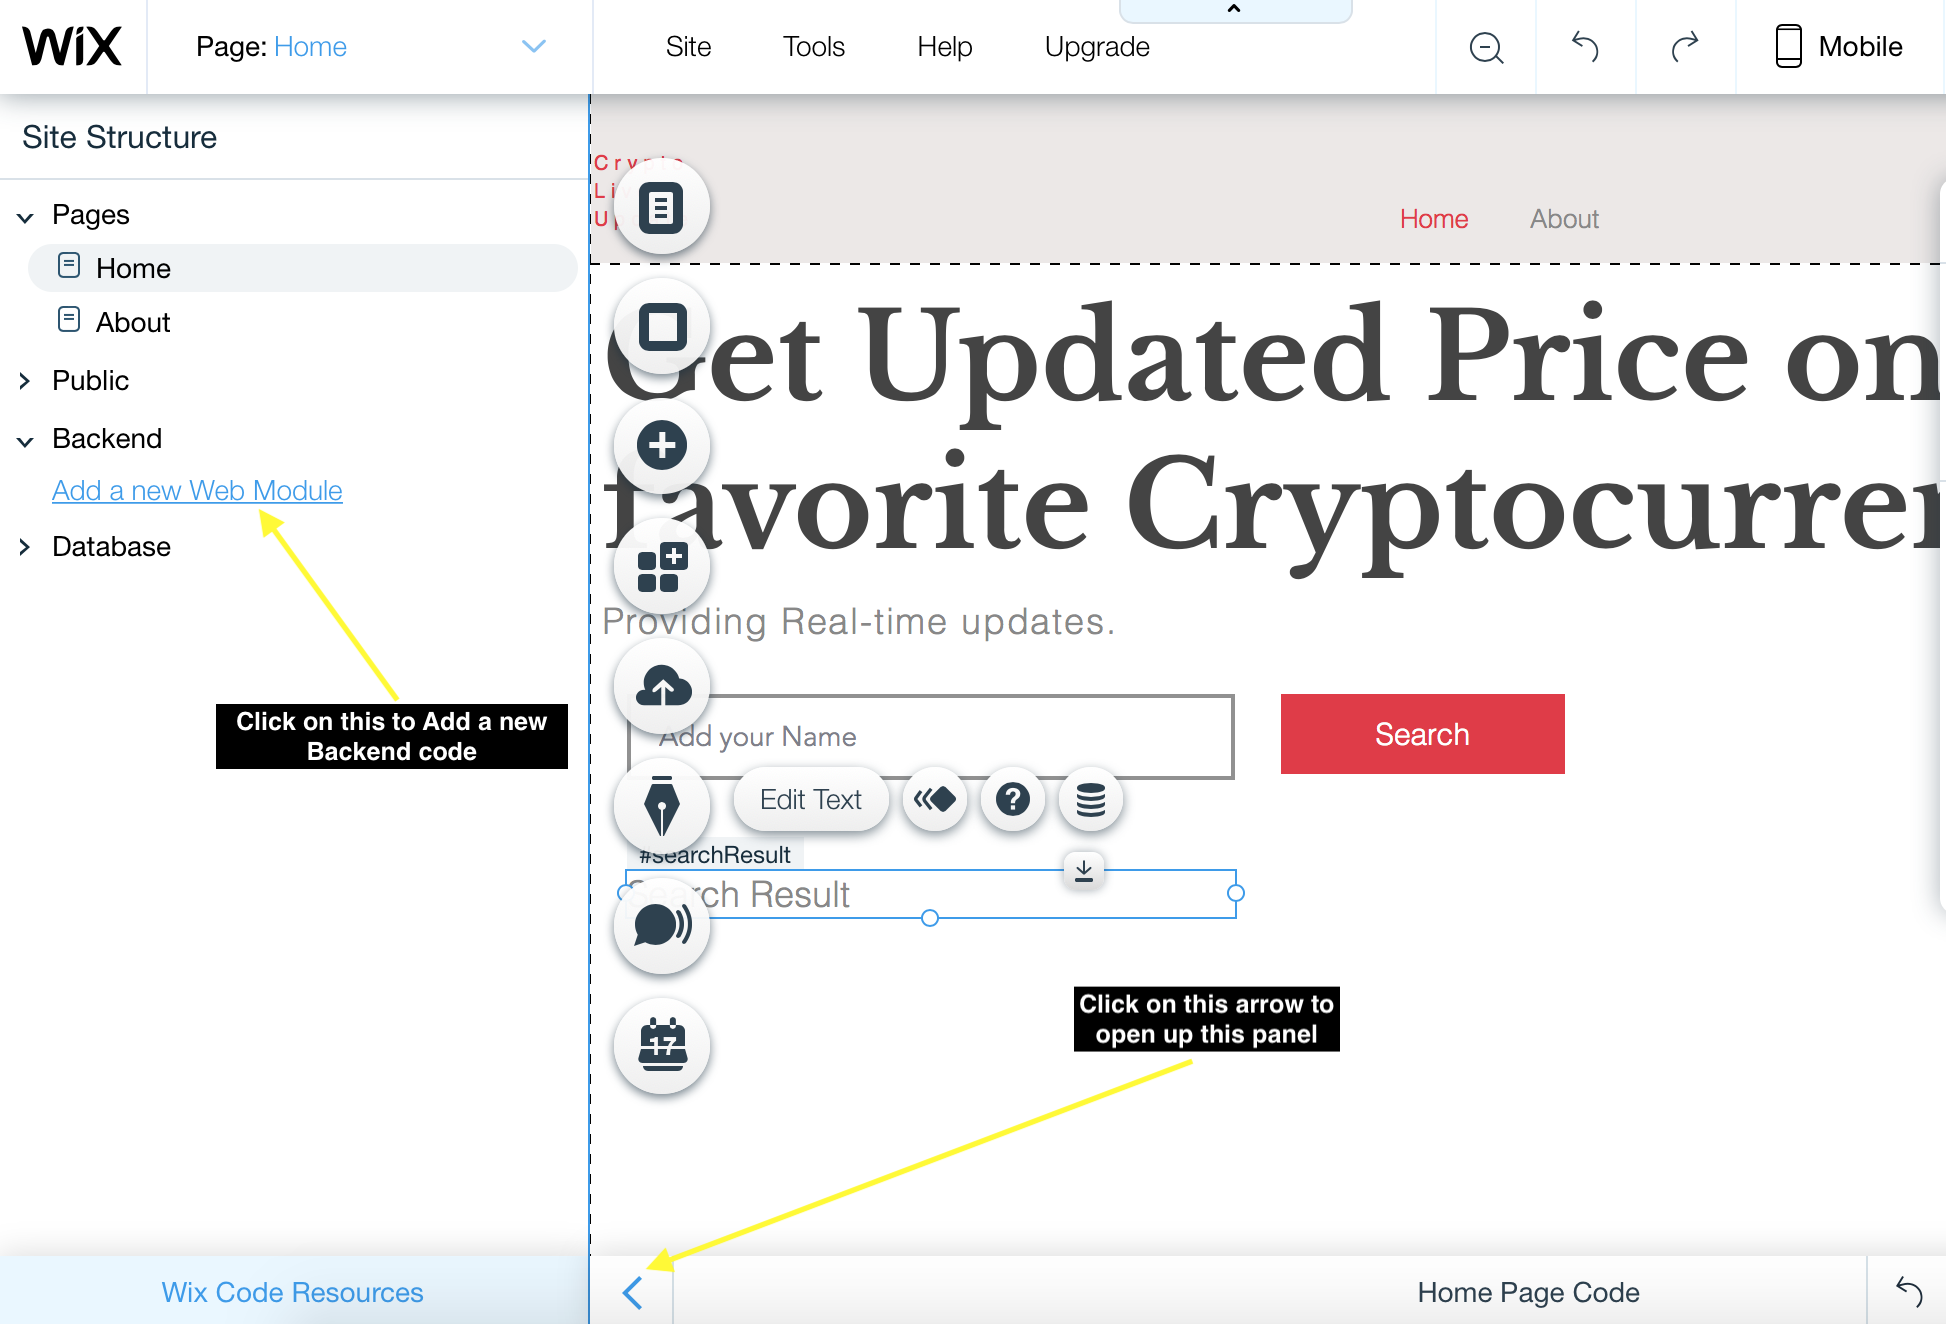
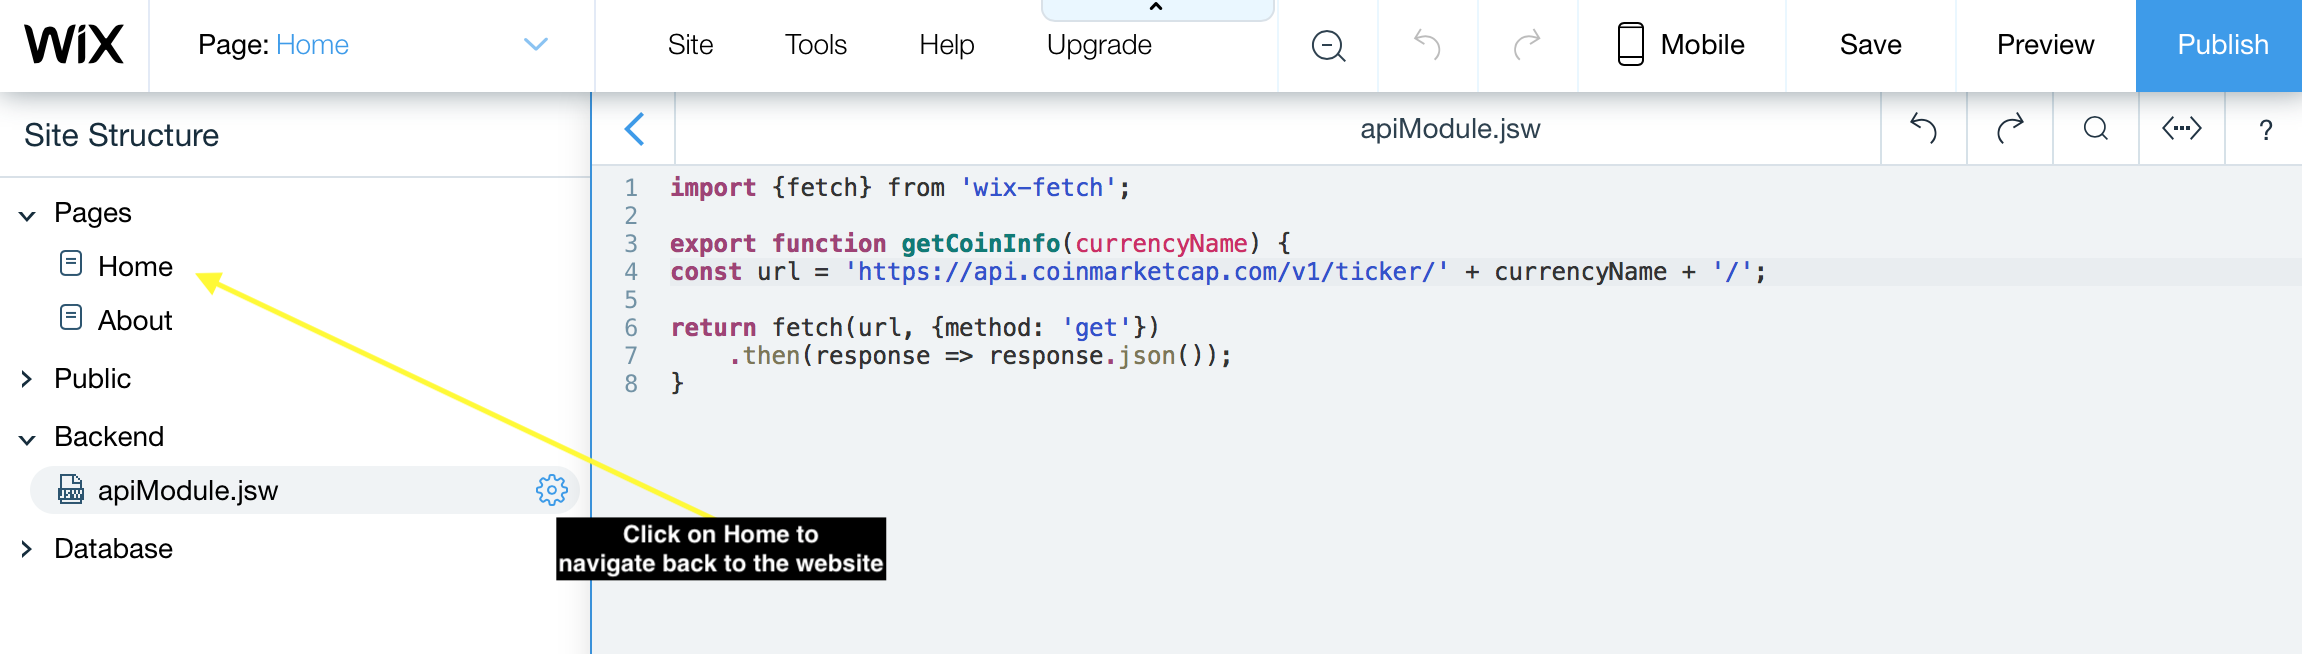
Once you click on Add a new Web Module you will be given a name suggestion of aModule.jsw I renamed mine to apiModule.jsw, rename the module and hit enter. Once you hit enter you should be shown a code editor page that looks like this:

import {fetch} from 'wix-fetch';

export function getCoinInfo(currencyName) {
const url = 'https://api.coinmarketcap.com/v1/ticker/' + currencyName + '/';

return fetch(url, {method: 'get'})
.then(response => response.json())
}
With the first import statement, we’re making sure that fetch is imported from the wix-fetch package. With fetch, we are able to initiate an HTTP call needed to retrieve information from the external API. The fetch function is then used within the function getCoinInfo to initiate an HTTP GET request to the API endpoint. The fetch function accepts/expects two parameters:
- The first parameter is a string containing the URL of the API endpoint.
- The second parameter is a configuration object in JSON format. In our specific case, this object is containing the property method which is set to string ‘get’ which simply means, we’re initiating an
HTTP GETrequest. - Fetch is returning a promise so we can use method chaining and add a
.then()to retrieve the value being returned byfetch.
We created a URL string, the base URL, which is passed into the fetch function call, the function
getCoinInfo is expecting to get the name of the cryptocurrency as an input parameter. The complete URL is built by concatenating the base URL endpoint https://api.coinmarketcap.com/v1/ticker/ with the currency name. Read more about wix-fetch here. It’s just an extension of the JavaScript fetch API.
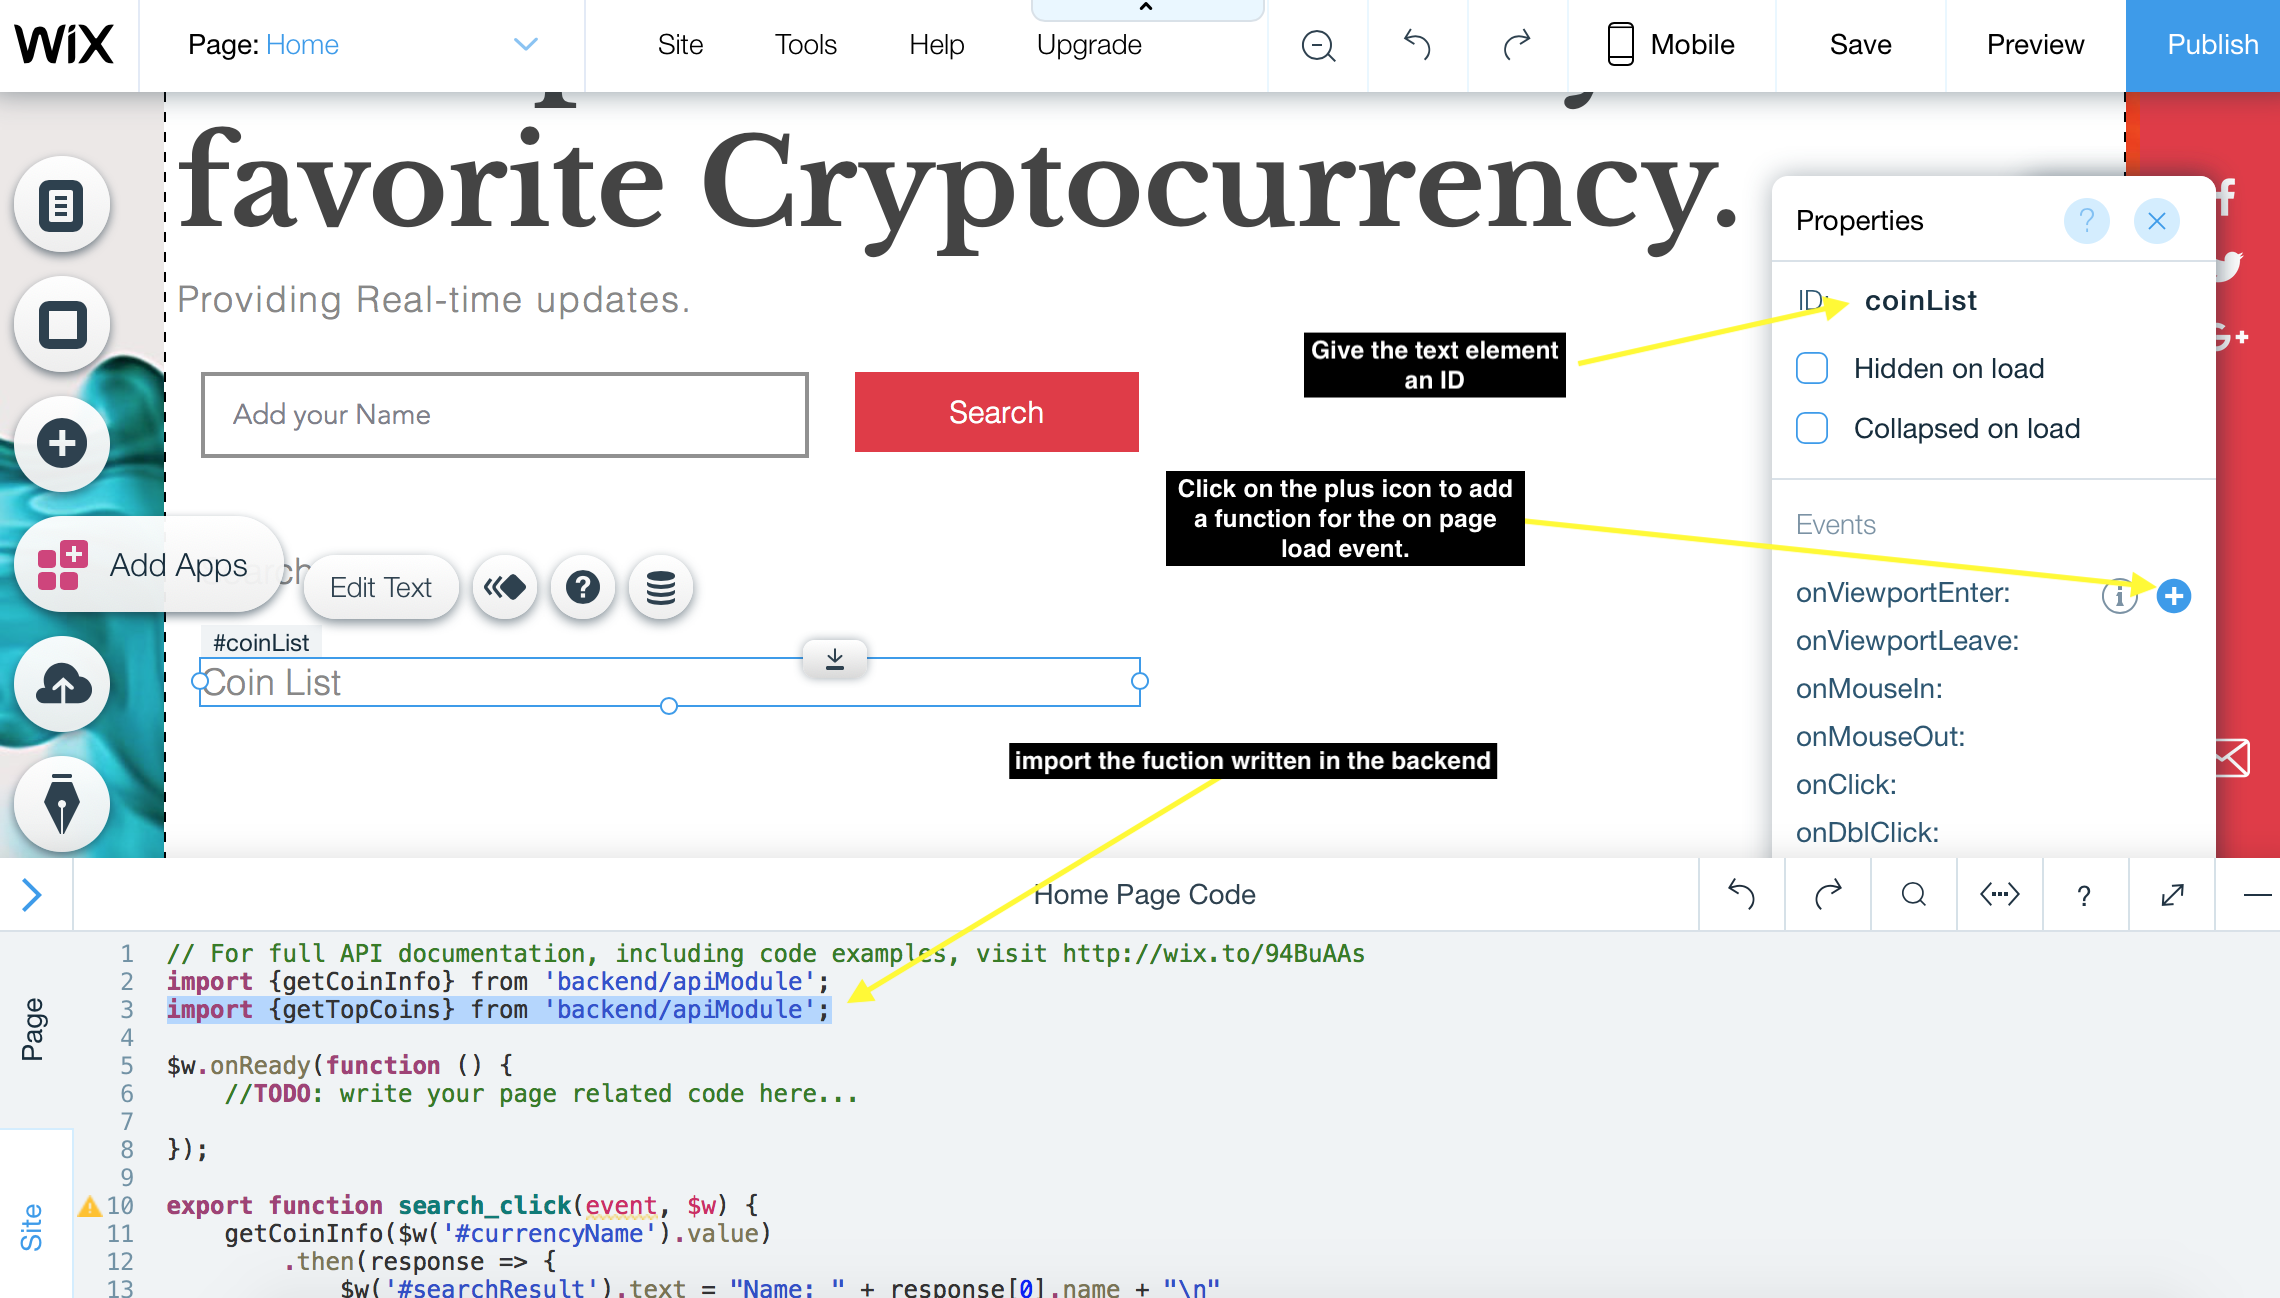
Next, we will use the backend code we have just created and then connect it with Search button we created earlier. We want the backend code to run when a user types in the name of a currency in the input element and clicks on the search button. To make this work, we will register an onClick event on the search button. Select the button and then in the properties panel click on the plus icon opposite the onClick event listed there as shown in the image below:

We will make use of the function getCoinInfo in the code editor that opened after clicking on the plus icon of the onClick event. Insert the following import statement first at the top of the editor.
import {getCoinInfo} from 'backend/apiModule';
Now, we can use the getCoinInfo() function on the frontend side by simply calling it inside the search_click() function created for the onClick event of the search button.
import {getCoinInfo} from 'backend/apiModule';

export function search_click(event, $w) {
getCoinInfo($w('#currencyName').value)
.then(response => {
$w('#searchResult').text = "Name: " + response[0].name + "n"
+ "Symbol: " + response[0].symbol + "n"
+ "Price (USD): " + response[0].price_usd;
});
}
First we get the value of the text input from user, which is the name of the currency that the getCoinInfo() function expects, the javascript’s fetch api responds with a promise so we use method chaining to apply the then() which is where we retrieve the currency info.
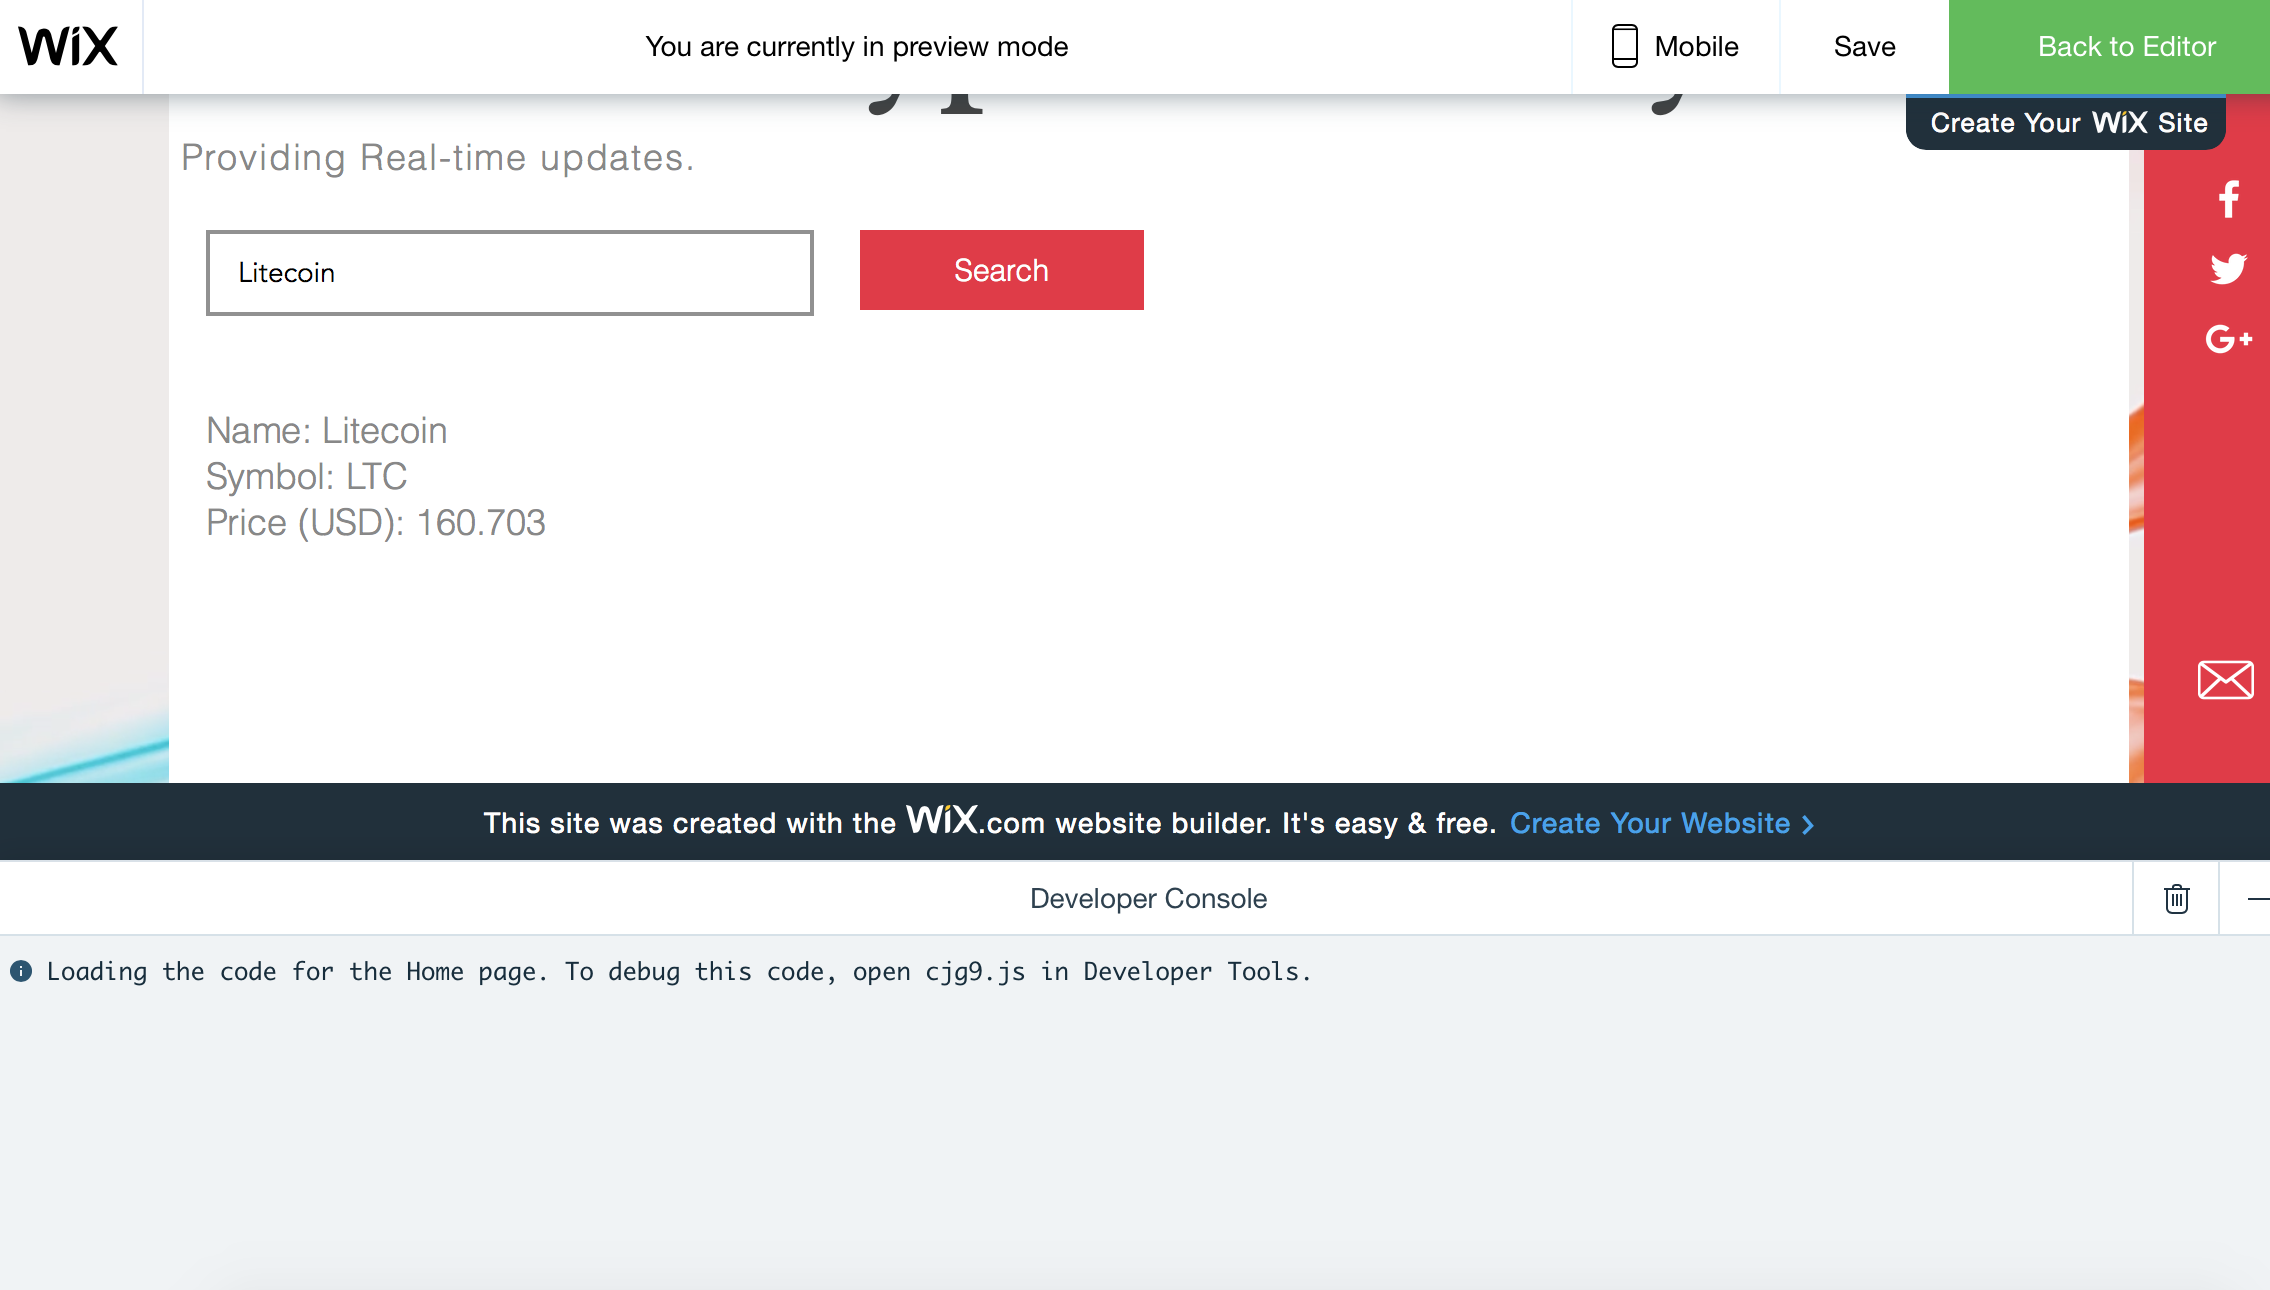
After writing this code, you can hit save and then preview to see your site up and running.
Here’s the result after testing it:
You can display more results from the API by simply adding from the list on CoinMarketCap API .
We can further improve the app by adding another function to get the first 10 currencies from the Coin Market Cap API. This will be displayed directly under the search result. Before proceeding to write the function, let’s add another Text element and then give it an ID of coinList. After that, navigate to the Backend/apiModule.jsw file and then add the function there.
export function getTopCoins() {
const url = 'https://api.coinmarketcap.com/v1/ticker/?limit=10';

return fetch(url, {method: 'get'})
.then(response => response.json());
}
And then navigate back to Home. On the home do the following, Choose the Coin List which should have coinList Id and then navigate to the onViewportEnter event, click on the plus icon, which will create a new function in the frontend editor. And then import the getTopCoins() from the backend.
After adding the content of the function for the onViewportEnter event, my code looks like this:

export function page1_viewportEnter(event, $w) {
getTopCoins().then(response => {
$w('#coinList').text = "Name: " + response[0].name + "t t"
+ "Symbol: " + response[0].symbol + "t t"
+ "Price (USD): " + response[0].price_usd + "n n"
+ "Name: " + response[1].name + "t t"
+ "Symbol: " + response[1].symbol + "t t"
+ "Price (USD): " + response[1].price_usd + "n n"
+ "Name: " + response[2].name + "t t"
+ "Symbol: " + response[2].symbol + "t t"
+ "Price (USD): " + response[2].price_usd + "n n"
+ "Name: " + response[3].name + "t t"
+ "Symbol: " + response[3].symbol + "t t"
+ "Price (USD): " + response[3].price_usd + "n n"
+ "Name: " + response[4].name + "t t"
+ "Symbol: " + response[4].symbol + "t t"
+ "Price (USD): " + response[4].price_usd + "n n"
+ "Name: " + response[5].name + "t t"
+ "Symbol: " + response[5].symbol + "t t"
+ "Price (USD): " + response[5].price_usd + "n n"
+ "Name: " + response[6].name + "t t"
+ "Symbol: " + response[6].symbol + "t t"
+ "Price (USD): " + response[6].price_usd + "n n"
+ "Name: " + response[7].name + "t t"
+ "Symbol: " + response[7].symbol + "t t"
+ "Price (USD): " + response[7].price_usd + "n n"
+ "Name: " + response[8].name + "t t"
+ "Symbol: " + response[8].symbol + "t t"
+ "Price (USD): " + response[8].price_usd + "n n"
+ "Name: " + response[9].name + "t t"
+ "Symbol: " + response[9].symbol + "t t"
+ "Price (USD): " + response[9].price_usd + "n n"
});
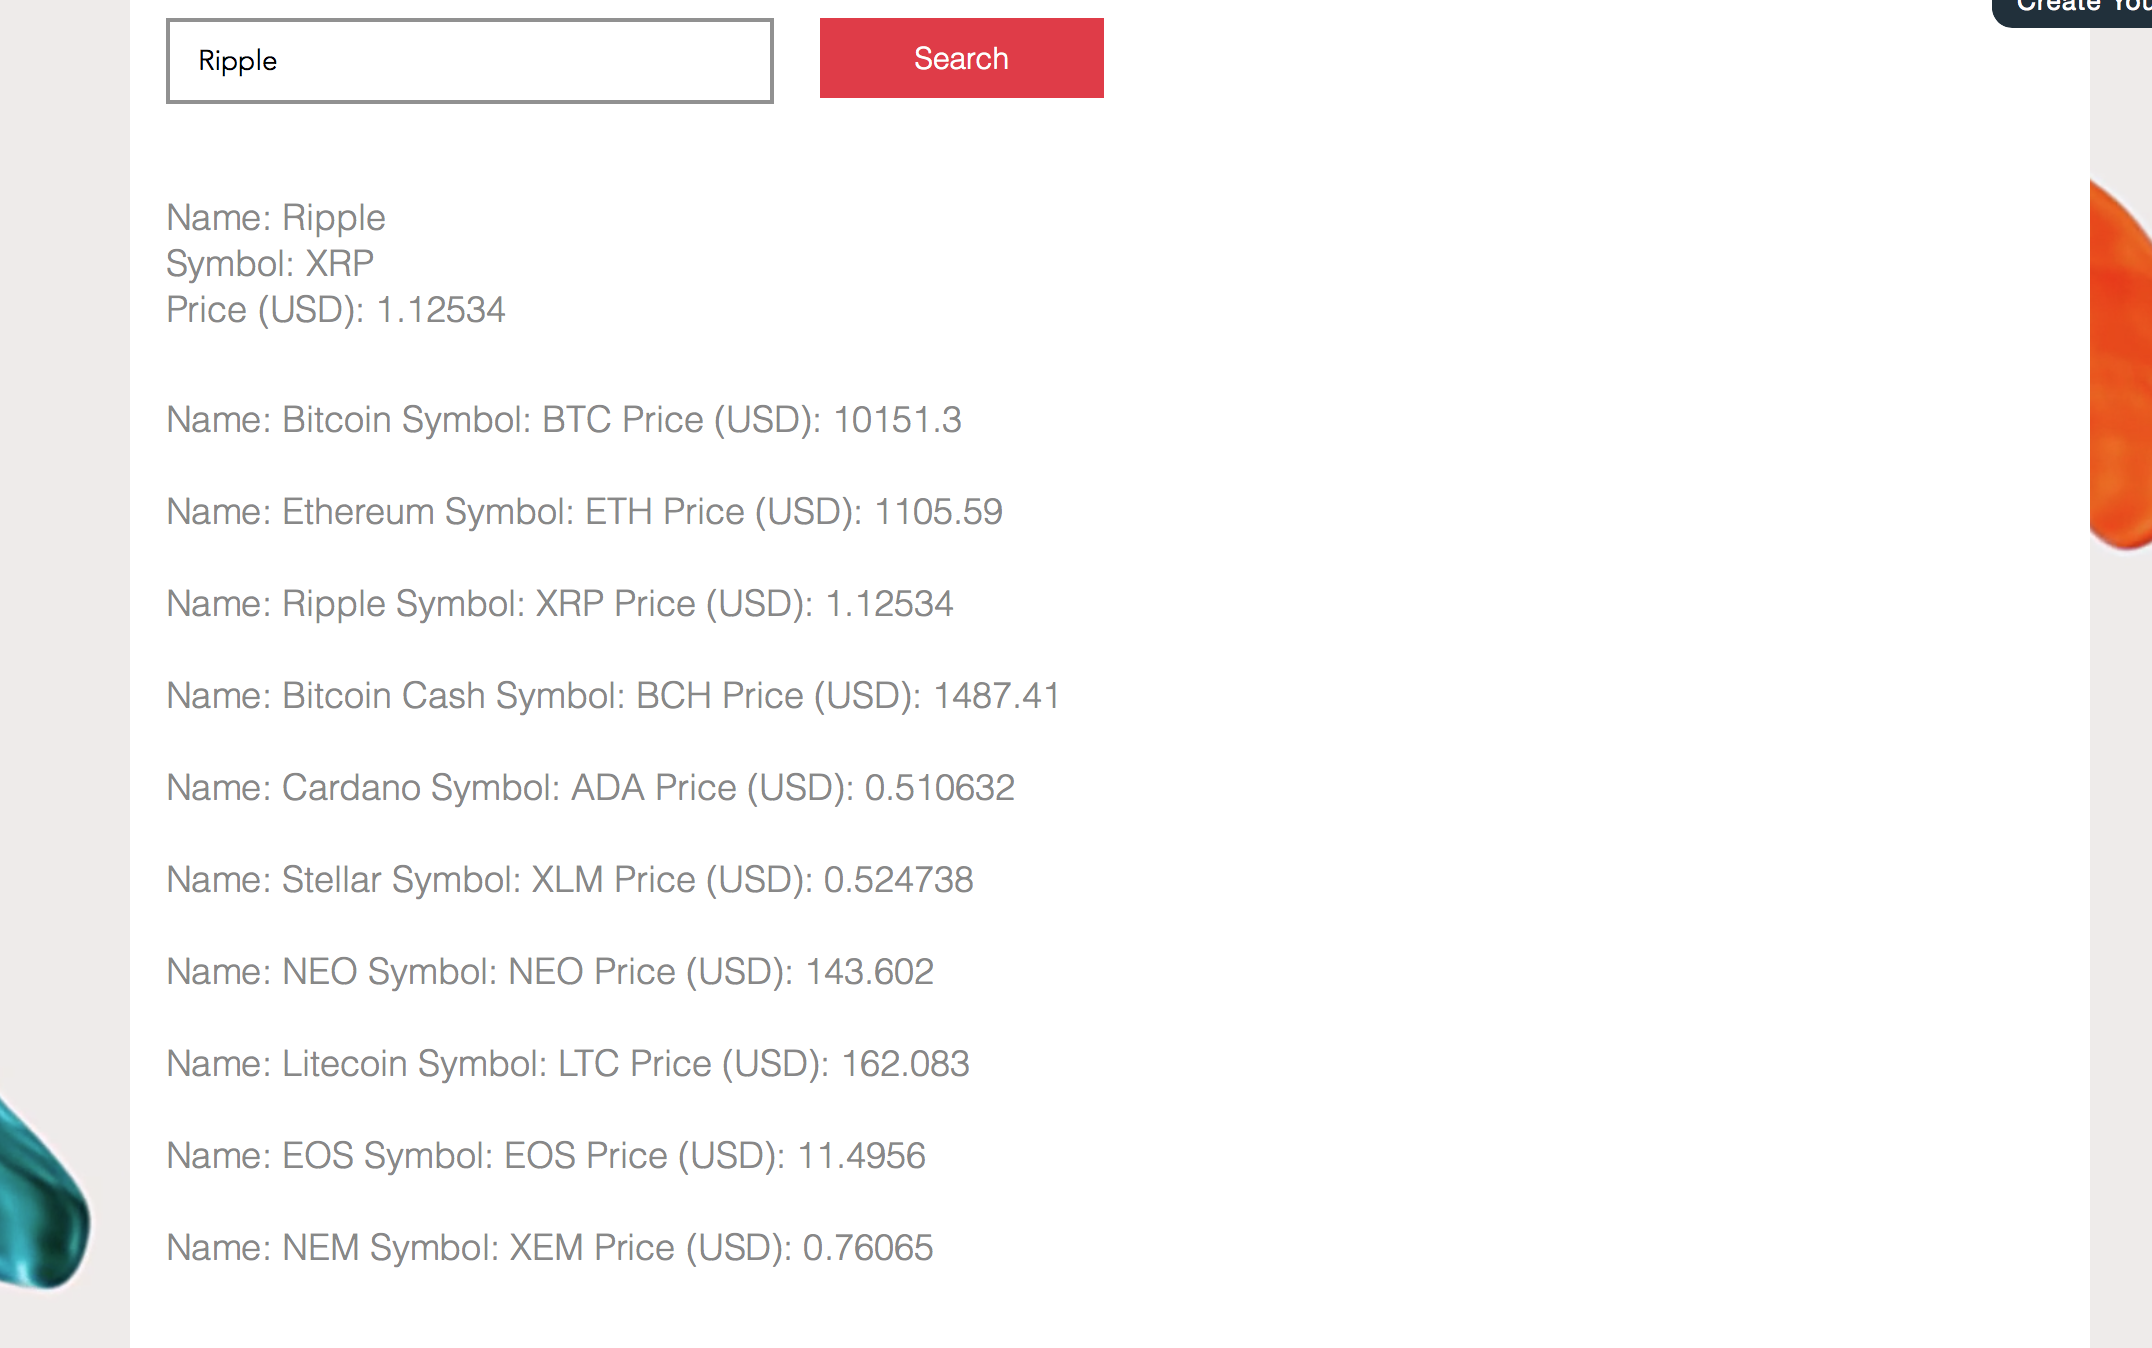
}This function is displaying all the 10 currencies that was requested from the CoinMarketCap API in the backend code and function getTopCoin() through this url https://api.coinmarketcap.com/v1/ticker/?limit=10.
The final output looks like this:
Update
Due to high demand from our readers, we’ve extended the app further and made the UI even better, but to do that. We wanted to add images of the currencies, but Coin Market Cap API does not provide images for these currencies so we had to query another API to get the images of the currencies. Here’s how we did that:
Navigate back to the Backend/apiModule.jsw file and add this code to query the CryptoCompare API. The API has an endpoint for ImageUrl for the images/logo of each of the currencies. You can navigate here to see the Logo of Bitcoin for example.
export function getImageFromCryptoCompare() {
const url = 'https://min-api.cryptocompare.com/data/all/coinlist';

return fetch(url, {method: 'get'})
.then(response => response.json());
}
Import the backend function into the frontend code editor. And then Add the functions to display the data.
import {getImageFromCryptoCompare} from 'backend/apiModule';
Navigate to the Home and then Add a Repeater from the Lists & Grids.
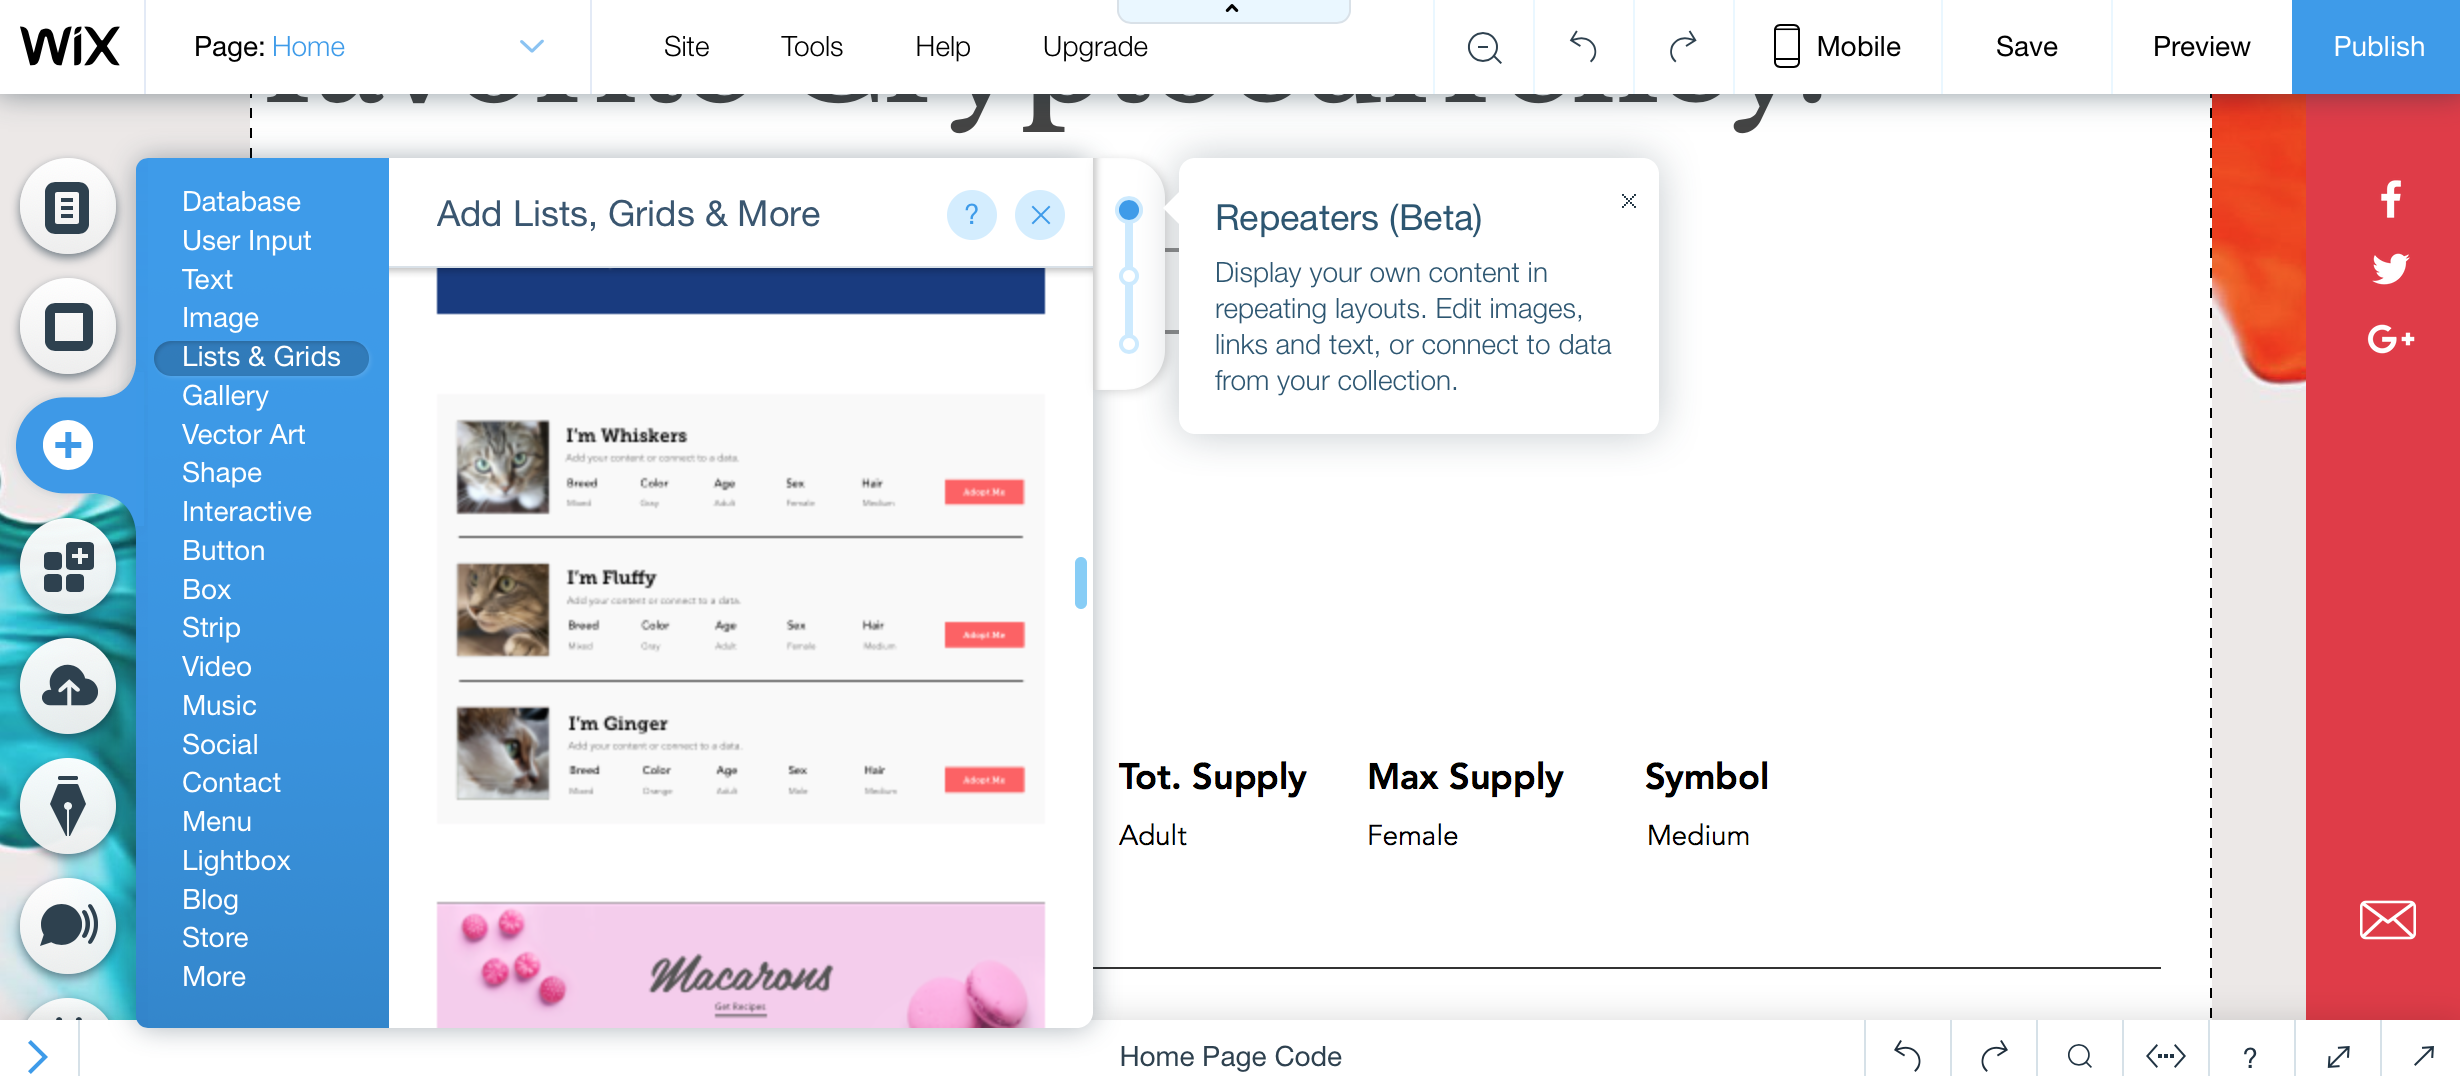
You have to add a single repeater for each of the ten coins. And then give each of the HTML text elements a unique Id. The code to interact with the repeaters should be placed in $w.onReady() function since we want the function to execute immediately the page loads. Each section of this code represents data being displayed on each of the repeaters.
$w.onReady(function () {
getTopCoins().then(response => {
getImageFromCryptoCompare().then(resp => {
$w('#image1').src = 'https://www.cryptocompare.com' + resp.Data[response[0].symbol].ImageUrl;
$w('#coin1').text = response[0].name;
$w('#text23').text = response[0].price_usd;
$w('#text13').text = "Rank: " + response[0].rank;
$w('#text21').text = response[0].total_supply;
$w('#text22').text = response[0].available_supply;
$w('#text20').text = response[0].max_supply;
$w('#text19').text = response[0].symbol;

$w('#image2').src = 'https://www.cryptocompare.com' + resp.Data[response[1].symbol].ImageUrl;
$w('#coin2').text = response[1].name;
$w('#text35').text = response[1].price_usd;
$w('#text25').text = "Rank: " + response[1].rank;
$w('#text33').text = response[1].total_supply;
$w('#text34').text = response[1].available_supply;
$w('#text32').text = response[1].max_supply;
$w('#text31').text = response[1].symbol;

$w('#image3').src = 'https://www.cryptocompare.com' + resp.Data[response[2].symbol].ImageUrl;
$w('#coin3').text = response[2].name;
$w('#text47').text = response[2].price_usd;
$w('#text37').text = "Rank: " + response[2].rank;
$w('#text45').text = response[2].total_supply;
$w('#text46').text = response[2].available_supply;
$w('#text44').text = response[2].max_supply;
$w('#text43').text = response[2].symbol;

$w('#image4').src = 'https://www.cryptocompare.com' + resp.Data[response[3].symbol].ImageUrl;
$w('#coin4').text = response[3].name;
$w('#text59').text = response[3].price_usd;
$w('#text49').text = "Rank: " + response[3].rank;
$w('#text57').text = response[3].total_supply;
$w('#text58').text = response[3].available_supply;
$w('#text56').text = response[3].max_supply;
$w('#text55').text = response[3].symbol;

$w('#image5').src = 'https://www.cryptocompare.com' + resp.Data[response[4].symbol].ImageUrl;
$w('#coin5').text = response[4].name;
$w('#text71').text = response[4].price_usd;
$w('#text61').text = "Rank: " + response[4].rank;
$w('#text69').text = response[4].total_supply;
$w('#text70').text = response[4].available_supply;
$w('#text68').text = response[4].max_supply;
$w('#text67').text = response[4].symbol;

$w('#image6').src = 'https://www.cryptocompare.com' + resp.Data[response[5].symbol].ImageUrl;
$w('#coin6').text = response[5].name;
$w('#text83').text = response[5].price_usd;
$w('#text73').text = "Rank: " + response[5].rank;
$w('#text81').text = response[5].total_supply;
$w('#text82').text = response[5].available_supply;
$w('#text80').text = response[5].max_supply;
$w('#text79').text = response[5].symbol;

$w('#image7').src = 'https://www.cryptocompare.com' + resp.Data[response[6].symbol].ImageUrl;
$w('#coin7').text = response[6].name;
$w('#text95').text = response[6].price_usd;
$w('#text85').text = "Rank: " + response[6].rank;
$w('#text93').text = response[6].total_supply;
$w('#text94').text = response[6].available_supply;
$w('#text92').text = response[6].max_supply;
$w('#text91').text = response[6].symbol;

$w('#image8').src = 'https://www.cryptocompare.com' + resp.Data[response[7].symbol].ImageUrl;
$w('#coin8').text = response[7].name;
$w('#text107').text = response[7].price_usd;
$w('#text97').text = "Rank: " + response[7].rank;
$w('#text105').text = response[7].total_supply;
$w('#text106').text = response[7].available_supply;
$w('#text104').text = response[7].max_supply;
$w('#text103').text = response[7].symbol;

$w('#image9').src = 'https://www.cryptocompare.com' + resp.Data[response[8].symbol].ImageUrl;
$w('#coin9').text = response[8].name;
$w('#text119').text = response[8].price_usd;
$w('#text109').text = "Rank: " + response[8].rank;
$w('#text117').text = response[8].total_supply;
$w('#text118').text = response[8].available_supply;
$w('#text116').text = response[8].max_supply;
$w('#text115').text = response[8].symbol;
For clarity, here’s how the code looks in the Home Page Editor.
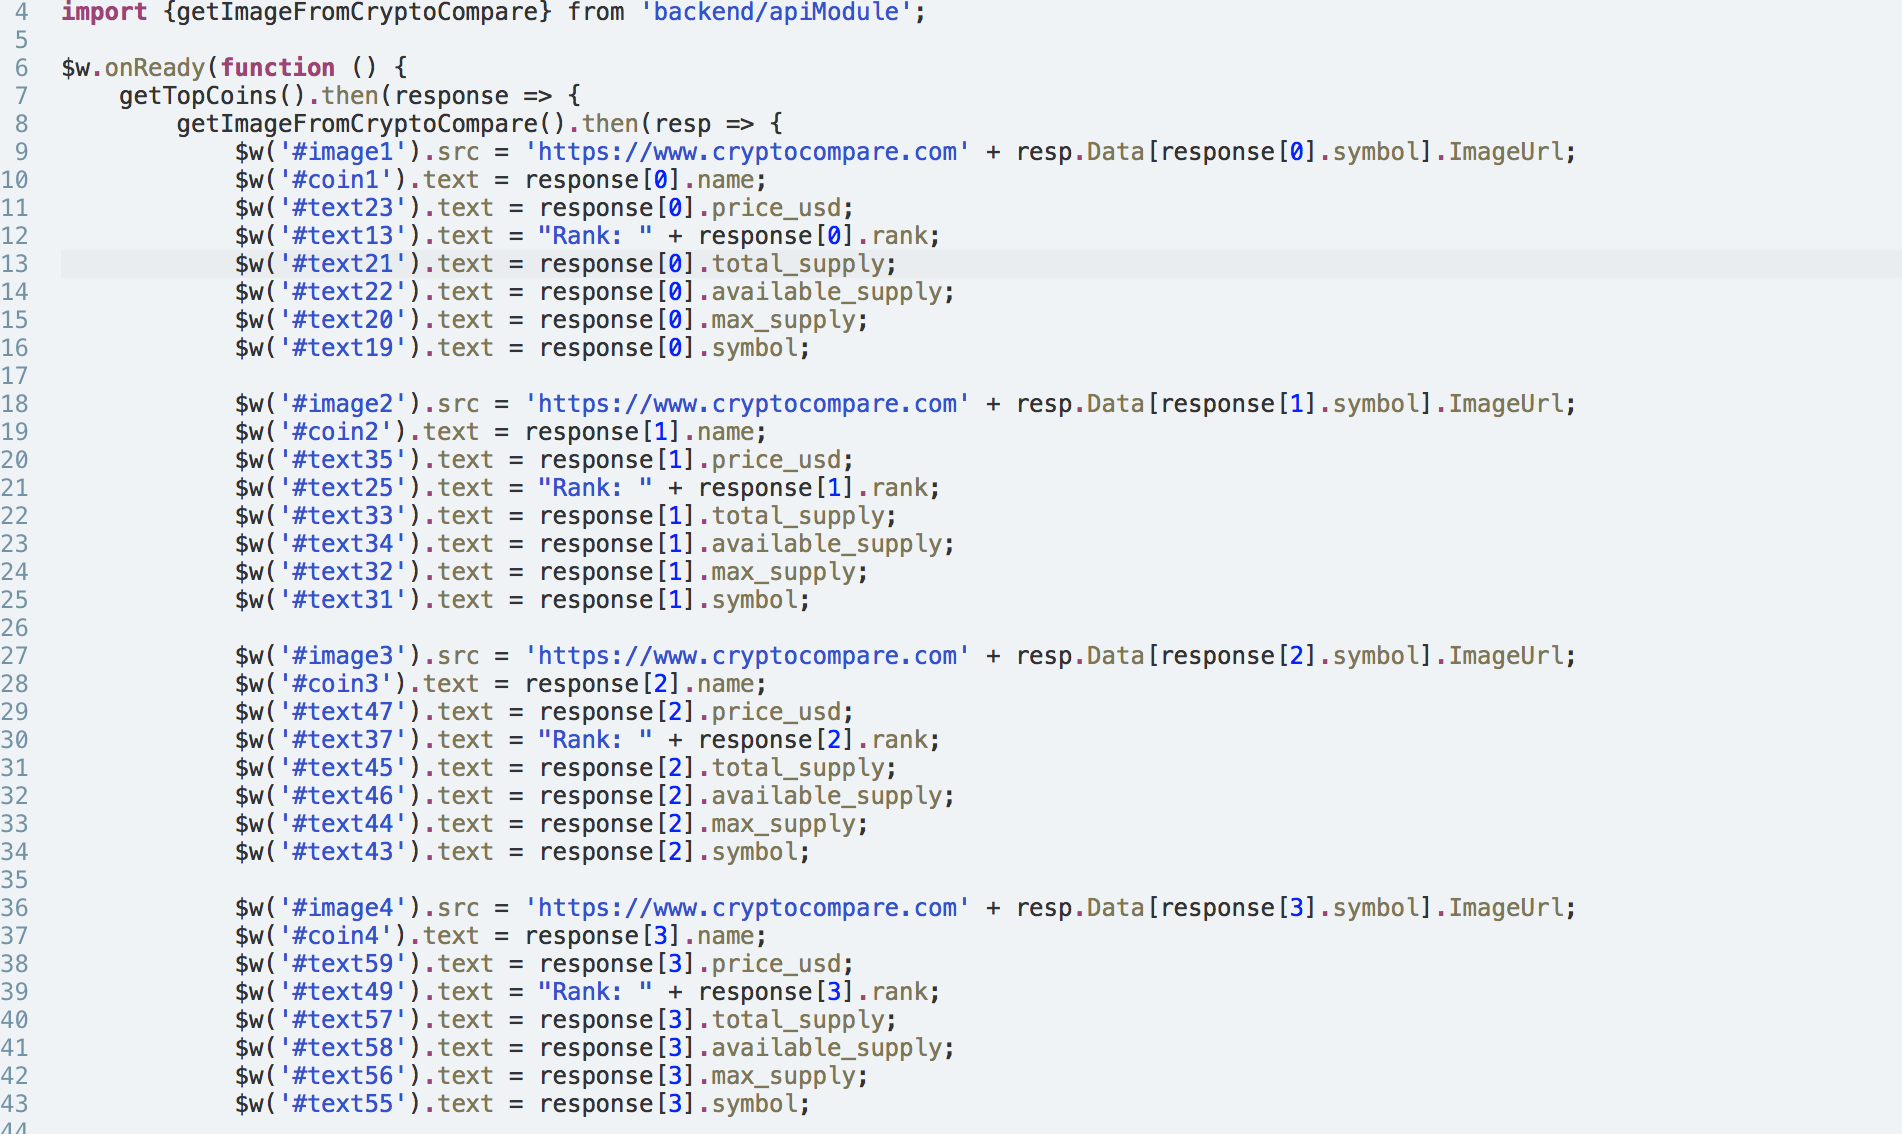
As you can see on line 9, for example, we get the symbol of the coin from CoinMarketCap API first, which is the response object returned by the getTopCoins() function. And then we pass this symbol to the resp object returned by CryptoCompare API, which is in the getImageFromCyptoCompare() function. And everything else remains the same as we’ve received the info and displayed in the text element earlier.
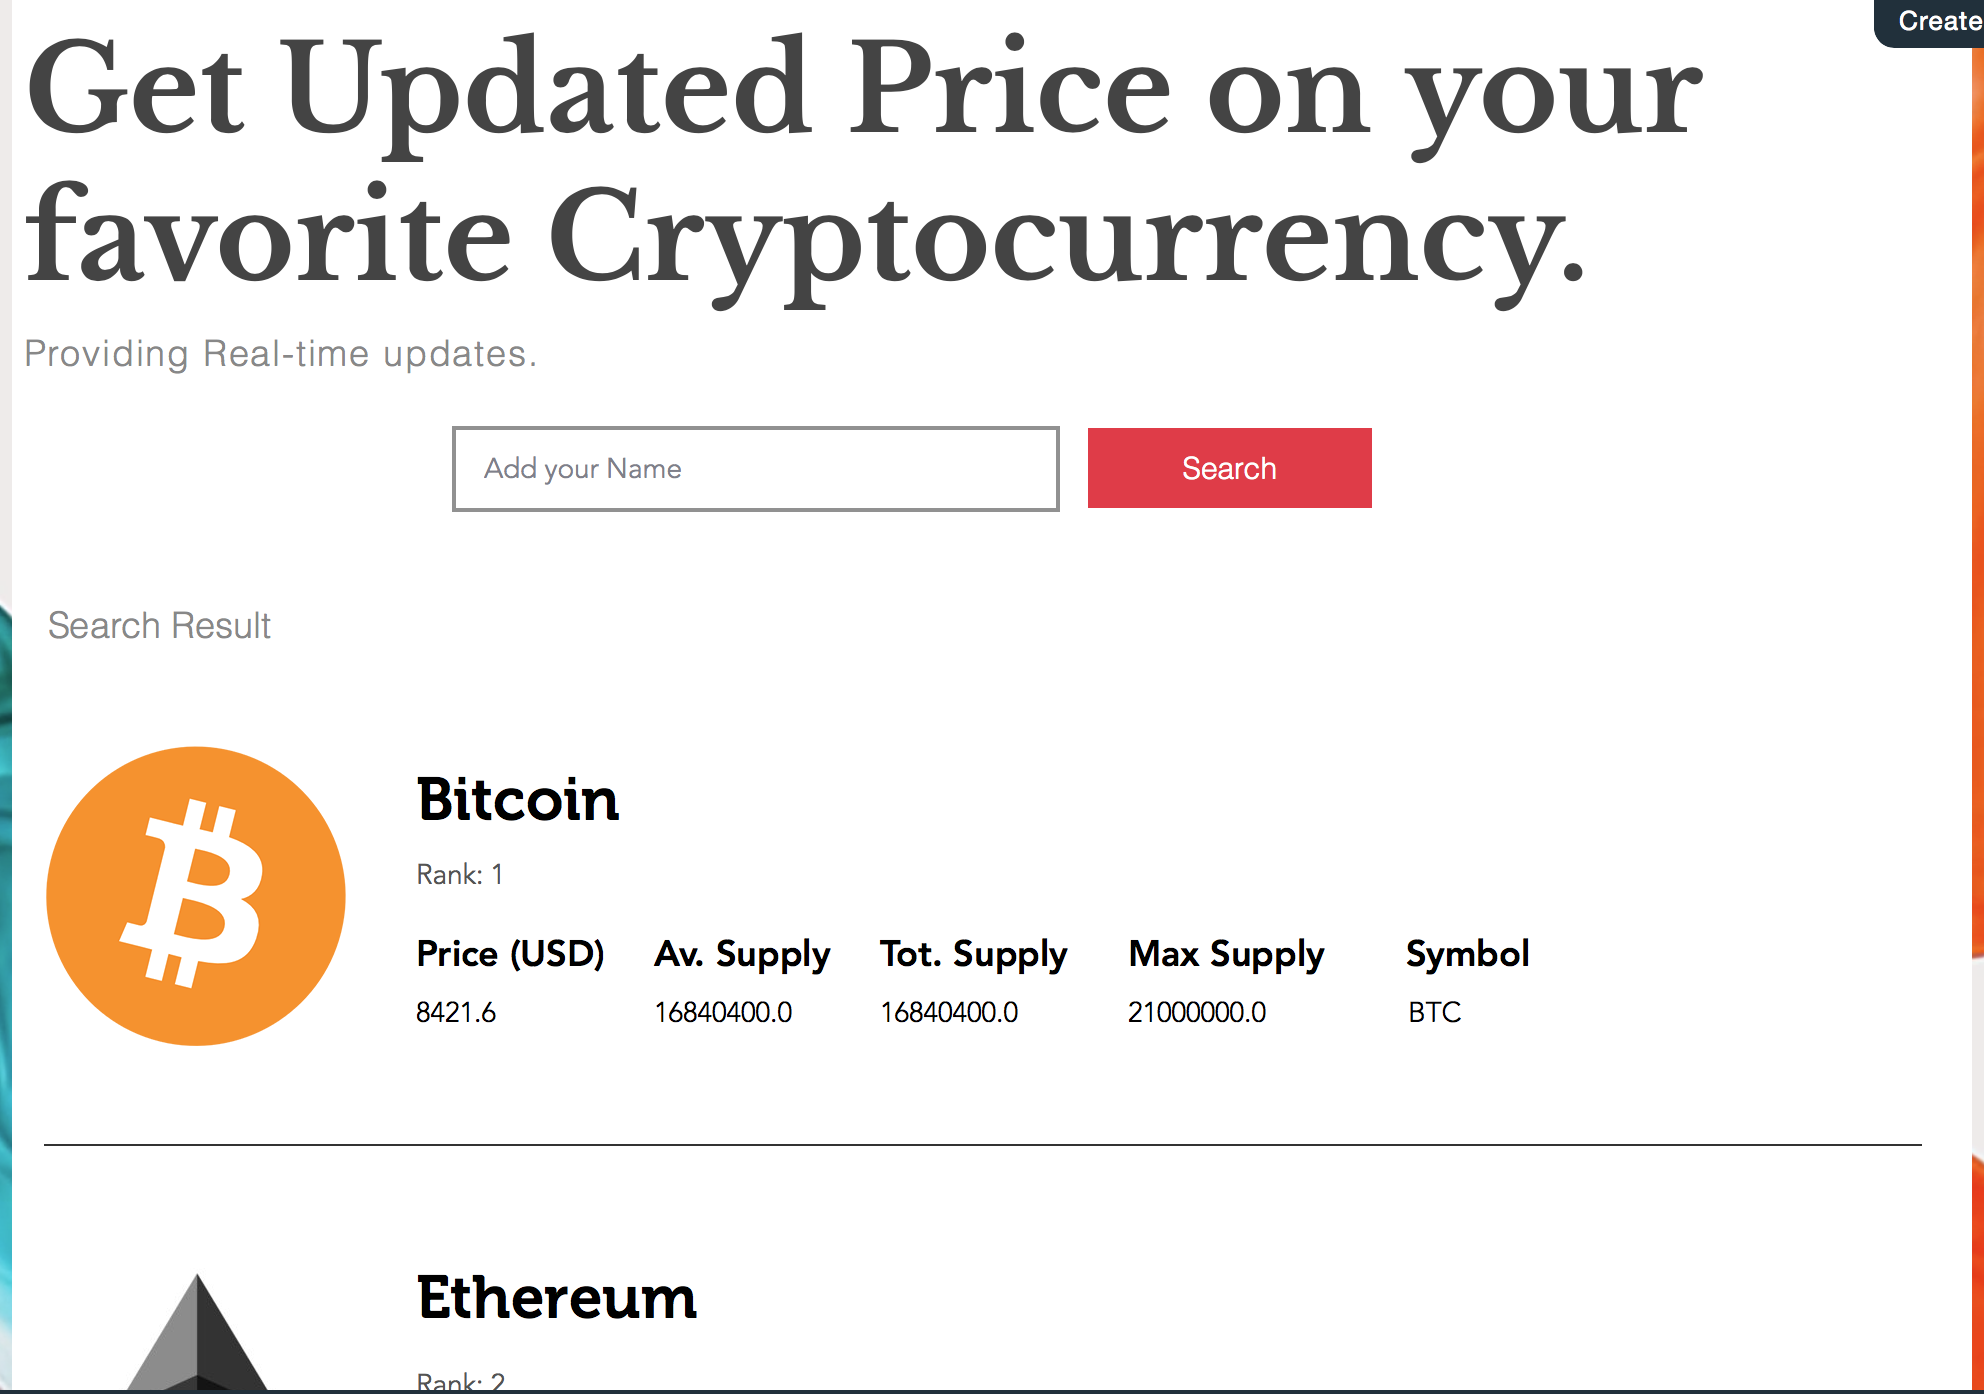
And the final output after updated design now looks like this:
Conclusion
Wix Code has great potential that I believe could help the platform continue to grow. The addition of the Wix Code to the Wix suite will eventually make it possible to develop a fully functioning app with custom components that will not need a special backend. One of the most significant features of Wix is that it is serverless and Wix code will only continue to expose these benefits. A combination of all the ready-made features and components of Wix plus Wix Code opens up new ways to think about your application, giving you a powerful toolset for creating awesome websites quickly.
If you have any questions or get stuck in any of the steps above do not hesitate to drop a comment below or tweet me.