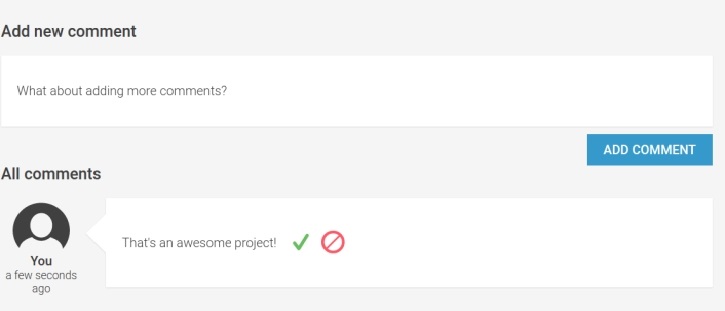
In This Tutorial , we’re going to create a commenting Application using angular 2. That will enable users to write comments in various areas of our application. Each comment itself is encapsulated into a Comment component. Comment components themselves use an editor that enables users to edit comments once they are created.
Preview of Our app
Building the comment component
Let’s start building our commenting system by fleshing out the Comment component first. In addition to the comment itself, we’d like to display the user’s profile who commented, and of course, the time of the comment.
To display the time, we will make use of relative time formatting, as this will give our users a better feel of time. Relative time formatting displays timestamps in the format “5 minutes ago” or “1 month ago”, in contrast to absolute timestamps, such as “25.12.2015 18:00”. Using the Moment.js library, we’ll create a pipe that we can use within component templates to convert timestamps and dates into relative time intervals.
Let’s create a new pipe within a new folder named pipes. The pipe needs to be created within a file named from-now.js, which is created under the pipes folder:
import {Pipe} from '@angular/core';
// We use the Moment.js library to convert dates to relative times
import Moment from 'moment';

@Pipe({
  // Specifying the name to be used within templates
  name: 'fromNow'
})
// Our pipe will transform dates and timestamps to relative times
// using Moment.js
export class FromNowPipe {
  // The transform method will be called when the pipe is used
  // within a template
  transform(value) {
    if (value && (value instanceof Date ||
        typeof value === 'number')) {
      return new Moment(value).fromNow();
    }
  }
}
This pipe can now be used within the templates of components to format timestamps and dates into relative time intervals.
Let’s use this pipe and the Editor component we created in the previous topic to create our Comment component. Within a file named comment.html, which is located within a new comment folder in the comments folder, we’ll create the template for our Comment component:
<div class="comment__l-meta">
  <div class="comment__user-picture">
    <img [attr.src]="user.pictureDataUri" src="">
  </div>
  <div class="comment__user-name">{{user.name}}</div>
  <div class="comment__time">
    {{time | fromNow}}
  </div>
</div>
<div class="comment__l-main">
  <div class="comment__message">
    <ngc-editor [content]="content"
                [showControls]="true"
                (editSaved)="onContentSaved($event)">
    </ngc-editor>
  </div>
</div>
From the user object, we will get the user’s profile image as well as the username. To display the time of the comment in a relative format, we’ll use the fromNow pipe that we created earlier.
Finally, we will make use of the in-place editor component to display the content of the comment and make it editable at the same time. We will bind the comment content property to the content input property of the editor. At the same time, we will listen for the editSaved event of the editor and call the onContentSaved method on our comment component class. If you look at our component code again, you’ll notice that we are re-emitting the event within the method so that the outside world is also notified about the change in the comment.
Let’s take a look at the component class that we will create in a file named comment.js:
import {Component, Input, Output, ViewEncapsulation, EventEmitter} from '@angular/core';
import {Editor} from '../../ui/editor/editor';
import template from './comment.html!text';
// We use our fromNow pipe that converts timestamps to relative
// times
import {FromNowPipe} from '../../pipes/from-now';

@Component({
  selector: 'ngc-comment',
  host: {
    class: 'comment'
  },
  template,
  encapsulation: ViewEncapsulation.None,
  directives: [Editor],
  pipes: [FromNowPipe]
})
export class Comment {
  // The time of the comment as a timestamp
  @Input() time;
  // The user object of the user who created the comment
  @Input() user;
  // The comment content
  @Input() content;
  // If a comment was edited this event will be emitted
  @Output() commentEdited = new EventEmitter();

  onContentSaved(content) {
    this.commentEdited.next(content);
  }
}
The component code is pretty straightforward. The only noticeable difference to other components we’ve created so far is the pipes property within the component’s annotation. Here, we specify that we’d like to use the FromNowPipe class that we’ve just created. Pipes always need to be declared within the component; otherwise, they can’t be used within the component’s template.
As input, we expect a user object that is passed along with the user input property. The content input property should be filled with the actual comment as a string, while the time input property should be set to a timestamp that reflects the actual time of the comment.
We also have an output property called commentEdited, which we will use to notify the changes on the comment. The onEditSaved method will be called by the event binding on our Editor component, which will then emit an event using the commentEdited output property.


