
We will be creating a blog using Angular 5, Angular universal and Firebase in a 2 part series. Our app will allow for easy creation and publishing of blog posts. A normal Angular application executes in the browser, rendering pages in the DOM in response to user actions. In order to improve the user experience, we want to render the pages server side and send the generated static content to the client side, this will ensure that our content is crawlable by search engines and also allow users with feature phones to consume our content.
The technology that allows us to run our Angular applications on the server is described in the Angular docs as Angular Universal. Angular Universal generates static application pages on the server through a process called server-side rendering (SSR). It can generate and serve those pages in response to requests from browsers. It can also pre-generate pages as HTML files that you serve later.
New Angular Project
Open Angular IDE and from the top menu select File ,then New, then Angular Project. In the New Angular Project wizard, enter FireBlog as the project name, 1.6.4 as the Angular CLI version,8.9.4 as the node.js version and 5.6.0 as the npm version. Click Next then click Finish.
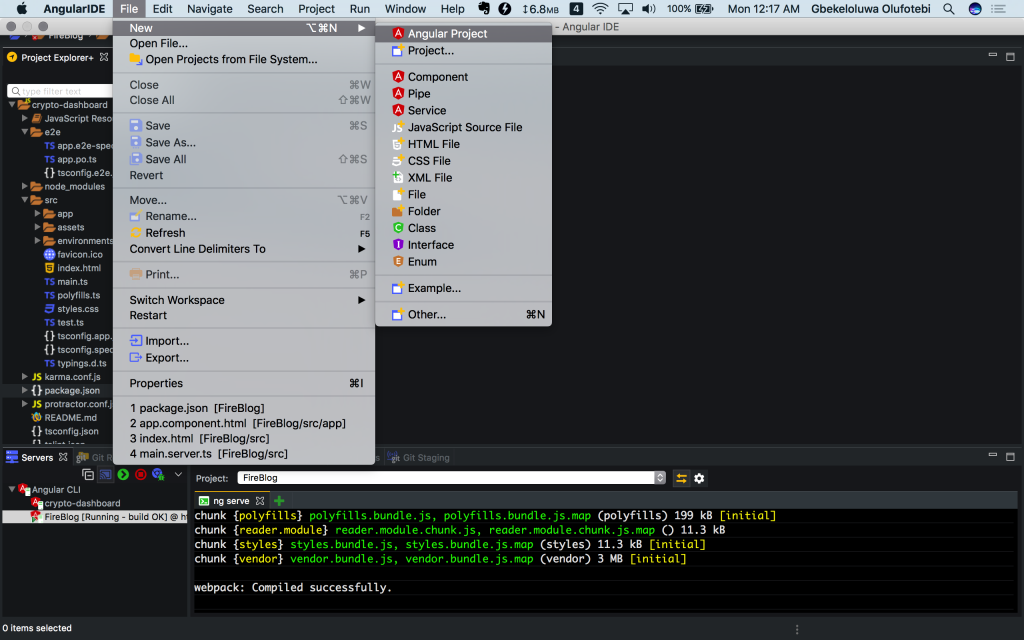
Angular IDE – New Project
Project Module Directories
Our project is a simple blog built with Angular, which will use FireBase for authentication and as a database. In this project we will use at least two modules to organize our code:
- Editor Module: This module will provide functionality for authors to create and modify content for the blog.
- Reader Module: This module will provide functionality for users who come to the blog to read and interact.
Components for Editor Module
We need at least two components for the editor module:
- EditorPostsComponent to show the title, published status and other summary details for a list of all blog posts in the application.
- EditorPostComponent to show the details for a single post and allows us to edit this single post.
In the top menu select File > New > Component, in the New Component dialog, enter /FireBlog/src/app/modules/editor/components as Source Folder and editor-posts as element name. Also create a new component in /FireBlog/src/app/modules/editor/components with element name editor-post.
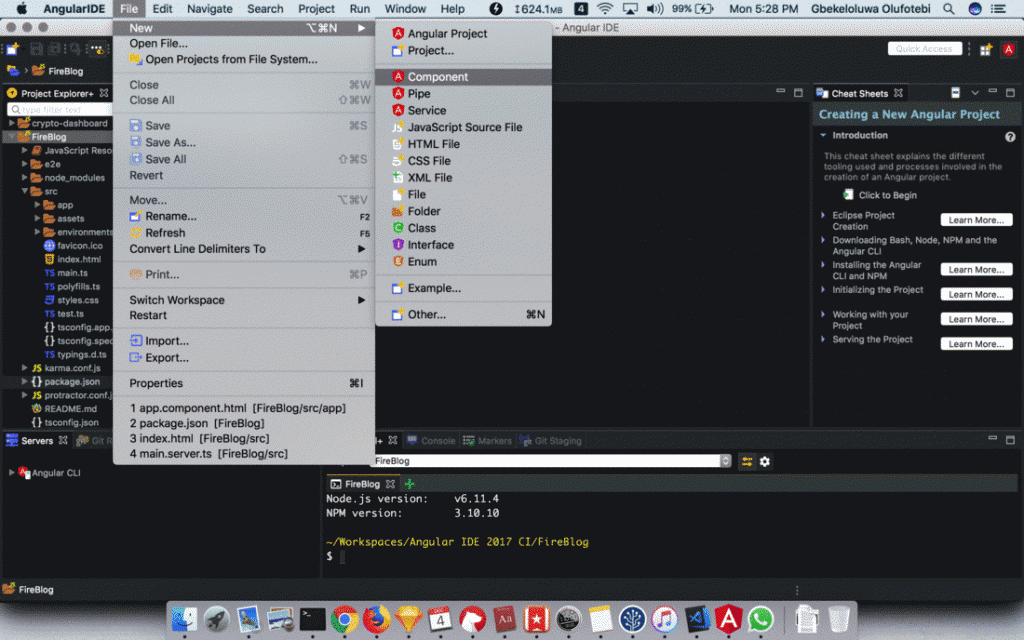
New Component
The Editor Module
For our Editor Module we will need two classes, EditorModule which will be our feature module, and EditorRoutingModule which will configure the routing for EditorModule.
- In the project explorer, right click on the
editorfolder - In the pop up menu select New > Class
- In the ‘New Typescript Class’ wizard, enter
EditorModuleas class name, andeditor.module.tsas file name. - Repeat steps 1 and 2
- In the ‘New Typescript Class’ wizard, enter
EditorRoutingModuleas class name, andeditor-routing.module.tsas file name.
EditorRoutingModule
Update the content of src/app/modules/editor/editor-routing.module.ts
import { NgModule } from '@angular/core';
import { RouterModule, Routes } from '@angular/router';

import { EditorPostComponent } from './components/editor-post/editor-post.component';
import { EditorPostsComponent } from './components/editor-posts/editor-posts.component';

const editorRoutes: Routes = [
  {
    path: 'posts',
    component: EditorPostsComponent
  },
  {
    path: 'post/:id',
    component: EditorPostComponent
  },
  { path: '',
    redirectTo: 'posts',
    pathMatch: 'full'
  },
];

@NgModule({
  imports: [RouterModule.forChild(editorRoutes)],
  exports: [RouterModule],
  declarations: []
})
export class EditorRoutingModule {}
The Angular Router enables navigation from one view to the next as users perform application tasks. In EditorRoutingModule, we are setting up 3 child routing rules
- /posts to render a view of all post titles and some metadata like published status, author, e.t.c
- /post/:id to render a view that allows editors to make changes to a single post.
- An empty route will be redirected to /posts
EditorModule
Update the content of src/app/modules/editor/editor.module.ts
import { CommonModule } from '@angular/common';
import { NgModule } from '@angular/core';
import { FormsModule } from '@angular/forms';

import { EditorRoutingModule } from './editor-routing.module';


import { EditorPostsComponent } from './components/editor-posts/editor-posts.component';
import { EditorPostComponent } from './components/editor-post/editor-post.component';

@NgModule({
  imports: [
    CommonModule,
    FormsModule,
    EditorRoutingModule,
  ],
  declarations: [EditorPostsComponent, EditorPostComponent],
  exports: [],
  providers: []
})
export class EditorModule {}
In EditorModule we import EditorRoutingModule and include it among the imports for NgModule EditorModule. We also import EditorPostsComponent, and EditorPostComponent, which we add to the declarations for NgModule EditorModule.
Components for Reader Module
We need at least two components for the reader module:
- ReaderPostsComponent to show title, published status and other summary details for a list of published blog posts in the application.
- ReaderPostComponent for the read only view for a single post.
Create two components with element names reader-posts and reader-post using FireBlog/src/app/modules/reader/components as the Source folder.
The Reader Module
For our Editor Module we will need two classes, ReaderModule which will be our feature module, and ReaderRoutingModule which will configure the routing for ReaderModule.
- In the project explorer, right click on the
readerfolder - In the pop up menu select New > Class
- In the ‘New Typescript Class’ wizard, enter
ReaderModuleas class name, andreader.module.tsas file name. - Repeat steps 1 and 2
- In the ‘New Typescript Class’ wizard, enter
ReaderRoutingModuleas class name, andreader-routing.module.tsas file name.
Reader Routing Module
Update the content of src/app/modules/reader/reader-roting.module.ts
import { NgModule } from '@angular/core';
import { RouterModule, Routes } from '@angular/router';

import { ReaderPostComponent } from './components/reader-post/reader-post.component';
import { ReaderPostsComponent } from './components/reader-posts/reader-posts.component';

const editorRoutes: Routes = [
  {
    path: 'post/:id',
    component: ReaderPostComponent
  },
  { path: '',
    component: ReaderPostsComponent
  },
];

@NgModule({
  imports: [RouterModule.forChild(editorRoutes)],
  exports: [RouterModule],
  declarations: []
})
export class ReaderRoutingModule {

}
Similar to EditorRoutingModule, we set up an NgModule ReaderRoutingModule, to configure routing for views to be used by readers on the site, we just have two routes, the empty path which will render ReaderPostsComponent to show a list of posts available on the blog, and post/:id to read a particular blog post.
Reader Module
Update the content of src/app/modules/reader/reader.module.ts
import { CommonModule } from '@angular/common';
import { NgModule } from '@angular/core';
import { FormsModule } from '@angular/forms';

import { ReaderRoutingModule } from './reader-routing.module';


import { ReaderPostsComponent } from './components/reader-posts/reader-posts.component';
import { ReaderPostComponent } from './components/reader-post/reader-post.component';

@NgModule({
  imports: [
    CommonModule,
    FormsModule,
    ReaderRoutingModule,
  ],
  declarations: [ReaderPostsComponent, ReaderPostComponent],
  exports: [],
  providers: []
})
export class ReaderModule {}
In ReaderModule, we import ReaderRoutingModule and add it to the imports for NgModule, then we import ReaderPostsComponent, ReaderPostComponent and add them to the declarations.
Routing Module for AppModule
We will create a routing module for our AppModule, but before that lets create a 404 page component. Let’s follow these steps
- Right click on the
appfolder in the project explorer - In the menu select New > Component
- In the New component dialog, enter
/FireBlog/src/app/componentsas source folder and page-not-foundas element name.
Now let us create a routing module for AppModule
- Right click on the
appfolder in the project explorer - In the pop up menu select New > Class
- In the ‘New Typescript Class’ wizard, enter
AppRoutingModuleas class name, andapp-routing.module.tsas file name.
Update the content of src/app/app-routing.module.ts
import { NgModule } from '@angular/core';
import { RouterModule, Routes } from '@angular/router';

import { PageNotFoundComponent } from './components/page-not-found/page-not-found.component';

const appRoutes: Routes = [
  {
    path: '',
    loadChildren: 'app/modules/reader/reader.module#ReaderModule'
  },
  {
    path: 'editor',
    loadChildren: 'app/modules/editor/editor.module#EditorModule'
  },
  { path: '**', component: PageNotFoundComponent }
];

@NgModule({
  imports: [RouterModule.forRoot(appRoutes)],
  exports: [RouterModule]
})
export class AppRoutingModule {}
In AppRoutingModule, we have configured our ReaderModule, which imports ReaderRoutingModule to handle urls without the editor prefix and we have configured EditorModule which imports EditorRoutingModule to handle urls with the editor prefix. For example fireblog-domain.tld/post/1 will be routed throughReaderRoutingModule, while fireblog-domain.tld/editor/post/1 will be routed through EditorRoutingModule.
Now let us update the content of src/app/app.module.ts, and import AppRoutingModule and add it to our imports, also checking to ensure PageNotFoundComponent is in the declarations array.
import { BrowserModule } from '@angular/platform-browser';
import { NgModule } from '@angular/core';

import { AppRoutingModule } from './app-routing.module';

import { AppComponent } from './app.component';

import { PageNotFoundComponent } from './components/page-not-found/page-not-found.component';


@NgModule({
  declarations: [
    AppComponent,
    PageNotFoundComponent,
  ],
  imports: [
    BrowserModule,
    AppRoutingModule
  ],
  providers: [],
  bootstrap: [AppComponent]
})
export class AppModule { }
Add Bootstrap CSS
Update src/index.html by using a link tag in the document head to include Bootstrap 4 from maxcdn. The file content becomes
<!doctype html>
<html lang="en">
<head>
  <meta charset="utf-8">
  <title>FireBlog</title>
  <base href="/">

  <meta name="viewport" content="width=device-width, initial-scale=1">
  <link rel="icon" type="image/x-icon" href="favicon.ico">
  <link rel="stylesheet" href="https://maxcdn.bootstrapcdn.com/bootstrap/4.0.0-beta.2/css/bootstrap.min.css" integrity="sha384-PsH8R72JQ3SOdhVi3uxftmaW6Vc51MKb0q5P2rRUpPvrszuE4W1povHYgTpBfshb" crossorigin="anonymous">
</head>
<body>
  <app-root></app-root>
</body>
</html>
Layout
We will update src/app/app.component.html, to add a simple navigation bar and create a sidebar and a content area.
 <nav class="navbar navbar-expand-lg navbar-light bg-light">
  <a class="navbar-brand" href="#">{{title}}!</a>
  <button class="navbar-toggler" type="button" data-toggle="collapse" data-target="#navbarSupportedContent" aria-controls="navbarSupportedContent" aria-expanded="false" aria-label="Toggle navigation">
    <span class="navbar-toggler-icon"></span>
  </button>

  <div class="collapse navbar-collapse" id="navbarSupportedContent">
    <ul class="navbar-nav mr-auto">
      <li class="nav-item" routerLinkActive="active" [routerLinkActiveOptions]="{ exact: true }">
        <a class="nav-link" routerLink="" >Home</a>
      </li>
      <li class="nav-item" routerLinkActive="active" [routerLinkActiveOptions]="{ }">
        <a class="nav-link" routerLink="/editor" >Editor</a>
      </li>
    </ul>
  </div>
</nav>
<div class="container mt-4">
    <div class="row">
        <div class="col-9"><router-outlet></router-outlet></div>
        <div class="col-3">
            <p class="text-center">About FireBlog!</p>
            <p><img src="https://via.placeholder.com/300x246" class="img-fluid"></p>
            <p class="text-justify">
            FireBlog is a blog created using Angular 5 and FireBase. It is a technology blog, bringing you the latest updates from around the world. Never miss out on new stuff.
            </p>
        </div>
    </div>
</div>
Now let’s update src/app/modules/editor/components/editor-posts/editor-posts.component.html with placeholder text, the full functionality will be implemented in the next post in this series.
<p>
  Posts will be managed here.
</p>
Also update src/app/modules/reader/components/reader-posts/reader-posts.component.html
<p>
  Recent posts will be listed here.
</p>
Server Side Rendering – Install dependencies
In order to implement server side rendering we need to install some additional dependencies. Open Terminal+ enter the following commands
$ npm install --save @angular/platform-server @nguniversal/module-map-ngfactory-loader ts-loader @nguniversal/express-engine
The root AppModule
Open file src/app/app.module.ts and find the BrowserModule import in the NgModule metadata. Replace that import with this one:
BrowserModule.withServerTransition({ appId: 'fire-blog' }),
Create an app.server.module.ts file in the src/app/ directory with the following AppServerModule code:
import { NgModule } from '@angular/core';
import { ServerModule } from '@angular/platform-server';
import { ModuleMapLoaderModule } from '@nguniversal/module-map-ngfactory-loader';

import { AppModule } from './app.module';
import { AppComponent } from './app.component';

@NgModule({
  imports: [
    AppModule,
    ServerModule,
    ModuleMapLoaderModule
  ],
  providers: [
    // Add universal-only providers here
  ],
  bootstrap: [ AppComponent ],
})
export class AppServerModule {}
Create a main.server.ts file in the src directory with the following code:
export { AppServerModule } from './app/app.server.module';
Create a server.ts file in the project’s root directory and add the following code:
// These are important and needed before anything else
import 'zone.js/dist/zone-node';
import 'reflect-metadata';

import { enableProdMode } from '@angular/core';

import * as express from 'express';
import { join } from 'path';

// Faster server renders w/ Prod mode (dev mode never needed)
enableProdMode();

// Express server
const app = express();

const PORT = process.env.PORT || 4000;
const DIST_FOLDER = join(process.cwd(), 'dist');

// * NOTE :: leave this as require() since this file is built Dynamically from webpack
const { AppServerModuleNgFactory, LAZY_MODULE_MAP } = require('./dist/server/main.bundle');

// Express Engine
import { ngExpressEngine } from '@nguniversal/express-engine';
// Import module map for lazy loading
import { provideModuleMap } from '@nguniversal/module-map-ngfactory-loader';

app.engine('html', ngExpressEngine({
  bootstrap: AppServerModuleNgFactory,
  providers: [
    provideModuleMap(LAZY_MODULE_MAP)
  ]
}));

app.set('view engine', 'html');
app.set('views', join(DIST_FOLDER, 'browser'));

// TODO: implement data requests securely
app.get('/api/*', (req, res) => {
  res.status(404).send('data requests are not supported');
});

// Server static files from /browser
app.get('*.*', express.static(join(DIST_FOLDER, 'browser')));

// All regular routes use the Universal engine
app.get('*', (req, res) => {
  res.render(join(DIST_FOLDER, 'browser', 'index.html'), { req });
});

// Start up the Node server
app.listen(PORT, () => {
  console.log(`Node server listening on http://localhost:${PORT}`);
});
NB: This sample server is not secure!
Create a tsconfig.server.json file in the /src directory to configure TypeScript and AOT compilation of the universal app.
{
  "extends": "../tsconfig.json",
  "compilerOptions": {
    "outDir": "../out-tsc/app",
    "baseUrl": "./",
    "module": "commonjs",
    "types": []
  },
  "exclude": [
    "test.ts",
    "**/*.spec.ts"
  ],
  "angularCompilerOptions": {
    "entryModule": "app/app.server.module#AppServerModule"
  }
}
Create a webpack.server.config.js file in the project root directory with the following code.
const path = require('path');
const webpack = require('webpack');

module.exports = {
  entry: { server: './server.ts' },
  resolve: { extensions: ['.js', '.ts'] },
  target: 'node',
  // this makes sure we include node_modules and other 3rd party libraries
  externals: [/(node_modules|main\..*\.js)/],
  output: {
    path: path.join(__dirname, 'dist'),
    filename: '[name].js'
  },
  module: {
    rules: [{ test: /\.ts$/, loader: 'ts-loader' }]
  },
  plugins: [
    // Temporary Fix for issue: https://github.com/angular/angular/issues/11580
    // for 'WARNING Critical dependency: the request of a dependency is an expression'
    new webpack.ContextReplacementPlugin(
      /(.+)?angular(\\|\/)core(.+)?/,
      path.join(__dirname, 'src'), // location of your src
      {} // a map of your routes
    ),
    new webpack.ContextReplacementPlugin(
      /(.+)?express(\\|\/)(.+)?/,
      path.join(__dirname, 'src'),
      {}
    )
  ]
};
Update apps section of .angular-cli.json (Note that this file will be hidden in your ide, so in Terminal+ execute the command open .angular-cli.json)
 "apps": [{
 "root": "src",
 "outDir": "dist/browser",
 "assets": ["assets", "favicon.ico"],
 "index": "index.html",
 "main": "main.ts",
 "polyfills": "polyfills.ts",
 "test": "test.ts",
 "tsconfig": "tsconfig.app.json",
 "testTsconfig": "tsconfig.spec.json",
 "prefix": "app",
 "styles": ["styles.css"],
 "scripts": [],
 "environmentSource": "environments/environment.ts",
 "environments": {
 "dev": "environments/environment.ts",
 "prod": "environments/environment.prod.ts"
 }
 },
 {
 "platform": "server",
 "root": "src",
 "outDir": "dist/server",
 "assets": ["assets", "favicon.ico"],
 "index": "index.html",
 "main": "main.server.ts",
 "test": "test.ts",
 "tsconfig": "tsconfig.server.json",
 "testTsconfig": "tsconfig.spec.json",
 "prefix": "app",
 "styles": ["styles.css"],
 "scripts": [],
 "environmentSource": "environments/environment.ts",
 "environments": {
 "dev": "environments/environment.ts",
 "prod": "environments/environment.prod.ts"
 }
 }
],
Build and run with universal
Now that you’ve created the TypeScript and Webpack config files, you can build and run the Universal application.
First add the build and serve commands to the scripts section of the package.json:
"scripts": {
    ...
    "build:universal": "npm run build:client-and-server-bundles && npm run webpack:server",
    "serve:universal": "node dist/server.js",
    "build:client-and-server-bundles": "ng build --prod && ng build --prod --app 1 --output-hashing=false",
    "webpack:server": "webpack --config webpack.server.config.js --progress --colors",
    ...
}
Build Universal
From Terminal+, type
npm run build:universal
Serve Universal
After building the application, start the server.
npm run serve:universal
The console window should say
Node server listening on http://localhost:4000
Open a browser to http://localhost:4000/.
Serve the App without Server Side Rendering
In the Server window right click on FireBlog and click the green icon with label Start Server
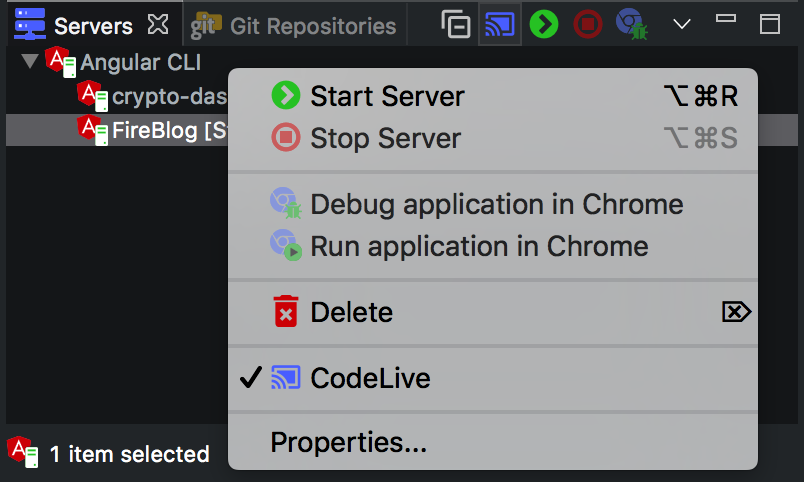
Start Server
Demo
Now we have our project running in two modes
- http://localhost:4200/ running the regular version of our blog. (Live demo available at https://fireblog.netlify.com/)
- http://localhost:4000/ running the server side rendered version of our blog.
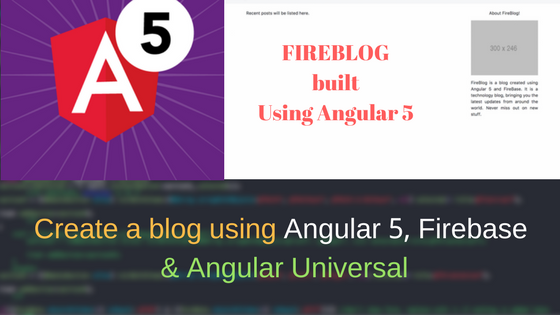
Both versions should look like the image below
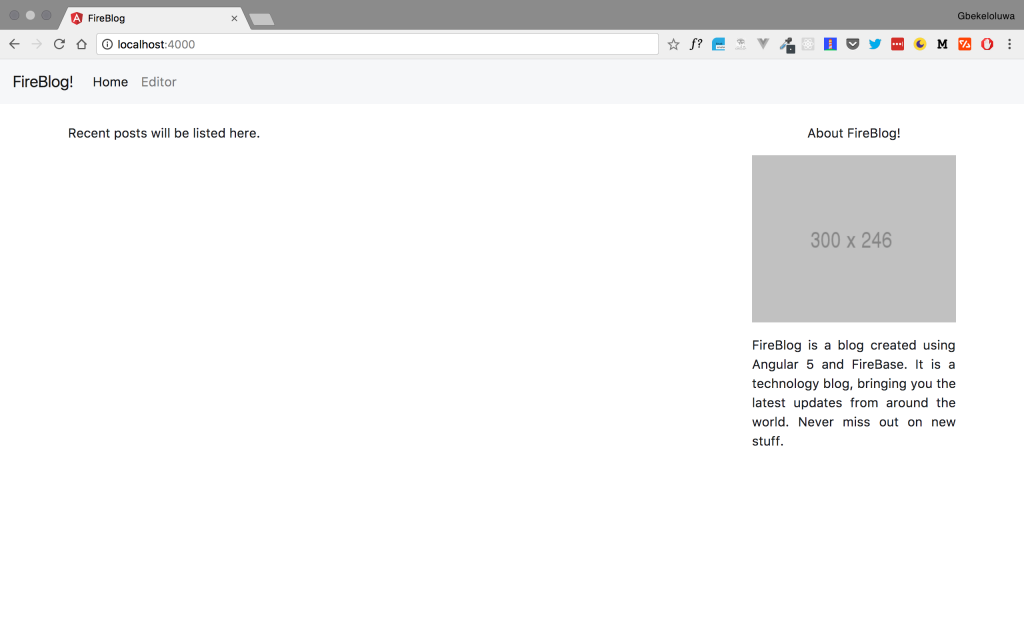
FireBlog Mock
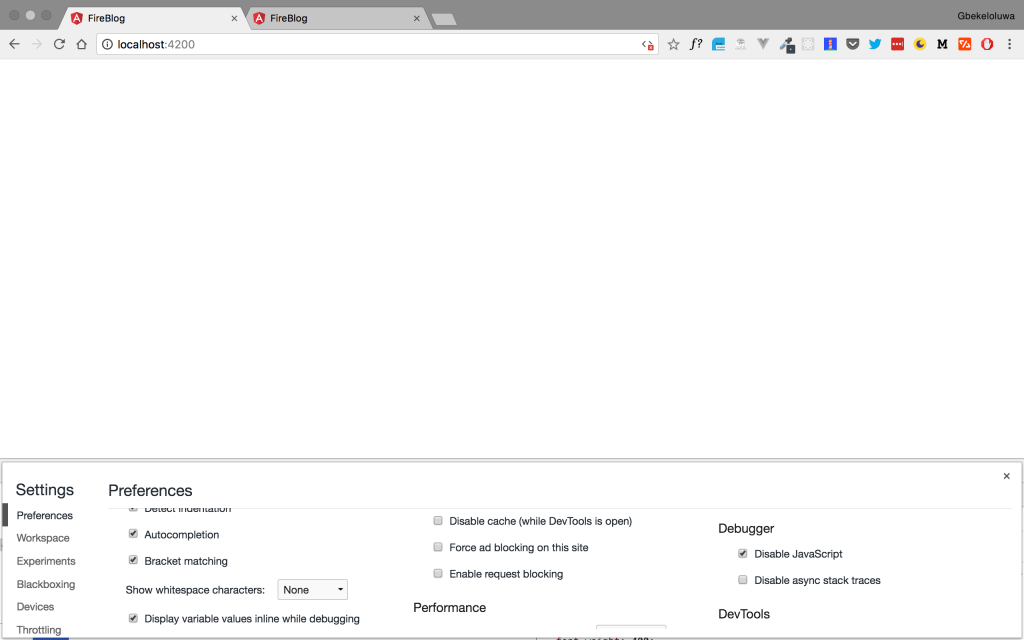
Disable Javascript
In order to see the difference between the two versions, let us go ahead to disable Javascript in our browser, I am using Google Chrome so I will check the disable Javascript option in the settings of developer tools.

Disable Javascript
Now we will see that the regular Angular project running displays a blank screen while the server side rendered version shows the rendered page even with Javascript disabled.
FireBlog with server side rendering and Javascript disabled
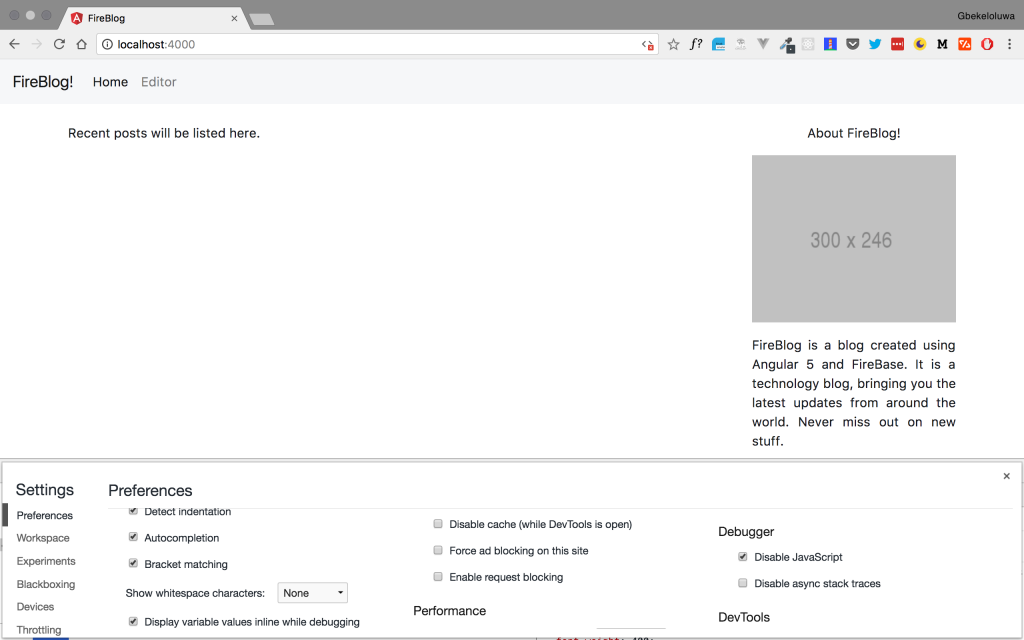
Server side rendered with Javascript disabled
Conclusion
With server-side rendering we can ensure that search engines, browsers with Javascript disabled, or browsers without Javascript can still access our site content. In the next article we will add the markdown editor for our authoring posts on our blog, and in the final article we will set up Firebase for authentication and persisting data to remote storage.