Create a Note Taking App using Angular
In this Angular tutorial, we are going to create Note Taking App using Angular. In the course of this tutorial, we will be using Angular IDE.
Creating an Angular Project
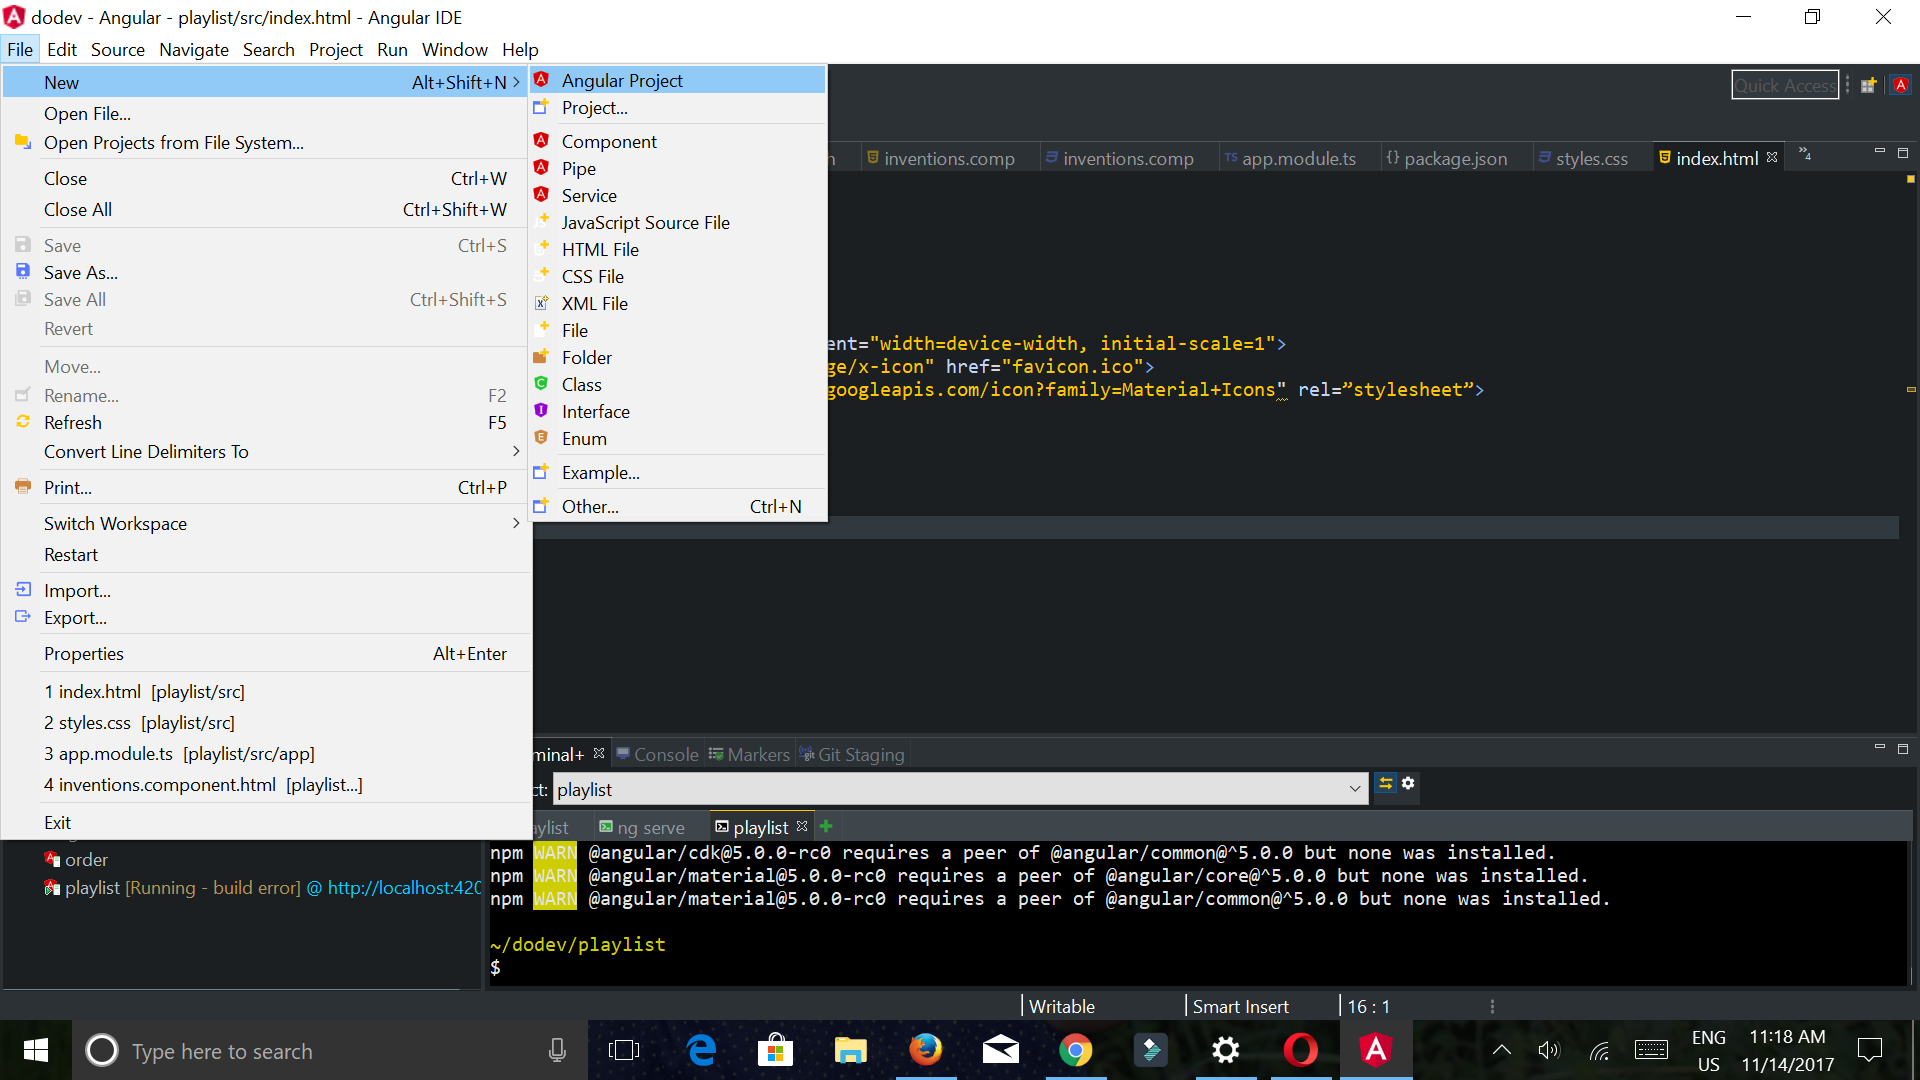
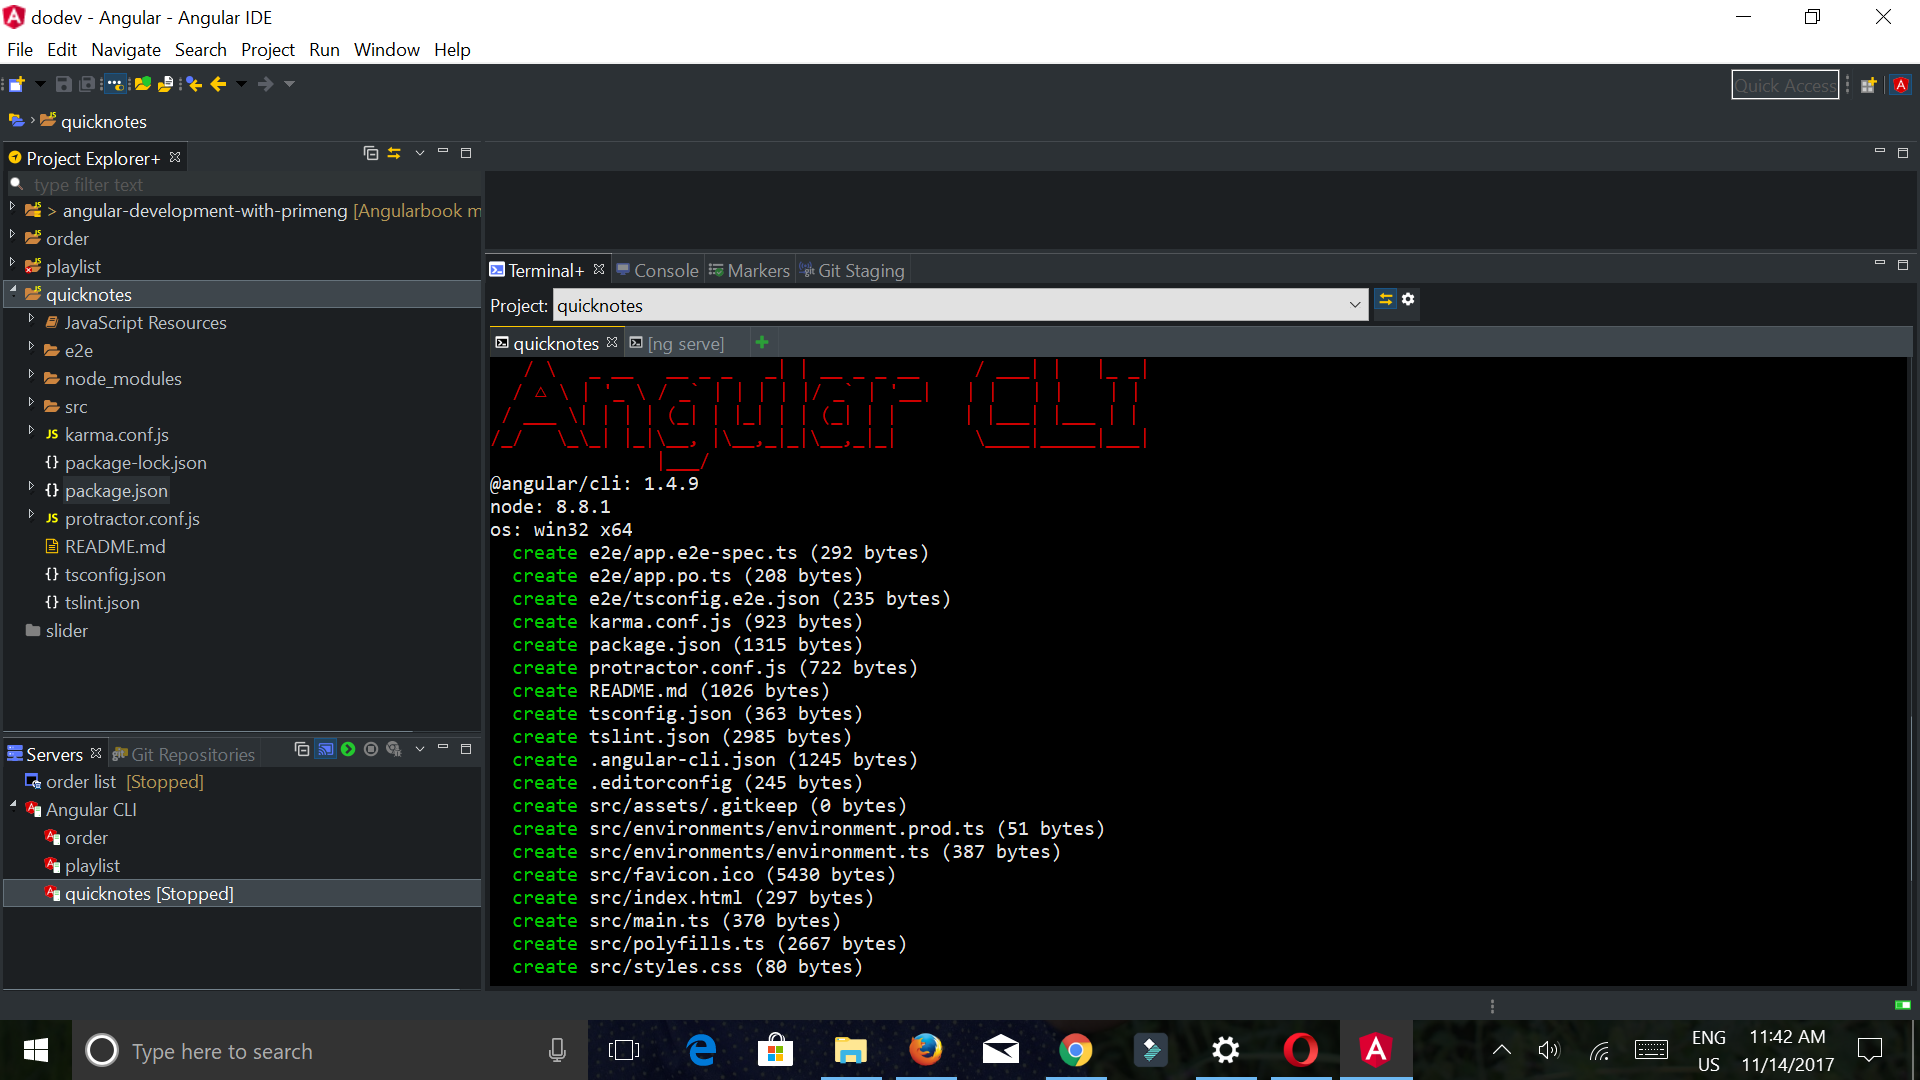
Let’s get started by firing up our Angular IDE and creating a new Angular project named quicknotes
Angular IDE will take a few minutes to set up the project, you can see the activities output in Terminal+. As shown below
Adding Angular Material
Once the project is created we can now install additional node_modules to our project. Angular IDE has a terminal view from which we can execute commands, so from the menu select Window, then Show view then click Terminal+. In the opened terminal type the following command
npm install --save hammerjs @angular/animations @angular/material @angular/cdk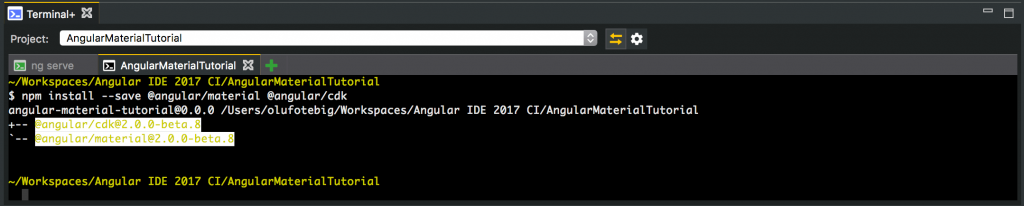
We installed Angular Animations because some of the Angular Material components depends on the Angular animations module for advanced transitions. We also installed HammerJS because some of the Angular Material components such as MdTooltip and MdSlider depend on HammerJS for gestures.
Creating new components
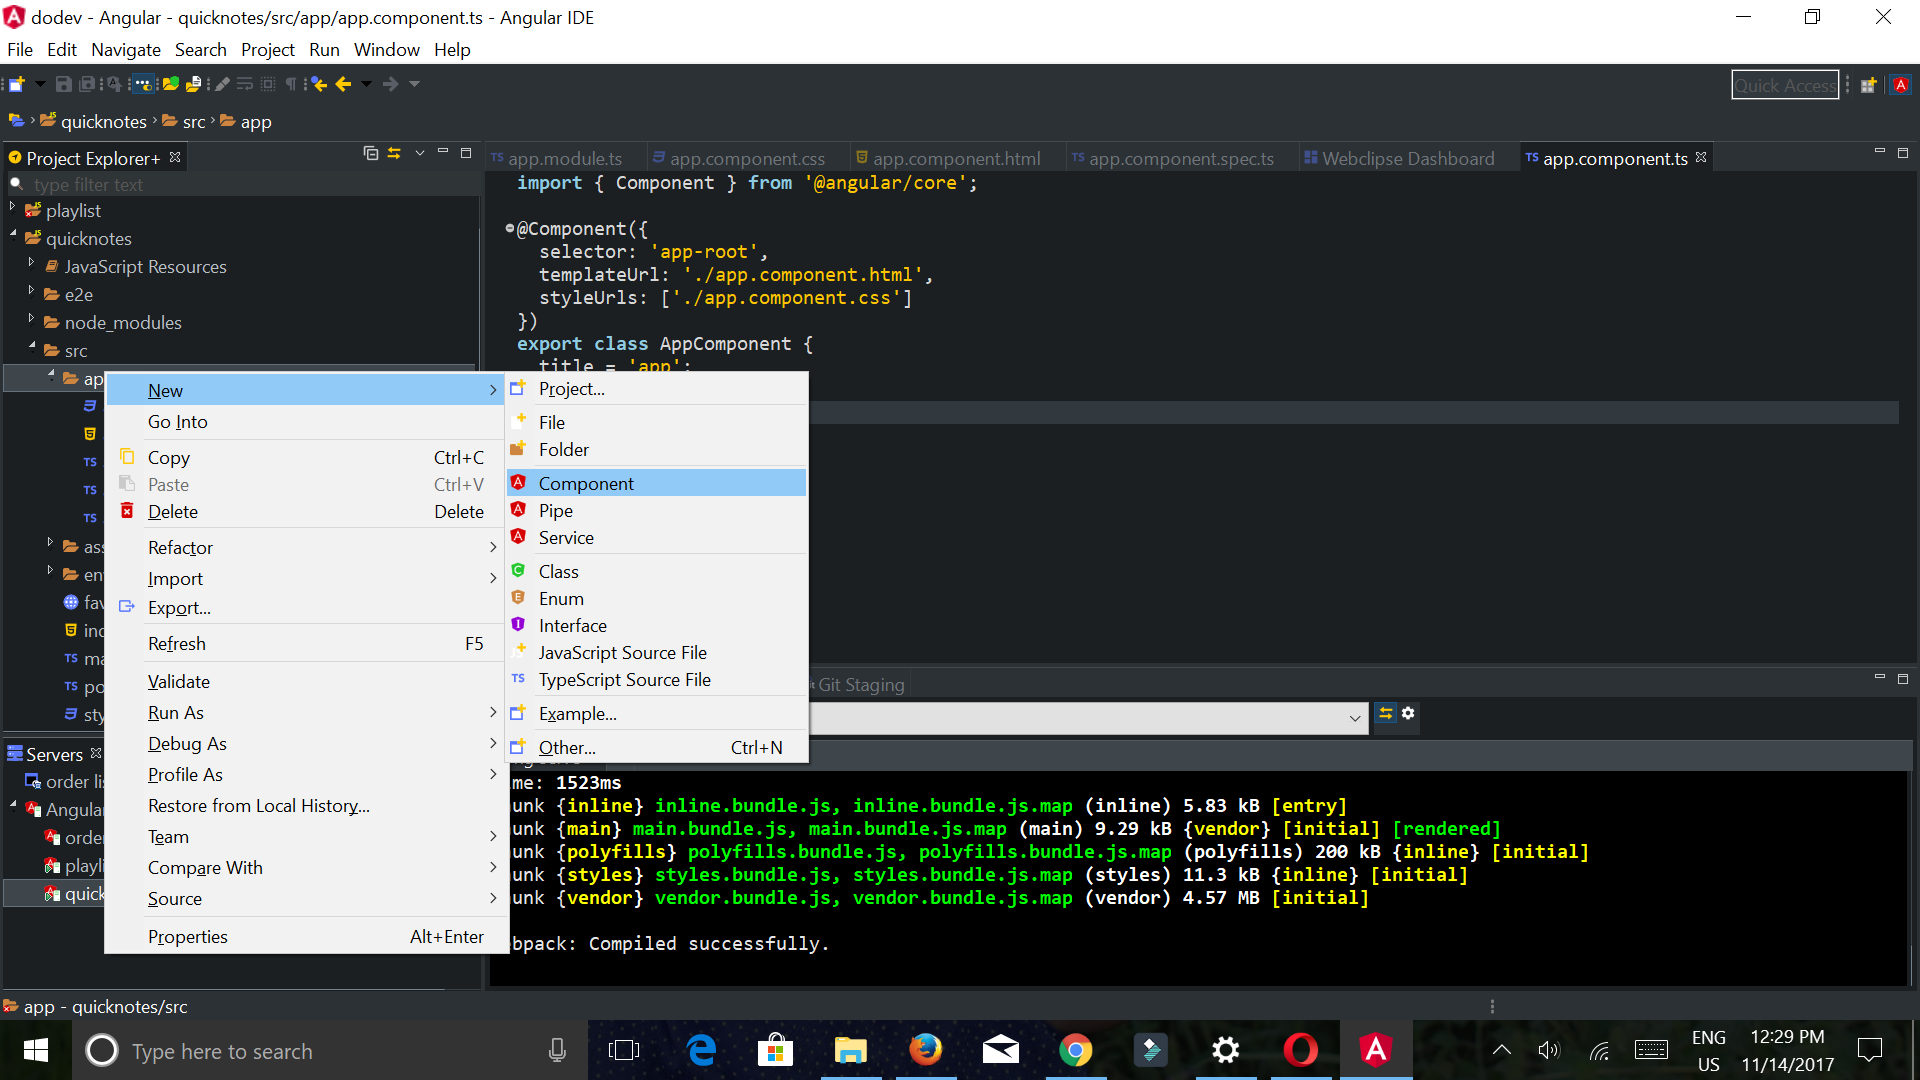
Now, let’s create the components. In the file explorer view, right click on app, select new, click.Component
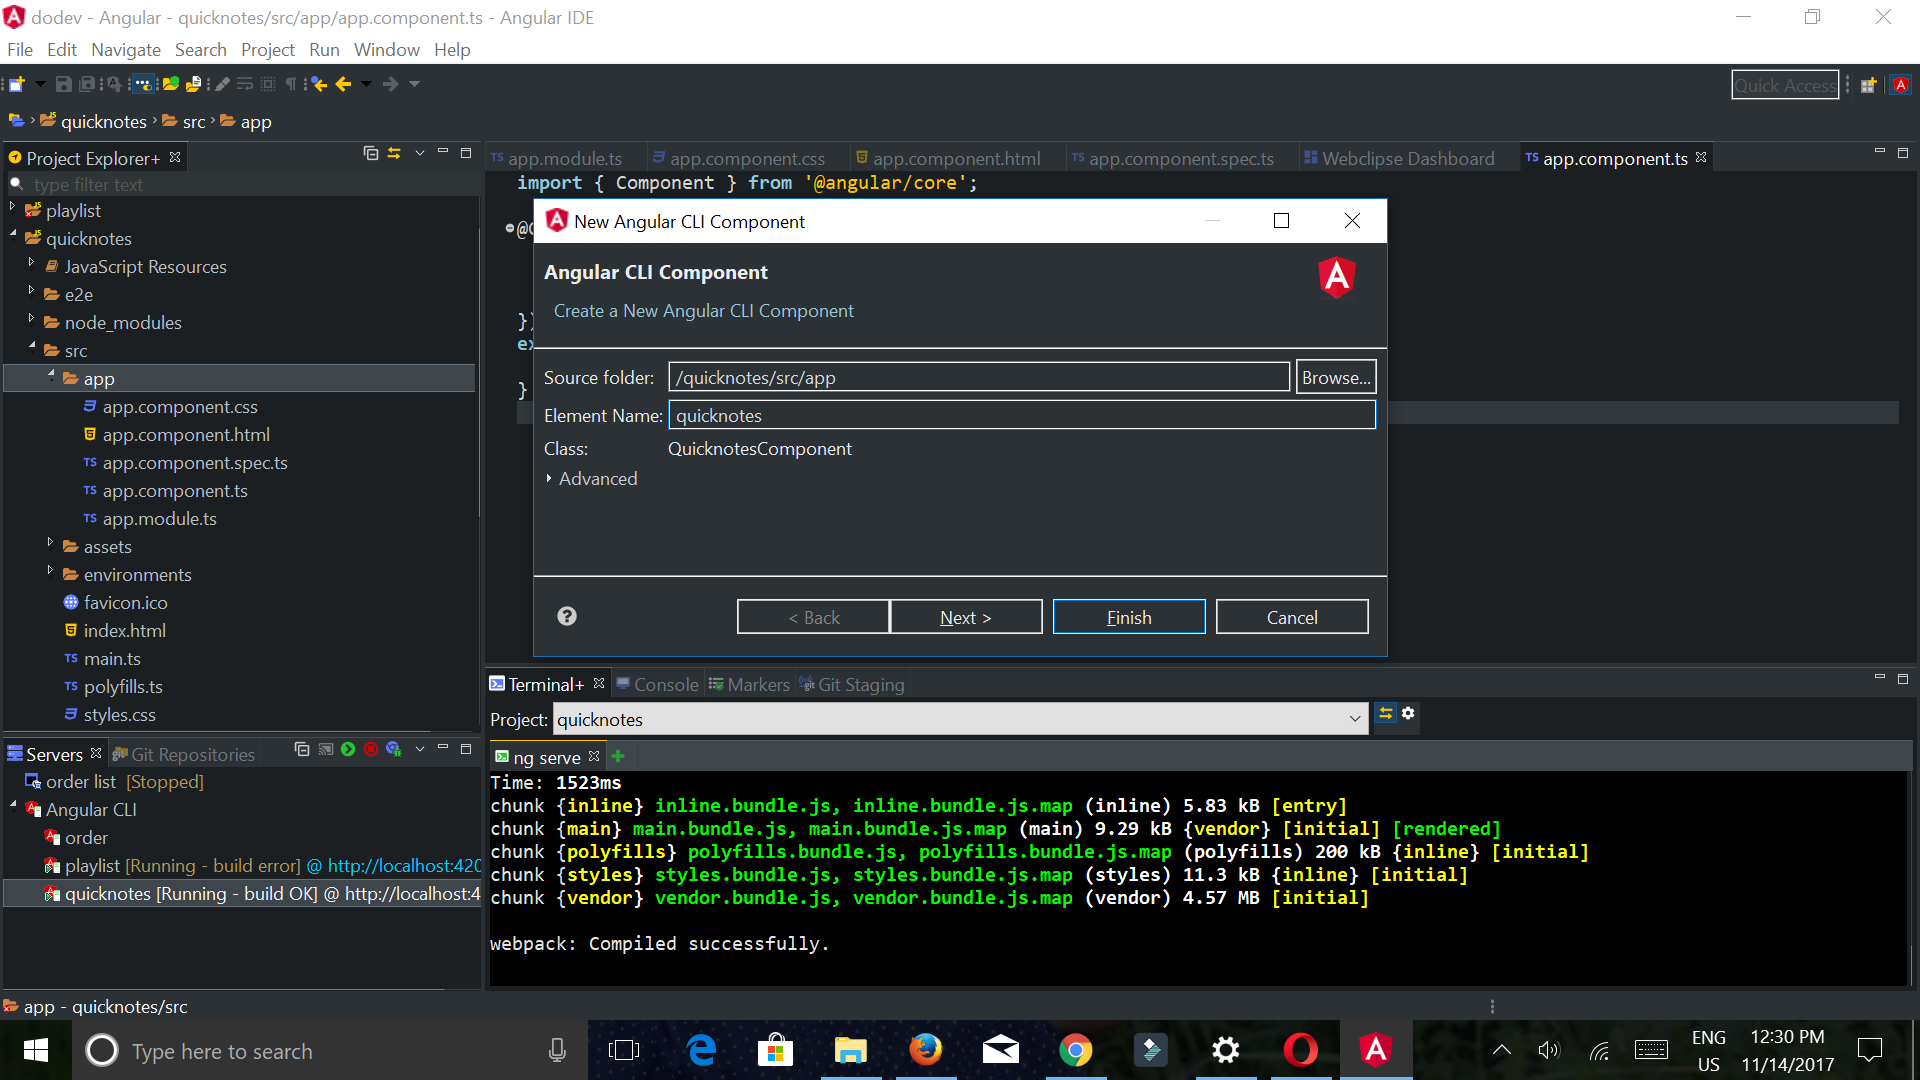
In the New Angular CLI dialog, enter quicknotes as element name, and click the finish button. See image below for reference
A new folder named quicknotes will be added to,src/app now open quicknotes.component.ts & Replace the default code snippet with the new snippet below
import { Component, OnInit } from '@angular/core';

export class Quicknotes {
title: String ;
content: String ;
todo: String;
}

@Component({
selector: 'app-quicknotes',
templateUrl: './quicknotes.component.html',
styleUrls: ['./quicknotes.component.css']
})
export class QuicknotesComponent implements OnInit {

titleModel: String;
contentModel: String;
todoModel: String;
quicknotes: Quicknotes[];

constructor() {
this.titleModel = '';
this.contentModel = '';
this.todoModel = '';

const defaultQuicknotes: Quicknotes = {
title: 'my note' ,
content : 'This is default note' ,
todo : ' this is the default time you want to your task done'
};

this.quicknotes = [ defaultQuicknotes ];
}
ngOnInit() {
}

createQuicknotes() {

const newQuicknotes: Quicknotes = {
title: this.titleModel ,
content : this.contentModel ,
todo : this.todoModel
};

this.quicknotes.push( newQuicknotes );

// set the model values to '' again
this.titleModel = this.todoModel = this.contentModel = '';
}

}
Let’s Understand the code snippet above
First, we Created an array to store our quicknotes then we added a default quicknotes to our array. we declared string type variables titleModel , contentModel, todoModel to help us add new quicknotes & at last we added a new method createQuicknotes().
Importing Forms module
Open your app.module.ts file and Add the import Form module like below
import { BrowserModule } from '@angular/platform-browser';
import { NgModule } from '@angular/core';
import {MatButtonModule, MatCheckboxModule, MatFormFieldModule, MatInputModule, MatCardModule } from '@angular/material';

import { FormsModule } from '@angular/forms';

import { AppComponent } from './app.component';
import { QuicknotesComponent } from './quicknotes/quicknotes.component';

@NgModule({
declarations: [
AppComponent,
QuicknotesComponent

],
imports: [
BrowserModule,
MatButtonModule,
MatCheckboxModule,
MatFormFieldModule,
MatCardModule,
MatInputModule,
FormsModule

],
providers: [],
bootstrap: [AppComponent]
})
export class AppModule { }
Now open quicknotes.component.html file & Replace the default code snippet with the new snippet below
<div class="example-container">
<mat-form-field>

<input matInput [(ngModel)]="titleModel" placeholder="Title">
</mat-form-field>
<br>

<mat-form-field>

<input matInput [(ngModel)]="contentModel" placeholder="Enter your content">
</mat-form-field>
<br>

<mat-form-field>

<input matInput [(ngModel)]="todoModel" placeholder="What to do">
</mat-form-field>

</div>

<br>

<button mat-raised-button color="accent" (click)="createQuicknotes()"> Add Note</button>

<hr>

<p *ngFor="let i of quicknotes">
<mat-card-title> {{ i.title }} </mat-card-title>
<mat-card> {{ i.content }} </mat-card>
<mat-card> {{ i.todo }} </mat-card>
Styling
There are default themes the ones used by Google on most of their services that we can use directly. To do so, add the following line to your styles.css file.
@import "~@angular/material/prebuilt-themes/purple-green.css";
updating Deafult component
Open Src/app/app.component.ts File and replace the code snippet with below
import { Component } from '@angular/core';

import { QuicknotesComponent } from './quicknotes/quicknotes.component';

@Component({
 selector: 'app-root',
 templateUrl: './app.component.html',
 styleUrls: ['./app.component.css']
})

export class AppComponent {
 title = 'A note taking app';
}
here we have imported quicknotes.component.ts file to app.component.ts file.
now update app.component.html file with the code snippet below
<div style="text-align:center">
 <h1>
 Welcome to {{title}}!!
 </h1>

</div>
<app-quicknotes> </app-quicknotes>
Important Notes
- MaterialModule has been deprecated in favor of defining a project-specific custom material module where you import and export only the needed components for this Tutorial I have used
MatButtonModule,MatCheckboxModule,MatFormFieldModule,MatInputModule,&MatCardModule
*ngForis angular syntax to iterate through the array ,ngModelis directive for 2-way data binding,(click)is used to add click handler & 2 curly braces{{ }}are used to bind values to view or template.
- Two-way Data Binding has to be one of the most important features in Angular. Two-way Data Binding is a mechanism to map the data directly from model to view and vice versa.
Running our app
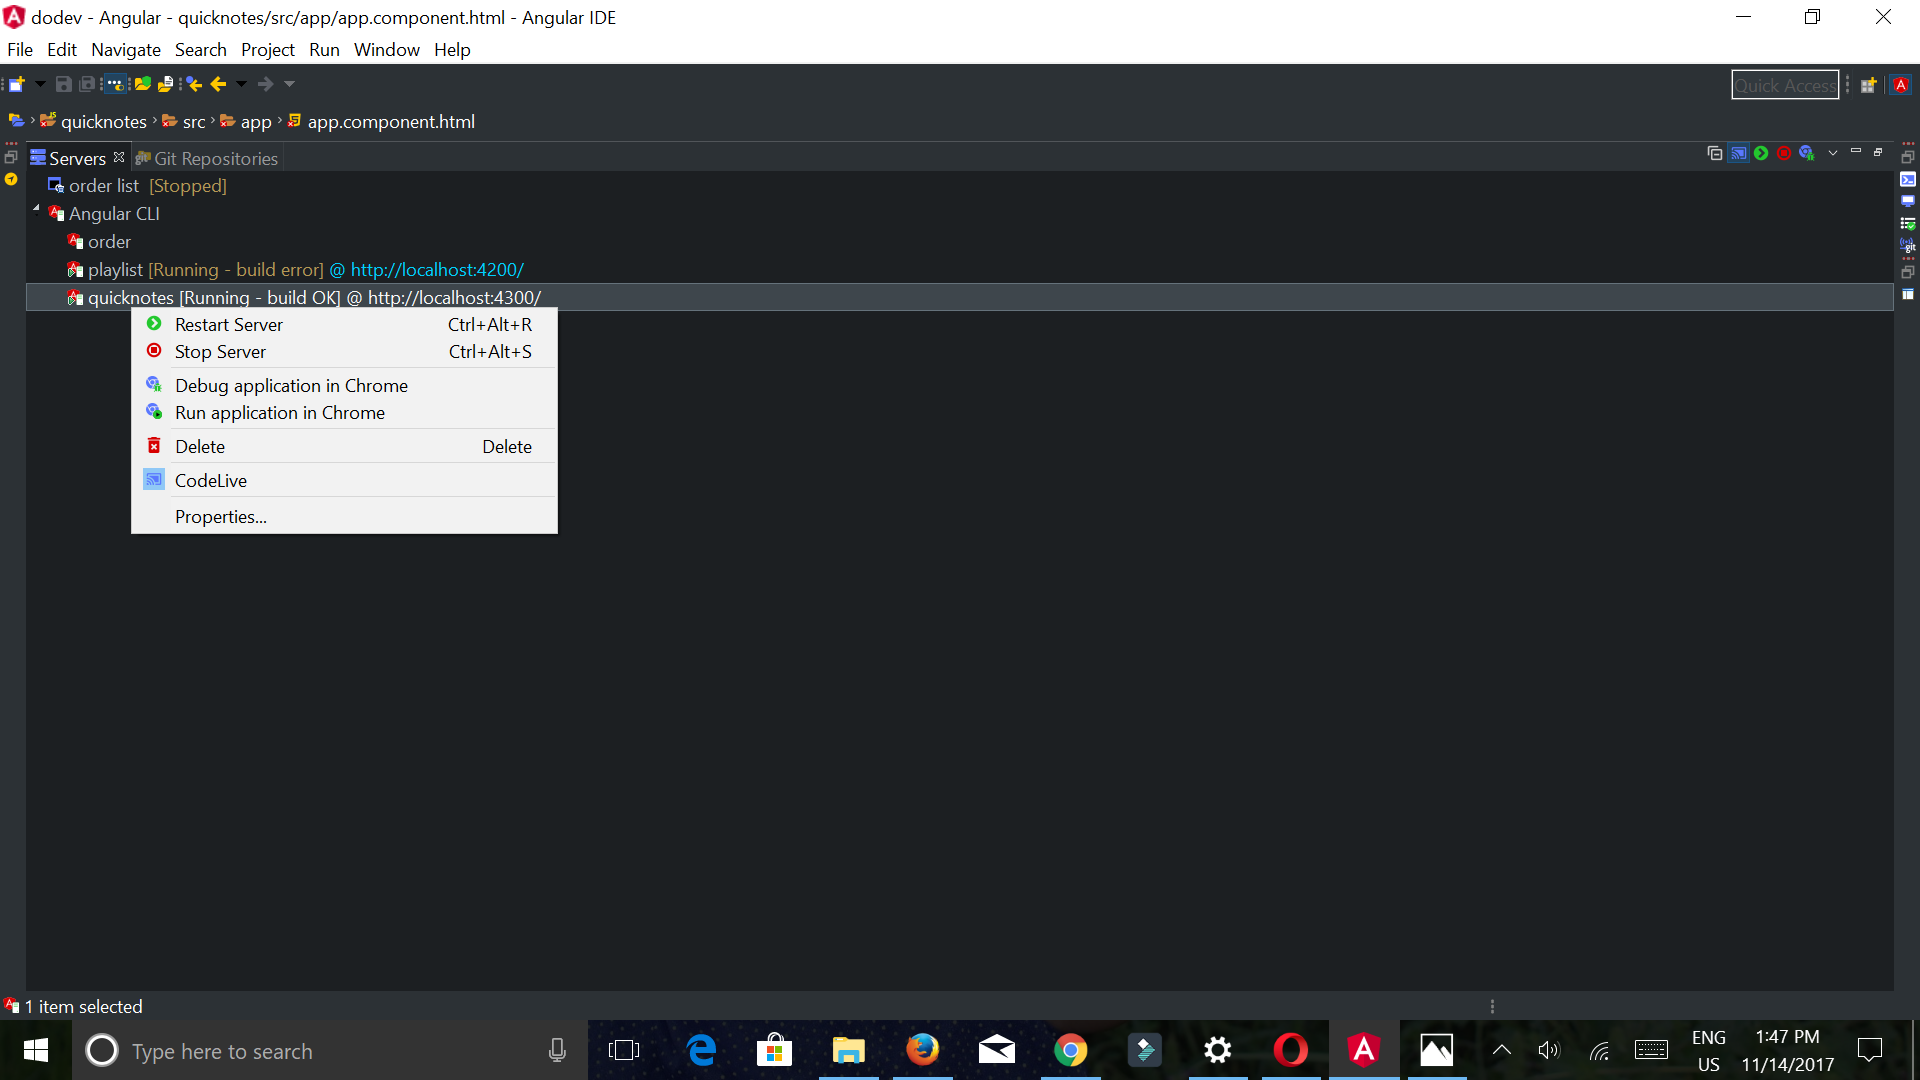
There is a server view in Angular IDE, as shown in the below image. To open it – Window > Show View > Server. Right click on your project (here quicknotes). Angular IDE serves the application on localhost port 4200 ( But in this case i am using port 4300 since i have already a project running on port 4200, you can easily change port of your app by visiting properties section of server as shown below) , by default, so open up http://localhost:4300 in your browser to see the running app.
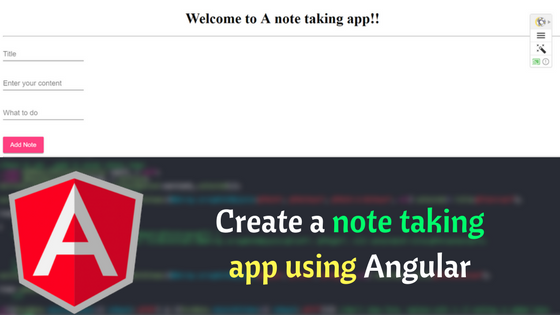
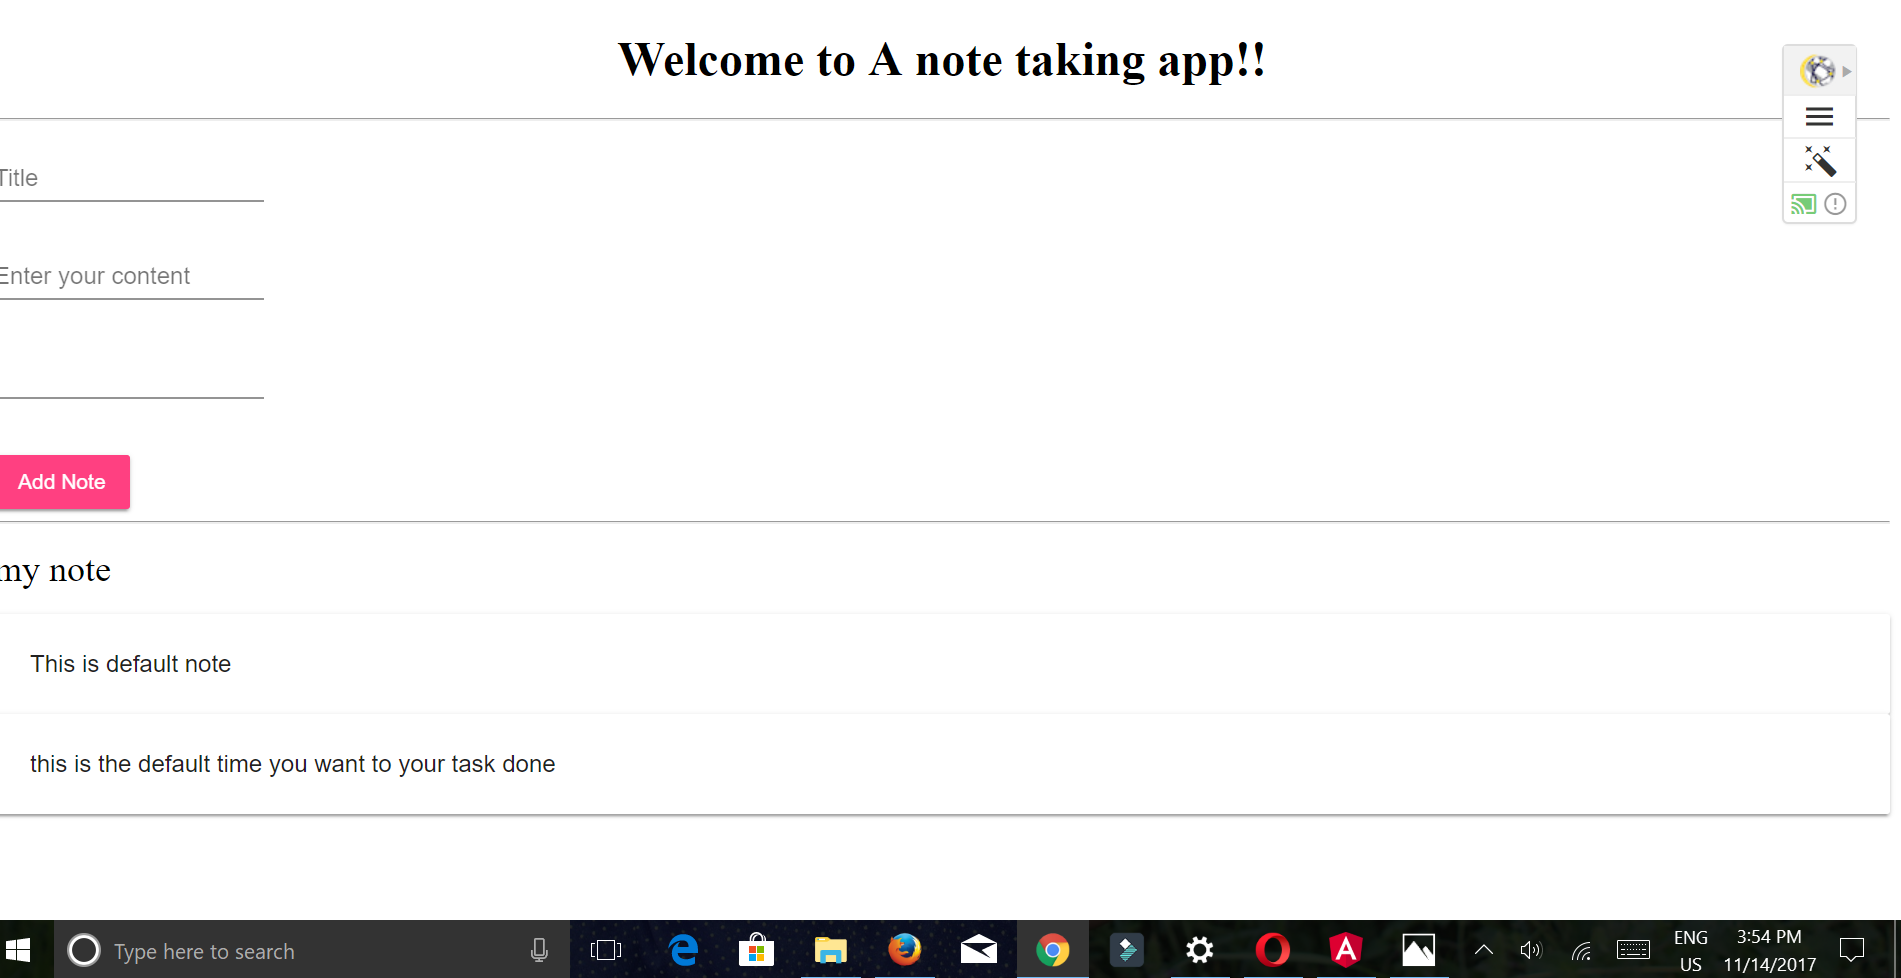
now visit localhost:/4300 and our app will look like below
Using Codelive to quickly jump from a web page to its source.
Angular IDE provides a special feature known as codelive. CodeLive provides a bridge between the IDE and the browser, which speeds up web development. You can use Code Live to easily explore your Angular application, navigating effortlessly to pieces of code you need to work with.
App in Action
The conclusion
we hope you learnt a few things about Angular and Angular IDE. Every article can be made better, so please leave your suggestions and contributions in the comments below. If you have questions about any of the steps, please do ask also in the comments section below.