How to use Laravel Telescope

When we start to develop a web application, it is common for us to face bugs in our code. That can be a simple bug like a missing comma or a complex bug like wrong queries, path, etc.
And we know that debugging can be very painful. But Laravel officially provides an effective bug assistant called Telescope for our Laravel projects.
As a plus point, the Telescope not only helps to catch bugs in our code but also tracks many more processes like requests, database queries, commands, caches, models, views, and more. In this article, you’re going to learn how to install and use Telescope to track the bugs.
In your Laravel project, you can install the Telescope with the following commands-
composer require laravel/telescope
php artisan telescope:install
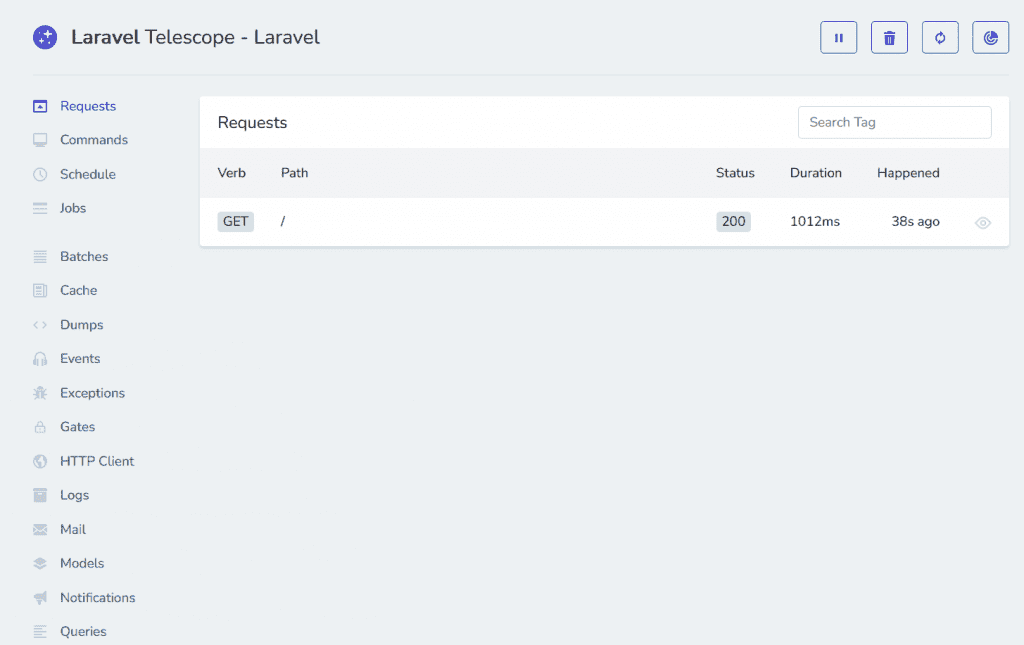
php artisan migrateAfter installing we get an interface like this-
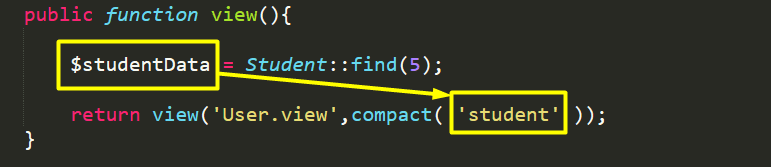
Now, let’s see an example of how Telescope tracks our operations. Suppose, we have a student table in our database and we want information about a specific student.
public function view(){
    $studentData= Student::find(5);
    return view('User.view', compact('studentData'));
}
In this example, we simply call the Student model and request the information of the student id “5”. Now if we see the browser result-
OUTPUT:

At the moment we don’t have any bugs in our code. Let’s see how Telescope keeps tracking our process-
Telescope Requests:

As you can see, in the Telescope the route name automatically appears and it’s showing us the status 200 which is a successful HTTP request-response that means our code was executed successfully.
Telescope Queries:

Here is our detailed database query for fetching the student.
Now let’s create an error in our code and see how Telescope tracks the bug-
Generating error:
You can see, we generated a spelling error in our code while passing the data through the compact() function. Now let’s see how Telescope reacts-
Telescope Exceptions:
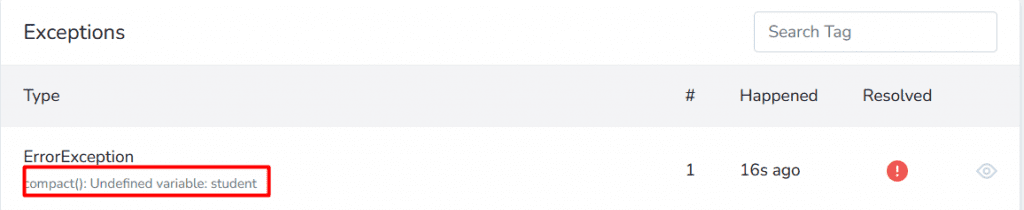
In the exception menu of Telescope, we can find out the error and details about it. We passed the $studentData variable as a student. So, it’s showing us the undefined variable error. Now if we solve the error and get back to the requests menu-
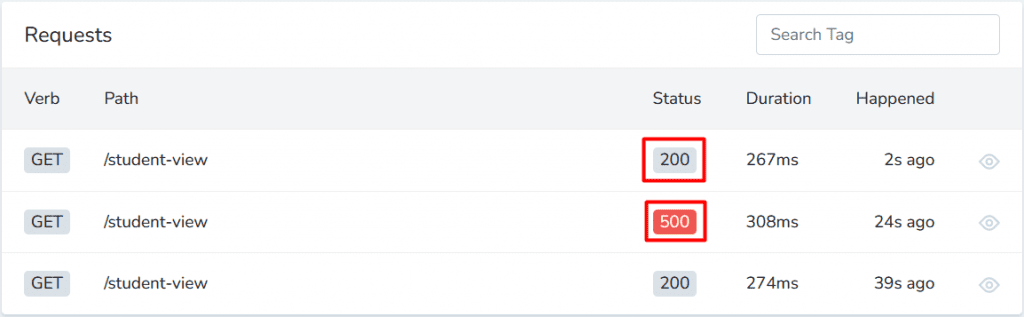
We can see that the second status is 500 which is a generic error response when our error occurred and after solving it’s again showing us the success status which is 200.
That’s how we can see the error in the Laravel Telescope and easily debug it. I hope this article was helpful to you. Thank you.