Create your first web server and Learn basic routing in Nodejs

NodeJS is an open-source JavaScript runtime built on the Chrome V8 engine for executing JavaScript code on the server side.
To make the web page more interactive the language, JavaScript was built. Writing JavaScript code outside of the browser was like daydreaming once at a time.
But now it is the reality that we can write JavaScript code outside of the browser with the help of NodeJS which is nothing but a JavaScript runtime.
NodeJS is built on the Chrome V8 engine which is a bunch of C++ code so that we can handle server-related tasks like creating a web server, handling HTTP requests, and so on.
In this tutorial, we are going to build our first web server using NodeJS and also do basic routing.
This tutorial will help those who are trying to learn NodeJS and know the basics of JavaScript code.
This is not for those who are trying to learn advanced things in NodeJS.
It will give the learners a quick kick-start while diving into NodeJS. First thing first, let’s see the prerequisite to completing this tutorial in the most effective way.
Why use NodeJS?
There are tons of programming languages but why use NodeJS? If you are looking for the answer to this question see the features below that make NodeJS unique and popular to the Developers.
- Used both in Front-end and Back-end: The biggest reason for using Node is that you can use the same language in your entire stack of development. You can write both front-end and back-end code using a single language which is JavaScript. If you learn one language you can work on both and you don’t need to learn new programming languages to handle the back-end and not to switch to different languages. Moreover, It will save your time and open more career opportunities for you within a short period of time.
- Fast and Scalable: NodeJS is very fast and highly scalable and the main reason behind it is that it is based on an event-driven, single-threaded and, non-blocking I/O model. These features make NodeJS very lightweight and efficient.
- Perfect for building Fast and Scalable data-intensive apps: You can make super fast and highly data-intensive apps using NodeJS. Because you can build an API with a database behind it. You can handle NoSQL databases easily in this. Moreover, you can build data streaming apps such as Netflix, YouTube, etc. Real-time chat applications, server-side web applications are also possible to build in NodeJS which will give you a better performance.
- Stable to use in Production: Many tech giant companies have already adopted and started using NodeJS that indicates that to use this at your own production level is secure and stable. Companies like Netflix, Uber, eBay, and many more are using NodeJS.
- Large Community: You will get extensive large community support from NodeJS. That makes this language more powerful. The things you can think of and the problems that you have faced are mostly faced by others and thought by others in the NodeJS community. This is huge support that can make your development journey more smooth and easy.
These are some reasons why use NodeJS in today’s time. I think these reasons are explained enough to choose NodeJS.
If you choose this technology you are welcome and let’s jump to the next section where we will build our first web server.
Create web server
We will create our very first real web server that will be capable of accepting requests and sending back responses. let’s see the following steps.
Step1: Import HTTP modules
In this step, we will import HTTP modules. It comes with Node built-in modules.
I expect that you have already known about the node module systems and how to import different types of node modules.
This HTTP module will open the door for us to work with the network functionality.
See the below example of how you can import HTTP modules into your NodeJS-creating web server project.
const http = require('http')here, we are requiring an HTTP build-in node module. In the next step, we will create our server.
step 2: Create a server
In this step, we will use our http modules to create a server. In JavaScript Object, you may get accessed the property of a particular object with the help of (.) notation.
Here, we will also use the same to get accessed. See the code below first :
const server = http.createServer((req,res) => {
    res.end('Hello world from the server!')
})
Here, we have got accessed to createServer by using http(.) notation.
This createServer is accepting a callBack() function that will be fired up each time when a new request hits on the server this callback function gets accessed to two important variables that are request and response and we send a plain text response to the server by using res.end().
Finally, we wrap this server into a variable that is named server.
Step 3: Listen to the Server
In this step, we will listen to our server to get incoming requests. We will listen to our incoming request by defining server.listen(). This will accept a couple of parameters they are port number and hostname.
- Port: A port is nothing but a random number to define an entry point for the requests and responses. You may define a port number on your own. There is no specific port number to set but while working on local projects you may set your port number as 8080
- Host: While working on a project locally on your computer you don’t need to define it. Because there is a default host on your computer which generated automatically. But to make things clear we will define our local host that is
127.0.0.1.
- Callback: Finally, it accepts a callback() function. where will do nothing except print a ok message that our server is connected successfully
See the below code example:
server.listen(8080,'127.0.0.1',() => {
    console.log('Server is listening to port 8080')
})
Step 4: Output
To check the output all you need to do is to go to the web browser and type your hostname and the port name.
In our case, our host is 127.0.0.1 which is the default and the same for all, and the port number is 8080. Let’s check it in the browser.
But first of all, we need to run the node app so that our created server can listen to the incoming requests. We need to give the command node and our file name which is node app.js.
When we give this command in our terminal it will run the server on our specified port number and also print the message in the console that we have defined.
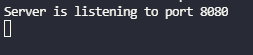
You can see that the message is printing in the console and did not terminate the program. It will keep listing. Now let’s check the request message is printing in the browser or not.

The moment we hit the URL with 127.0.0.1:8080 it immediately shows us a message and the message is coming from the backend server. That means we have successfully created our NodeJS server.
Basic Routing
If you have come this far then you already know how to create a web server in NodeJs and send data from the backend to the browser.
Let’s take this knowledge one step ahead and try to do something more.
We will do some basic routing and send data from different paths. Routing is nothing but a specified path to pass a specific sort of data to the client. See the following steps:
Step 1: Import url modules
In this step, we will import URL modules. It comes with Node built-in modules. I expect that you have already known how to import different types of node modules.
This URL module will help us to define the different path names. See the below example of how you will import it.
const url = require('url')Here, we are requiring an URL build-in node module. In the next step, we will define our routes and shows different messages based on routes.
Step 2: Create basic routes
You may have seen many times while browsing lots of sites like this “www.example.com/user”. Here, “/user” will show you the user information.
Let’s create our own dummy router like this where data will send to clients based on specific requests. See the code example below:
const server = http.createServer((req,res) => {
    const pathName = req.url

    if(pathName === '/'){
        res.end('This is the default page!')
    }else if(pathName === '/user'){
        res.end('This route will show the User Data!')
    }

})
Here, in our server, we have defined a variable pathName and if our pathName hits on the default path it will show the default page data and if it hits on the “/user” router it will show the user data message. see the output below for 127.0.0.1:8080/user.
Output:

You can see that we are getting different messages based on the routes. Now, what if you are requesting some other routes that do not exist in your program? You will get nothing and it will go into a never-ending loop.
Let’s see how we can handle this never-ending loop in the next step.
Step 3: Handle undefined routes
We already know about the routes that are being defined by us.
So we can add a simple not found message for the route that is not defined by us. See the code example below:
const server = http.createServer((req,res) => {
    const pathName = req.url

    if(pathName === '/'){
        res.end('This is the default page!')
    }else if(pathName === '/user'){
        res.end('This route will show the User Data!')
    }else{
        res.end('The page you are requesting is not found!!!')
    }

})
Let’s check the output with a different route that is not defined in the program. For example, “/product”.
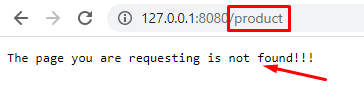
You can see the not found message has been showing successfully when we are trying to access a route that is not handled by us.
Conclusion
If you have made it this far then congratulation from myself to all of you because now you already know how to create a web server and how to do basic routings with Nodejs.
We have covered things like requesting data from the client side, sending data to the client side, importing node modules and working with them, creating our localhost server with our specified port number, and so on in this tutorial.
As the back end is a very large concept itself but this tutorial will give you a kick-start and get your hands dirty with the NodeJS code. Your task is to take this tutorial as a reference and try to implement more things.